TL;DR
- The Stun Needle Launcher is mandatory and must hit the Ice Worm’s face directly
- You have only 3-4 damage phases before automatic mission failure
- High-damage explosive weapons are essential to pass the damage check
- Proper shot leading and timing are critical due to weapon firing delay
- Companions handle minor enemies while you focus on the main target
Confronting the colossal Ice Worm in Armored Core 6 demands specialized tactical preparation and carefully selected armaments. Unlike standard encounters where pilot creativity flourishes, this particular adversary imposes strict equipment constraints that cannot be circumvented.
While most Armored Core 6 boss engagements permit diverse mech configurations and combat approaches, the Ice Worm confrontation during Chapter 3’s Destroy the Ice Worm mission represents a notable exception. This chapter-concluding engagement will result in immediate failure if approached without the precise weapon configuration. The encounter functions as a structured test of both equipment selection and execution precision rather than open-ended combat creativity.
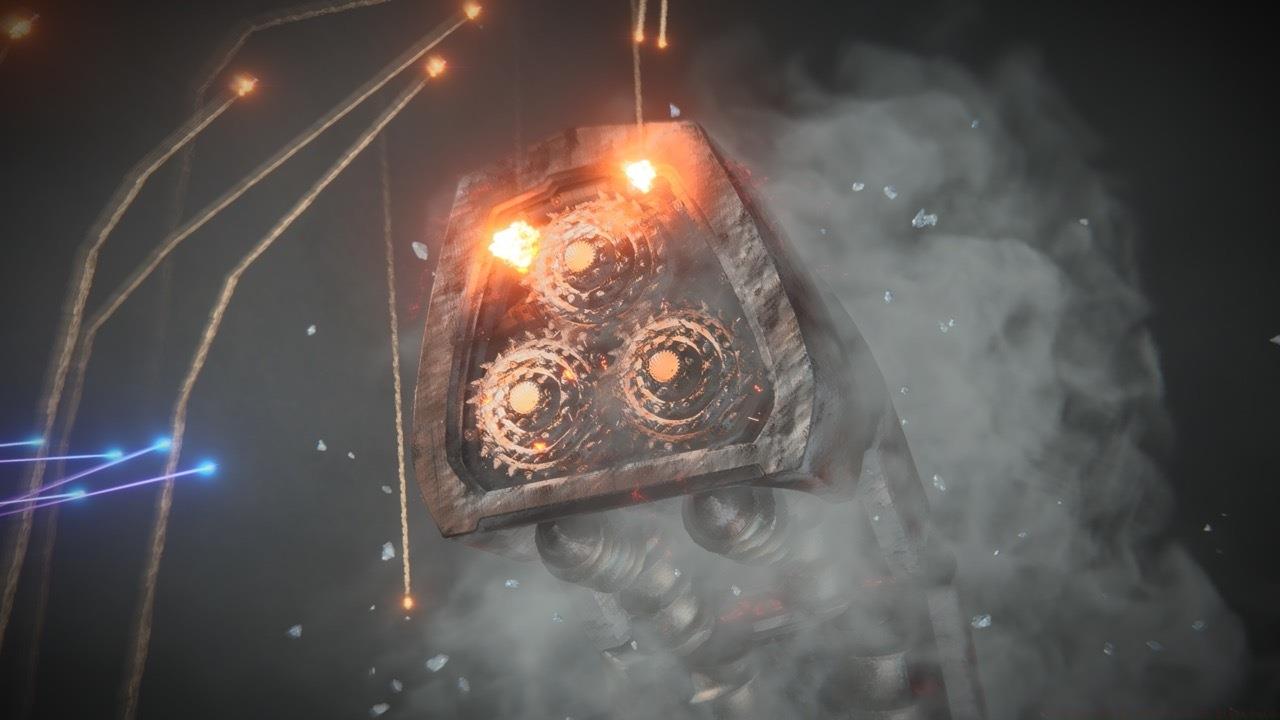
The Ice Worm’s vulnerable point is exclusively its facial region, requiring precise targeting.
Understanding the game’s damage mechanics reveals why facial targeting is crucial: the creature’s armored body deflects all other attacks, making accurate aim non-negotiable for success.
This engagement necessitates equipping the shoulder-mounted VE-60SNA Stun Needle Launcher, which becomes automatically available upon completing the preceding mission. This specific armament is indispensable for penetrating the Ice Worm’s defensive shield, making its inclusion mandatory. Your remaining weapon slots should prioritize high-impact demolition tools such as grenade dischargers or missile arrays. The rationale stems from an inherent damage threshold that must be exceeded to proceed; failure to meet this benchmark results in automatic mission termination. Fortunately, auxiliary combat units will manage lesser threats throughout the operation, allowing undivided attention on the primary objective.
For optimal performance, consider pairing the Stun Needle Launcher with weapons like the Songbirds grenade launcher or missile clusters that deliver substantial burst damage during limited vulnerability windows. Energy management and ammunition capacity should also influence your build decisions, as sustained firing during damage phases drains resources rapidly.
The operational framework is straightforward: eliminate the Ice Worm’s protective barrier by striking its facial area with the Stun Needle Launcher. The serpentine target exhibits extensive mobility, requiring direct frontal facial impact—the game references the head generally, but the vulnerable zone is specifically the forward-facing surface. Patiently await the creature’s movement cessation before discharging your weapon. The Stun Needle exhibits a slight activation-to-discharge delay, necessitating minimal leading of your target.
Upon shield disruption, an allied unit will discharge an enormous rail cannon at the worm, temporarily immobilizing it. You must target the creature’s face during this incapacitation period, as this represents the exclusive opportunity to inflict harm. You will receive only three or four such opportunities before the railgun system becomes inoperative. Failing to eliminate the Ice Worm on the ultimate attempt triggers automatic mission failure. During damage phases, unleash your entire explosive arsenal against the creature’s facial region. The Stun Needle itself delivers respectable damage output, and its ammunition reserves should suffice for all damage phases. If your damage output proves insufficient for mission completion, consider acquiring superior damage-dealing armaments from the storefront. Enhanced destructive capability directly correlates with success probability.
Advanced timing techniques involve anticipating the worm’s emergence patterns and pre-charging your weapons to maximize damage window utilization. The interval between stun phases typically allows for 2-3 full weapon cycles if properly managed.
Positioning represents a critical success factor often overlooked by novice pilots. Maintaining medium distance ensures clear targeting sightlines while providing adequate reaction time for evasive maneuvers. Avoid close proximity as the worm’s sudden movements can disrupt aim and positioning.
Common execution errors include mistiming the Stun Needle discharge, resulting in wasted opportunities. The weapon’s travel time requires anticipating the worm’s movement cessation rather than reacting to it. Another frequent mistake involves inefficient damage phase utilization—firing single weapons sequentially rather than unleashing all armaments simultaneously during stun periods.
For comprehensive Armored Core 6 guidance, consult our Complete Guide covering all mission types and mechanics. If you’re struggling with equipment selection, our Weapons Unlock guide details optimal loadouts for various engagements. Additionally, our Class Guide provides insights into mech configuration synergies that enhance combat effectiveness.
For additional insights, explore GameSpot’s Armored Core 6: Fires of Rubicon evaluation.
Action Checklist
- Equip mandatory VE-60SNA Stun Needle Launcher and high-damage explosives
- Monitor Ice Worm movement patterns and await stationary moments
- Lead Stun Needle shots slightly to account for firing delay
- During stun phases, unleash all weapons simultaneously at the face
- If damage insufficient, upgrade to higher-tier explosive weapons
No reproduction without permission:SeeYouSoon Game Club » Armored Core 6: Ice Worm Boss Fight Guide Master the Ice Worm encounter with essential weapon strategies and precise timing techniques