TL;DR
- ARC robotic enemies present greater tactical challenges than PvP combat in extraction scenarios
- Nine distinct enemy types require specific countermeasures and weapon loadouts for effective elimination
- Environmental positioning and team coordination are critical for surviving encounters with multiple ARC units
- Each enemy has identifiable behavior patterns and weak points that can be exploited for tactical advantage
- Advanced strategies include bait-and-switch tactics and area denial to control engagement distances
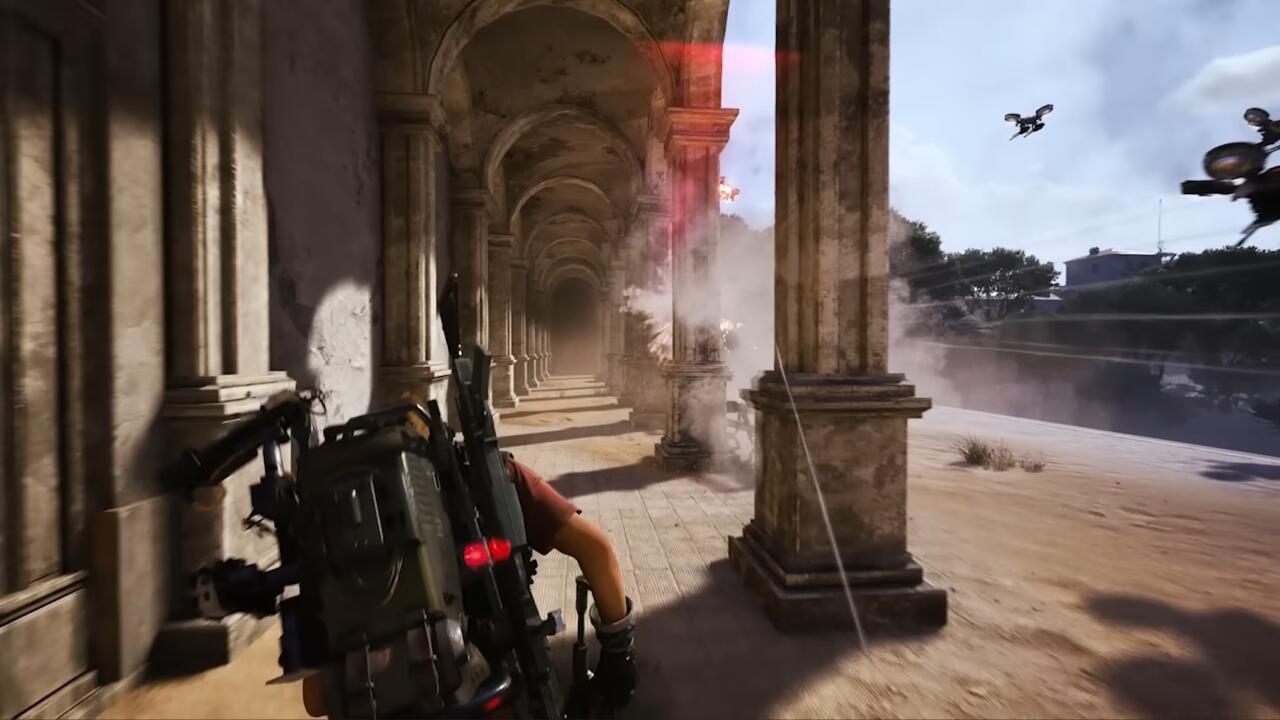
Mastering ARC robotic enemy encounters is essential for survival in Arc Raiders’ dangerous extraction environment. While player-versus-player combat presents obvious threats, the sophisticated artificial combatants known as ARC units often prove more lethal and unpredictable than human opponents.
In extraction shooter scenarios, ARC robotic enemies introduce unique tactical challenges that differ significantly from PvP engagements. These mechanical adversaries can inflict catastrophic damage within seconds, frequently resulting in failed missions and lost gear returns to Speranza without successful extraction. This comprehensive tactical analysis details every robotic threat currently documented in Arc Raiders and provides proven strategies for neutralizing each enemy type effectively.
- Wasp – Fast aerial scout with hit-and-run tactics; vulnerable to area denial weapons
- Hornet – Heavier aerial unit with swarm behavior; weak against precision targeting
- Snitch – Reconnaissance unit that alerts nearby enemies; prioritize elimination
- Fireball – Explosive kamikaze drone; maintain distance and use cover
- Pop – Disruptive EMP emitter that disables equipment; engage from maximum range
- Tick – Ground-based proximity mine; detect and destroy before activation
- Turret – Stationary defense with high damage output; use flanking maneuvers
- Sentinel – Mobile patrol unit with area denial capabilities; exploit movement patterns
- Shredder – Heavy assault unit with armor plating; target exposed weak points
Each ARC enemy type exhibits distinct behavioral patterns that informed Raiders can exploit. Small aerial units like Wasps and Hornets typically attack in coordinated patterns, while ground-based threats such as Ticks and Turrets create area denial challenges requiring tactical repositioning. Understanding enemy aggression triggers and patrol routes significantly improves survival rates during extraction missions.
Advanced tactical considerations include weapon selection based on enemy type – precision rifles for aerial units, explosive weapons for clustered enemies, and EMP devices for electronic threats. Environmental factors like elevation, cover density, and escape routes should influence engagement decisions when facing multiple ARC units simultaneously.
Successful ARC engagement requires moving beyond basic identification to sophisticated combat methodologies. Team composition should include specialized roles: designated marksmen for precision elimination of aerial threats, assault specialists for heavy units, and technical experts for disabling electronic enemies. Communication and role assignment before engagement dramatically increases mission success probability.
Weapon loadout optimization is critical – consider carrying both precision and area-effect weapons to handle diverse enemy types. Shotguns excel against clustered ground units like Ticks, while sniper rifles effectively neutralize aerial threats such as Wasps and Hornets before they close distance. Always maintain an escape option when engaging Sentinels or Shredders, as their sustained damage output can quickly overwhelm unprepared Raiders.
Environmental exploitation represents an underutilized tactical dimension. Use vertical positioning against ground-based units, lure enemies into choke points, and utilize destructible environments to create advantageous combat scenarios. Bait-and-switch tactics work exceptionally well against aggressive units like Fireballs, drawing them into prepared kill zones.
For squad-based operations, implement coordinated suppression and flanking maneuvers against fortified positions. Designate one member to draw aggro while others target weak points – this approach proves particularly effective against Turrets and Sentinels with predictable targeting behavior.
Understanding the diverse enemy roster in ARC Raiders is crucial for survival and success in this challenging extraction shooter. This comprehensive guide breaks down every mechanical threat you’ll encounter, providing detailed strategies for both solo play and coordinated team efforts. The ARC enemies are systematically categorized into two primary groups: basic units that appear regularly and special boss-level encounters that demand strategic coordination.
Successful raiders develop situational awareness for enemy behaviors and attack patterns. Learning to identify threats quickly and respond with appropriate countermeasures separates veteran players from those who repeatedly return to the lobby.
Wasp
Wasp
Weak Spot: Thrusters
As the most frequently encountered aerial unit, the Wasp presents a manageable but persistent threat. These drones excel at flanking maneuvers and can quickly overwhelm isolated raiders. Their rapid-fire weapons demand immediate cover response, but their structural vulnerability makes them susceptible to precise targeting.
Advanced Tactics: When facing multiple Wasps, prioritize destroying one thruster on each enemy rather than fully eliminating one at a time. This creates multiple disabled drones that spiral erratically, reducing their collective offensive capability.
Common Mistakes: Underestimating their group damage potential and failing to use environmental cover effectively against their sustained fire.
Hornet
Hornet
Weak Spot: Rear thrusters
The Hornet represents an upgraded Wasp variant with enhanced offensive capabilities. Its electrical discharge attacks not only damage health but also impair movement, creating vulnerable windows for other enemies to capitalize on.
Combat Optimization: The electrical shock has a distinctive audio cue approximately 1.5 seconds before firing. Use this warning to reposition or prepare to dodge.
Strategic Approach: Maintain distance while using cover to force the Hornet to reposition, creating opportunities to target its exposed rear thrusters. Crouching improves accuracy for these precision shots.
Snitch
Snitch
Weak Spot: Underside plating
This reconnaissance unit poses an indirect but significant threat through its ability to summon reinforcements. The Snitch’s laser scanning mechanism has a 120-degree frontal arc with limited vertical detection.
Priority Target: Eliminate within 8 seconds of detection to prevent aerial backup deployment.
Elimination Technique: Two of the three underside plating sections must be destroyed for a quick takedown.
Advanced Insight: The Snitch’s summoned reinforcements (two Wasps and one Hornet) arrive approximately 15 seconds after the alert is transmitted.
Fireball
Fireball
Weak Spot: Core (when open)
This aggressive ground unit utilizes relentless pursuit tactics combined with devastating close-range flamethrower attacks. Its armored exterior necessitates strategic engagement depending on your available weaponry.
Weapon-Specific Strategies: Heavy weapons can penetrate its shell consistently, while light ammo requires patience for core exposure moments.
Resource Management: Conserving ammunition against Fireballs is critical. Wait for the distinctive mechanical sound indicating core exposure rather than wasting rounds on its fortified exterior.
Pop
Pop
Weak Spot: N/A
The Pop employs kamikaze tactics with astonishing acceleration. These units typically travel in coordinated packs of 3-5, creating simultaneous explosive threats that can eliminate even well-shielded raiders instantly.
Threat Assessment: Their explosion radius extends approximately 8 meters, dealing catastrophic damage to both health and shields.
Survival Technique: Maintain constant situational awareness and prioritize target acquisition speed over precision. A single well-placed shot from any weapon type neutralizes them.
Tick
Tick
Weak Spot: N/A
These agile spider-like units specialize in indoor combat and disruption. Their rapid movement patterns make ranged engagement challenging, especially in confined spaces.
Optimal Engagement: The Raider Tool provides a silent, one-hit elimination method, crucial for maintaining stealth in building interiors.
Advanced Maneuver: When multiple Ticks are present, use doorways as chokepoints and time your melee swings to intercept their approach vectors.
Turret
Turret
Weak Spot: N/A
Stationary defense systems scan their environment with blue targeting lasers that transition to red upon target acquisition.
Combat Strategy: Flanking maneuvers and out-of-sight angles are essential for safe engagement. Their sustained bullet streams can deplete protection rapidly if you’re caught in their line of sight.
Elimination Priority: While heavy ammunition accelerates destruction, any weapon type can dismantle these units with proper positioning.
Sentinel
Sentinel
Weak Spot: Yellow canister
As an enhanced turret variant, the Sentinel possesses extended engagement range and significantly increased durability.
Tactical Considerations: Rear approaches are optimal but often challenging outdoors. The yellow canister provides a damage multiplier but requires precise aiming from advantageous positions.
Advanced Technique: When frontal engagement is unavoidable, use the environment to break line of sight between its sniper-style charged shots.
Shredder
Shredder
Weak Spot: N/A
This close-quarters specialist delivers catastrophic explosive damage if allowed to approach within 5 meters.
Defensive Protocol: Maintain distance and utilize heavy weaponry or grenades for efficient elimination.
Critical Warning: The Shredder’s charge sequence includes distinctive audio and visual cues approximately 2 seconds before detonation.
These formidable boss-level ARC units demand coordinated team strategies and resource management. While technically possible to engage solo, success rates dramatically improve with 2-3 raiders coordinating their attacks and equipment loadouts.
Resource Allocation Strategy: Grenades, particularly Wolfpack and Snap Blast variants, provide disproportionate effectiveness against special enemies, making them valuable strategic investments.
Surveyor
Surveyor
Weak Spots: Core
This data-collecting spherical enemy exhibits exceptional mobility and evasion behavior. Its distinctive blue laser projection into the atmosphere serves as both an identification marker and data transmission mechanism.
Elimination Methods: Stealth approaches combined with Snap Blast Grenades targeting the exposed core during data collection cycles provide optimal results.
Loot Recovery Note: As the Surveyor flees, it sheds destroyed armor plating that contains valuable resources. Following its escape path often yields additional loot opportunities.
Leaper
Leaper
Weak Spots: Face and legs
True to its nomenclature, the Leaper utilizes impressive aerial mobility to close distances rapidly. Its shockwave attack creates area denial in close proximity.
Team Coordination: Focus firing on specific leg joints creates cumulative structural damage that impairs mobility and creates attack windows.
Environmental Exploitation: Building interiors with doorways provide effective countermeasures against its leaping assault.
Advanced Strategy: Destroying individual legs not only reduces mobility but also creates longer vulnerability periods for concentrated fire on its facial armor.
Rocketeer
Rocketeer
Weak Spot: Thrusters
This oversized Hornet variant presents one of the most lethal threats with its rocket barrage capabilities. The substantial splash damage radius (approximately 10 meters) makes evasion extremely challenging even with well-timed rolls.
Engagement Protocol: Immediate retreat to substantial interior cover is mandatory upon detection. The rockets’ tracking capability requires complete break of line of sight for safety.
Systematic Destruction: Armored thruster plating must be eliminated first using heavy ammunition or explosive devices, then targeting the revealed internal components.
Wolfpack Application: A single grenade can eliminate a Rocketeer, but isolation from other ARC units is crucial to ensure maximum damage application.
Bastion
Bastion
Weak Spots: Legs and yellow canister on back
This crab-like mechanical behemoth patrols open terrain with devastating machine gun saturation fire.
Cover Utilization: Kiting maneuvers around large obstacles or utilizing corner coverage allows strategic engagement between its firing cycles.
Team Execution: Coordinated attacks on specific leg joints creates takedown opportunities, allowing flanking maneuvers to target the vulnerable rear canister.
Bombardier
Bombardier
Weak Spot: Legs and yellow canister on back
While visually similar to the Bastion, the Bombardier employs fundamentally different artillery tactics with mortar bombardment.
Spotter Interdiction: These units utilize Spotter drones (enhanced Snitch variants) that dramatically improve mortar accuracy through laser targeting.
Critical Priority: Immediately eliminate Spotters upon detection to prevent precision artillery strikes.
Engagement Similarity: The same leg joint and rear canister targeting strategy applies, but the increased danger demands enhanced cover discipline and immediate Spotter neutralization.
Queen
Queen
Weak Spot: Legs and face
This colossal robotic entity exclusively appears during Harvester map events, representing one of the game’s most demanding encounters.
Battle Preparation: This confrontation typically requires coordination between multiple raider teams (2-3 trios) for consistent success rates.
Armor Stripping Protocol: Systematic destruction of leg joint armor and facial plating exposes vulnerable internal structures for maximum damage application.
Optimal Loadout: Heavy weapons, Hullcracker launchers, and Wolfpack grenades are essential for meaningful participation in this extended engagement.
Matriarch
Matriarch
Weak Spot: Legs and face
This Queen-analogous unit demonstrates enhanced tactical versatility with its ability to summon additional special enemies during combat.
Combat Complexity: The Matriarch’s diverse arsenal includes homing missiles, flashbang disorientation devices, and gas mine area denial systems.
Strategic Priority: Maintain constant cover between yourself and the Matriarch while managing the additional threats it summons.
Shield Mechanics: A distinctive blue energy shield periodically activates, rendering the Matriarch completely immune to damage until the shield dissipates.
Recommended Approach: Hullcracker ammunition combined with Wolfpack grenades provides the most efficient damage delivery system.
For comprehensive strategies on managing the broader gameplay experience, consult our Complete Guide to master all aspects of your raiding operations.
As you navigate the hostile landscapes of ARC Raiders, you’ll regularly encounter several distinct enemy archetypes that form the backbone of robotic opposition. While these units may appear less intimidating than the massive boss encounters, underestimating their tactical coordination can quickly lead to mission failure. These standard adversaries are designed to test your fundamental combat proficiency and resource management skills.
Each enemy classification presents unique challenges that demand specific countermeasures. Mastering these encounters is essential for progressing through the game’s early and mid-stages, as they frequently appear in groups that can overwhelm unprepared players. The key to consistent success lies in understanding their behavioral patterns, weapon systems, and structural vulnerabilities.
Proper engagement sequencing and environmental awareness will allow you to handle these threats efficiently, even when operating solo. This guide provides the tactical framework needed to transform these encounters from potential threats into predictable engagements.
The Wasp represents your most frequent aerial adversary, serving as the baseline combat drone you’ll encounter throughout exploration phases. Its rapid-fire weapon system poses significant danger when it catches you exposed without adequate cover, particularly when multiple units coordinate their attacks. The weapon’s sustained damage output can rapidly deplete your health reserves if you fail to utilize defensive positioning.
Weak Spot: Rear thrusters
Strategic elimination focuses on disabling its mobility by targeting any of the four thrusters. Successful hits typically induce uncontrolled spiraling and eventual crash sequences. This vulnerability makes the Wasp susceptible to nearly all weapon types, though precision firearms yield the most efficient results.
The Hornet functions as an enhanced variant of the Wasp, incorporating electrical discharge weaponry that both damages and impairs movement capabilities. This disruption effect creates extended vulnerability windows where follow-up attacks become increasingly difficult to evade. The frontal thrusters maintain reinforced protection, necessitating focused fire on the exposed rear propulsion units.
Weak Spot: Underside plating
Advanced engagement protocol recommends utilizing substantial cover before crouching to stabilize your aim. Eliminating both rear thrusters simultaneously triggers the characteristic flailing descent that neutralizes the threat. For players progressing through BF6 Weapons Unlock systems, understanding these aerial patterns provides transferable skills for helicopter and drone engagements.
The Snitch specializes in reconnaissance operations, equipped with advanced laser scanning technology that detects your presence within considerable operational ranges. While it lacks direct offensive capabilities, its true danger emerges from its ability to summon immediate aerial reinforcements when detection occurs.
Weak Spot: Core (when open)
Immediate engagement is critical upon being spotted, as delayed response triggers backup deployment consisting of two Wasps and one Hornet. This reinforcement cascade dramatically increases encounter complexity and resource expenditure. The most efficient elimination method involves targeting the vulnerable underside plating assembly.
Typically, destroying two of the three protective plate sections proves sufficient to disable the unit. This reconnaissance elimination priority should supersede all other combat actions except immediate survival necessities. The tactical principle of neutralizing spotters before engaging combat units applies across multiple military simulation titles, including strategic approaches to Battlefield 6 Complete Guide reconnaissance mechanics.
Fireball units present aggressive ground-based threats capable of rapid pursuit and devastating flamethrower attacks. Their incendiary weapons bypass conventional shield mitigation with damage-over-time effects that quickly erode health reserves. Heavy weapon systems can penetrate their armored exteriors with minimal shots, while lighter ammunition requires more strategic engagement timing.
The critical tactical decision involves waiting for the core exposure sequence before committing your primary ammunition reserves. Premature engagement against the reinforced shell frequently results in wasted resources that could prove decisive in extended engagements. This ammo conservation principle directly correlates with resource management strategies discussed in comprehensive BF6 Class Selection guides for support roles.
Pop units complement the ground assault roster with high-velocity suicide charge tactics. These compact ARC detonate upon contact, inflicting massive damage to both shield integrity and health points. Their tendency to operate in coordinated packs creates scenarios where multiple simultaneous detonations guarantee player elimination.
Fortunately, their structural fragility allows elimination with just one or two well-placed shots from any firearm category. The challenge shifts from firepower to target acquisition speed and accuracy under pressure. Developing these reflexes provides foundational skills for handling explosive threats in various combat scenarios.
The Tick represents a specialized indoor threat with spider-like mobility that excels in confined spaces. Its rapid movement patterns and jumping attacks make traditional aiming difficult, while the attachment mechanic continuously damages you until manually dislodged.
This nuisance factor compounds when multiple Ticks coordinate in enclosed environments where maneuvering space becomes limited. Their agility often renders firearm engagements inefficient due to the tracking difficulty and ammunition expenditure required.
The optimal countermeasure involves switching to your Raider Tool for melee elimination. A single properly timed swing delivers an instant kill while maintaining auditory stealth—a critical consideration when operating near other enemy concentrations. This close-quarters proficiency translates well to urban combat scenarios found in modern military shooters.
Advanced players should practice the quick weapon swap sequence to minimize vulnerability windows during the transition. This skill becomes increasingly valuable as mission complexity escalates and resource conservation determines long-term survival prospects.
Beyond individual enemy tactics, strategic layer considerations dramatically impact your survival rates and mission efficiency. Weapon selection should correspond to anticipated enemy compositions—heavier options for armored units like Fireballs, while precision weapons excel against aerial threats. Environmental utilization cannot be overstated; vertical terrain and structural cover provide decisive advantages against most ARC types.
Resource management extends beyond ammunition to include healing items and equipment cooldowns. Planning engagement sequences to minimize simultaneous threats allows you to manage encounter pacing rather than reacting to enemy initiatives.
Common mistakes include underestimating Snitch detection ranges, engaging Fireballs with inappropriate weapons, and attempting to shoot Ticks at range instead of employing melee solutions. Each misstep consumes valuable resources that could determine success in subsequent encounters or boss engagements.
Mastering these fundamental opponents establishes the combat foundation necessary for tackling the game’s more complex challenges and multiplayer coordination requirements.
The Leaper presents a unique challenge in Battlefield 6 engagements due to its agile movement patterns. Each leg can be individually disabled, significantly impairing its stability and maneuverability capabilities. For optimal effectiveness, your squad should concentrate firepower on the same leg simultaneously rather than spreading damage across multiple limbs. This coordinated assault dramatically increases the probability of destabilizing the mechanical foe, creating critical windows to redirect attacks toward its primary facial weak points. Combining precision shooting with well-timed explosive devices accelerates elimination substantially beyond standard engagement timelines.
Critical Weak Points: Leg joints and facial targeting zones
Despite visual similarities to standard Hornet units, the Rocketeer represents a dramatically escalated threat level in BF6 weapon encounters. Once this aerial ARC detects your position, immediate retreat to interior cover becomes essential for survival. The rocket projectiles it launches at consistent intervals possess devastating potential to obliterate both shield integrity and health reserves in one direct impact. Compounding the danger, these explosives generate substantial splash damage across wide radii upon detonation, rendering evasion attempts through rolling maneuvers largely ineffective even with perfect timing execution.
Neutralizing Rocketeer threats requires strategic armor penetration. You must first dismantle the protective plating covering its thrusters using high-caliber ammunition or explosive devices, then concentrate fire on the vulnerable internal components revealed beneath. If the unit remains operational after disabling one or two thrusters, follow-up attacks to its central chassis using heavy or launcher ammunition typically secure the elimination.
A single Wolfpack grenade deployment can instantly defeat a Rocketeer, but tactical isolation is paramount. The grenade fragments into twelve autonomous homing missiles that distribute across up to three nearby ARC targets. To prevent inefficient dispersion against lesser drones, ensure the Rocketeer stands alone before deployment to guarantee maximum destructive potential.
Primary Vulnerabilities: Thruster armor and exposed internal mechanics
The Bastion operates as a heavily armored crab-style ARC patrolling expansive terrain sectors across multiple BF6 class operational zones. Upon detecting your presence, it unleashes rapid machine gun barrages capable of depleting health reserves so rapidly that defeat may occur before threat assessment completes. Consequently, engage this adversary exclusively when substantial cover resources are available. By employing kiting maneuvers around large obstacles or utilizing corner concealment, you can effectively launch counterattacks during its reloading cycles.
Defeating this mechanical beast demands precision targeting of the distinctive yellow markers on its leg articulation points. Disabling any single leg forces temporary ground immobilization, creating perfect opportunities for your team to flank its rear and assault the yellow canister positioned on its posterior. Sustained damage to these critical weak points eventually results in permanent deactivation.
Identified Vulnerabilities: Leg joint markers and rear canister assembly
The Bombardier shares nearly identical visual characteristics with the Bastion except for coloration, but its offensive capabilities prove significantly more lethal and challenging to counter. Unlike its counterpart, you’ll be evading mortar artillery from this substantial ARC. Direct blast impacts can be catastrophic, necessitating near-constant cover utilization or mastering precisely timed evasion maneuvers. These mortar strikes gain enhanced targeting precision when Spotters—functionally equivalent to Snitches that coordinate firing solutions for the massive machine—detect your position. If their yellow tracking laser establishes target lock, you’ll face extreme danger, making immediate Spotter elimination upon visual contact an absolute priority.
The Bombardier elimination methodology mirrors the Bastion approach. Target its yellow knee articulation components to induce collapse, then execute flanking maneuvers to deliver concentrated fire into the yellow canister on its rear section. After delivering sufficient damage across all designated weak points, you’ll successfully eradicate this mechanical menace from the combat theater.
Action Checklist
- Identify enemy types and prioritize threats based on immediate danger
- Select appropriate weapons – precision for aerial, explosives for clustered enemies
- Position strategically using elevation and cover before engagement
- Execute coordinated team tactics with assigned roles for complex encounters
- Maintain escape routes and disengage when overwhelmed by multiple ARC units
- Scan for Snitches and Spotters first in any engagement zone
- Prioritize aerial unit thruster targeting for quick disables
- Use Raider Tool for silent Tick elimination in indoor areas
- Save Wolfpack grenades for isolated special enemy encounters
- Coordinate with teammates to focus fire on specific weak points
- Prioritize Snitch elimination within 3 seconds of detection to prevent reinforcements
- Practice Raider Tool quick-swap against Ticks in safe zones
- Memorize weak spot locations: rear thrusters (Wasp), underside plating (Hornet), core (Fireball)
- Test weapon effectiveness against Fireball armor with different ammo types
- Develop cover transition patterns for Hornet electrical attacks
- Coordinate squad focus on single leg joints for all ARC types
- Break Rocketeer thruster armor with heavy weapons before internal targeting
- Eliminate Spotters immediately when engaging Bombardiers
- Deploy Wolfpack grenades only against isolated Rocketeers
- Utilize kiting tactics around cover objects against Bastion machine gun fire
No reproduction without permission:SeeYouSoon Game Club » Arc Raiders – All Enemies And How To Kill Them