TL;DR
- Assemble three specific X-ray pieces to form a complete brain scan showing a central tumor
- Restore power by installing fuses and systematically activating breaker switches
- Use the unique bottom piece as foundation and match compatible side segments
- Ensure pieces lock into place by releasing them, not just rotating correctly
- Complete the puzzle in approximately 5-7 minutes with proper preparation
Successfully completing the X-ray assembly in Alone in the Dark demands significantly more accuracy than initial appearances suggest. This cerebral challenge represents one of the game’s more intricate mechanical tests.
When you reach chapter 4’s Medical Ward segment, you’ll encounter this pivotal brain scan reconstruction task. The historical context is crucial here – while contemporary medicine uses advanced imaging techniques, the post-World War 1 timeframe depicted in the game relied on primitive X-ray technology. Your objective involves selecting and orienting three specific fragments to construct a complete brain image that clearly displays a central tumor mass.
Before tackling the X-ray assembly itself, thorough preparation is essential. You must collect two critical X-ray fragments and two electrical fuses scattered throughout the Medical Ward area. The environment contains three accessible chambers beyond the initial Morgue starting point.
Two rooms remain unlocked initially, while the third requires a key that’s conveniently located within the X-ray chamber itself. Methodically explore each area to secure all necessary components before returning to the wall-mounted X-ray display panel. Adjacent to this display sits the electrical breaker box where you’ll install the recovered fuses.
When activating the breaker switches, employ a systematic left-to-right approach. Some levers may initially resist and spring back upward, but persistent sequential engagement will eventually secure all switches in their downward positions, restoring full power to the apparatus.
With power restored, you can commence the actual brain scan reconstruction. The puzzle presents five available fragments, though only three constitute the correct solution. Begin with the singular base piece that serves as your foundation.
Following base placement, identify the appropriate left and right side segments. This selection process proves relatively straightforward since the incorrect alternatives are conspicuously oversized compared to the foundation piece’s dimensions.
Once you’ve selected the three correct components, the real challenge begins: rotational alignment. You must orient each fragment to create a seamless brain image without overlapping edges. Critical insight: Your placement only registers upon releasing the piece. Even perfectly rotated fragments won’t lock into position while you’re still holding them.
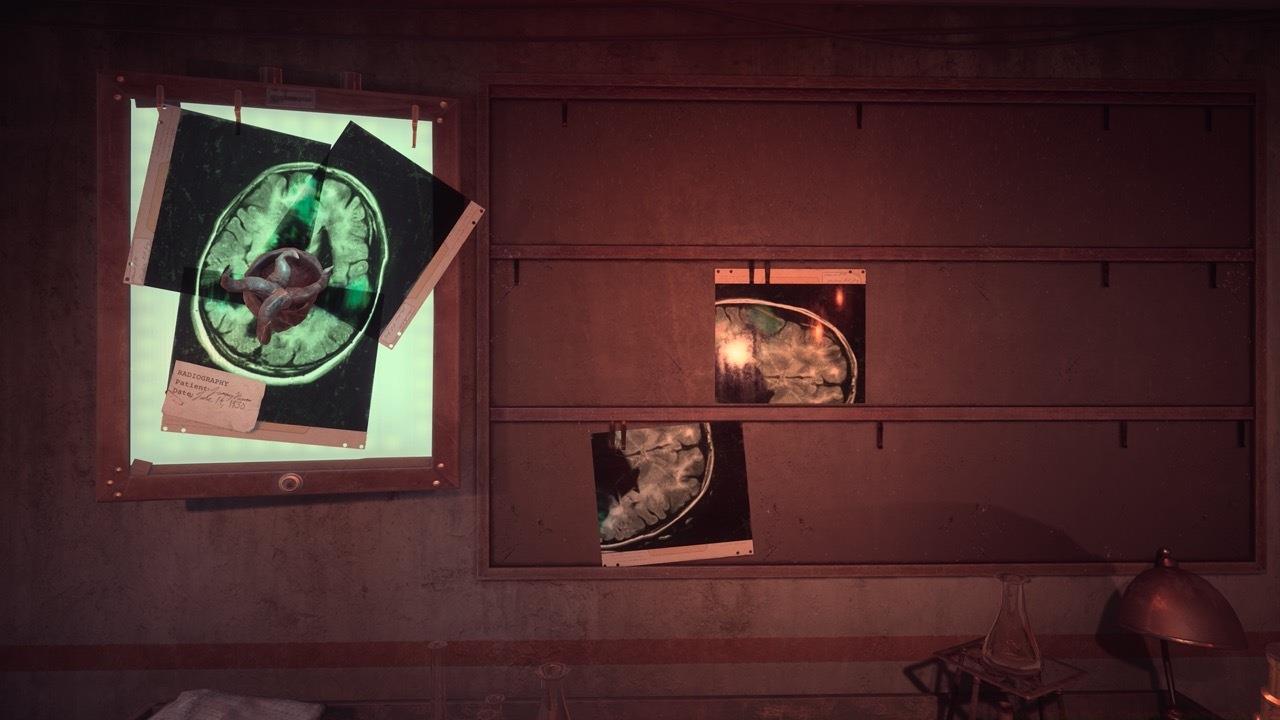
You will need to rotate and place the correct pieces to solve the X-Ray puzzle.
As demonstrated in the solution visualization, the completed scan forms a perfect cerebral image featuring a prominent dark mass at its center – the pathological tumor.
Many players encounter frustration by overlooking the release-to-lock mechanic. Remember that correct rotation alone isn’t sufficient – you must physically place each piece for the game to recognize your solution.
For optimal efficiency, prioritize the unique bottom fragment first, then test side pieces by their size compatibility. The two incorrect options are approximately 30-40% larger than the correct segments, making visual identification straightforward.
If pieces refuse to snap into place despite apparent correct alignment, verify that all breaker switches remain fully engaged. Occasionally, one lever may disengage during the process, requiring reactivation.
Seasoned players can complete this puzzle in under five minutes with proper route optimization. Consider exploring our Complete Guide for similar strategic approaches to complex game challenges.
Action Checklist
- Collect two X-ray fragments and two fuses from Medical Ward rooms
- Install fuses in breaker box and activate all switches systematically
- Place the unique bottom piece as foundation
- Select appropriately sized left and right side pieces
- Rotate and release pieces to lock into position
No reproduction without permission:SeeYouSoon Game Club » Alone In The Dark – Chapter 4 X-Ray Puzzle Guide Master the X-Ray puzzle in Alone in the Dark with precision placement strategies and troubleshooting tips