TL;DR
- Seven distinct Shrine types provide 30-second buffs with universal 35% movement speed
- Icon recognition is crucial for strategic activation – learn each symbol’s meaning
- Class-specific interactions dramatically change Shrine effectiveness, especially for Necromancers
- Faded Plaques offer permanent buffs but require specific activation conditions
- Proper timing and gear optimization can extend Shrine benefits significantly
Throughout Sanctuary’s diverse landscapes and treacherous dungeons in Diablo 4, strategic players will discover numerous Shrines offering temporary power boosts. Learning to leverage these effectively can dramatically improve your combat efficiency and survival rates.
You’ll encounter slender, luminous statues emitting a distinctive white glow across all regions. These Shrines grant randomized enhancements lasting precisely 30 seconds, though specialized equipment can extend this duration. Monitor your active buffs via the circular green icon above your health bar, which displays remaining time visually.
While Shrine selection is typically random, experienced players can identify potential buffs by examining the emblem atop each structure. This symbolic representation provides crucial intelligence for tactical planning before engagement. Below we break down the complete visual identification system.
Current analysis confirms seven distinct Shrine varieties available throughout the game world. Each provides the standard 30-second enhancement period alongside a consistent 35% movement speed increase. This velocity bonus stacks multiplicatively with Elixirs, equipment modifiers, and character abilities.
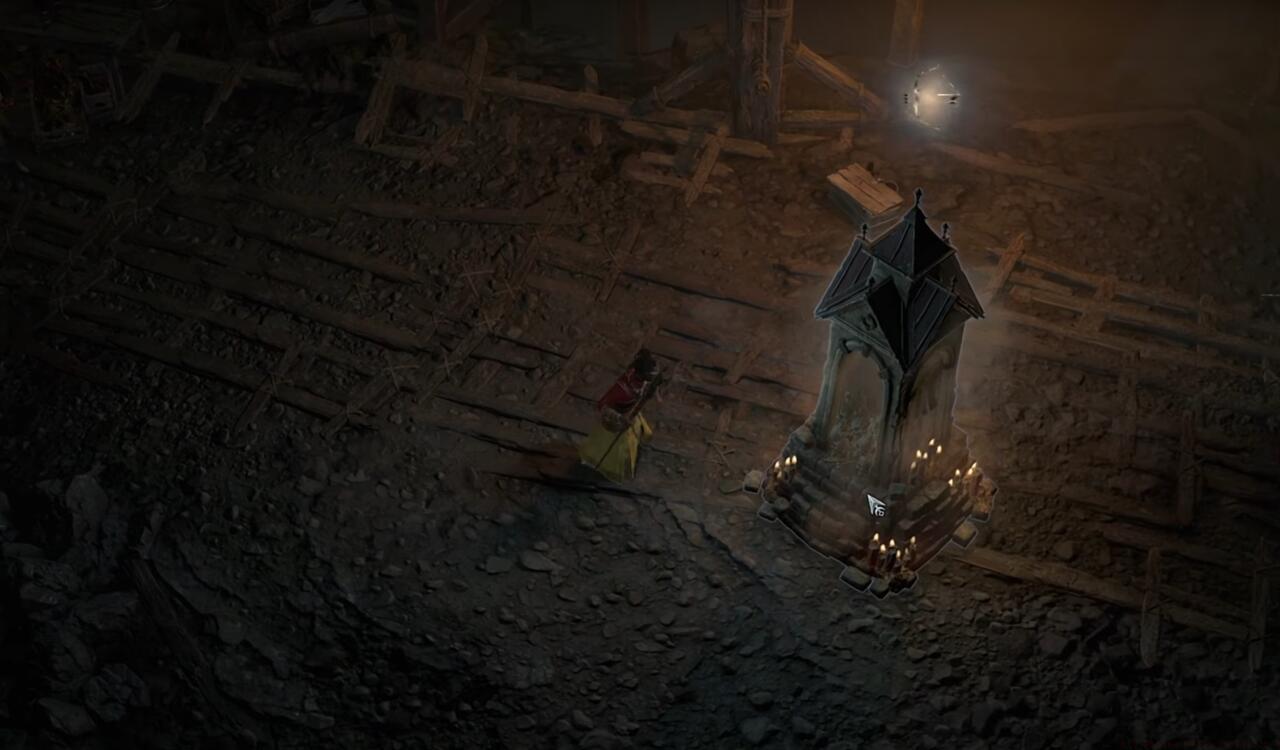
An example of an Artillery Shrine in Diablo 4.
Here’s the definitive guide to all seven Shrine types with their corresponding visual identifiers and mechanical effects:
- Artillery Shrine: Boosts attack speed by 150% and augments all attacks with holy projectile volleys. Critical for burst damage phases and elite pack clearing.
- Necromancer Synergy: When playing as a Necromancer, your entire minion army receives identical buffs, transforming them into holy arrow artillery platforms.
- Blast Wave Shrine: Generates explosive pulses every 3 seconds, devastating all enemies within substantial radius. Ideal for close-quarters combat specialists.
- Channeling Shrine: Eliminates all resource costs (mana, energy, fury) while reducing cooldowns by 40%. Perfect for ability-spam builds and emergency situations.
- Conduit Shrine: Creates continuous lightning chains between you and nearby enemies, dealing automatic damage while freeing you to use other abilities.
- Protection Shrine: Grants near-invulnerability through massive damage reduction shields. Essential for surviving deadly boss mechanics.
- Greed Shrine: Dramatically increases gold acquisition from all sources while sometimes providing bonus experience. Prioritize during farming routes.
- Lethal Shrine: Guarantees critical strikes on all attacks for the duration. Synergizes exceptionally with high-damage, slow-attack builds.
Master-level Shrine utilization requires understanding nuanced interactions beyond basic buff recognition. Different character classes derive varying value from specific Shrine types.
Resource Management: Time Channeling Shrine activations for when your primary resource is depleted, maximizing the free-cast window. Sorcerers and Barbarians benefit disproportionately from this effect.
Gear Optimization: Certain legendary items and aspects can extend Shrine durations by up to 100%. Look for equipment with “Shrine effect duration” modifiers in their stat rolls.
Positioning Tactics Activate Blast Wave and Conduit Shrines immediately before engaging dense enemy clusters rather than during combat initiation.
Movement Stacking: Combine Shrine speed boosts with movement skills like Sorcerer’s Teleport or Rogue’s Dash for unprecedented mobility during time-sensitive objectives.
Beyond traditional Shrines, seasoned adventurers will discover Faded Plaques – ancient stone tablets offering permanent or long-duration enhancements when activated under specific conditions.
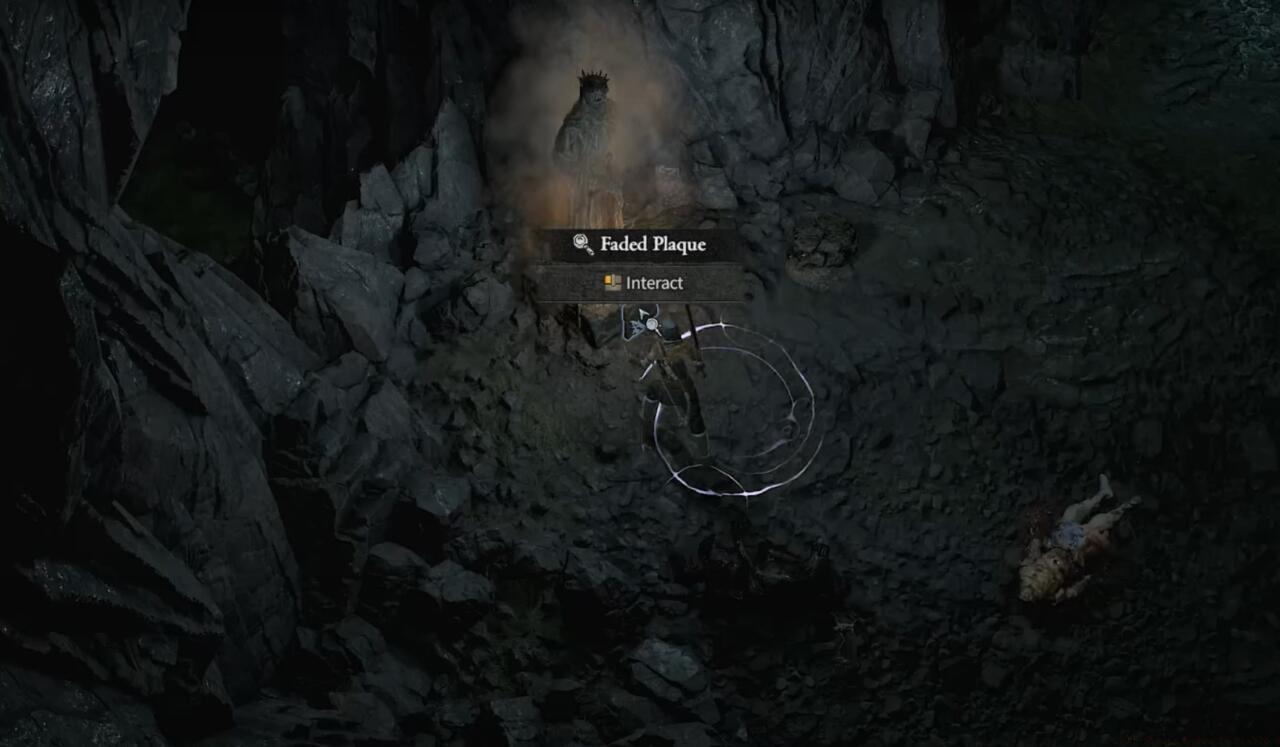
Faded Plaques are another way to earn buffs in Diablo 4.
These mysterious artifacts typically require puzzle-solving or environmental interaction rather than simple activation. Some demand clearing entire areas of enemies, while others need specific item combinations or sequence completion.
Unlike temporary Shrine buffs, Faded Plaque enhancements often persist through death or last for entire dungeon runs, making them strategically superior for difficult content.
Avoiding Premature Activation: The most frequent error involves activating Shrines before reaching combat density. Wait until you’ve aggroed multiple enemy groups for maximum value.
Resource Waste: Using Channeling Shrines with full resource pools wastes their primary benefit. Time activations for when you’re resource-starved.
Movement Overestimation: While the 35% speed boost is valuable, don’t overestimate its defensive utility. You still need proper positioning against telegraphed attacks.
Endgame Application: In nightmare dungeons and endgame content, prioritize Shrines that counter specific affixes or boss mechanics rather than always taking the nearest option.
Group Play Coordination: In multiplayer, communicate Shrine activations so all party members can benefit from the area effects and coordinated assault windows.
Action Checklist
- Memorize all seven Shrine icons and their corresponding buff effects
- Practice identifying Shrine types from distance before engagement
- Experiment with gear that extends Shrine duration in safe environments
- Develop class-specific activation strategies for different Shrine types
- Integrate Shrine timing into your advanced combat rotations and boss strategies
No reproduction without permission:SeeYouSoon Game Club » All Shrine Buffs In Diablo 4 Master Diablo 4 Shrine buffs with expert strategies, icon identification, and optimization techniques