TL;DR
- Omamori function as equipment providing stat boosts and special effects
- Two acquisition methods: Shrine shop (random) and hidden locations (fixed)
- 23 shop Omamori with escalating Faith costs from 400 to 1,000
- Some hidden Omamori require New Game Plus to access
- Strategic collection requires planning routes and managing resources
GameSpot may receive revenue from affiliate and advertising partnerships for sharing this content and from purchases through links.
Omamori serve as essential equipment items in Silent Hill f, offering diverse character enhancements that significantly impact gameplay effectiveness. These protective charms range from straightforward statistical improvements—such as increased Health pools or enhanced Stamina regeneration—to more specialized benefits like bonus damage when wielding high-durability weapons or improved resistance against specific enemy types.
Understanding Omamori mechanics is crucial for optimizing your character build. Unlike traditional equipment, these charms operate on a slot-based system where strategic combinations can create powerful synergies. For example, pairing a Health-boosting Omamori with one that enhances defensive capabilities can dramatically improve survivability in challenging encounters.
Strategic tip: Always prioritize Omamori that complement your playstyle. Aggressive players benefit more from damage-enhancing charms, while cautious explorers should focus on defensive and utility options.
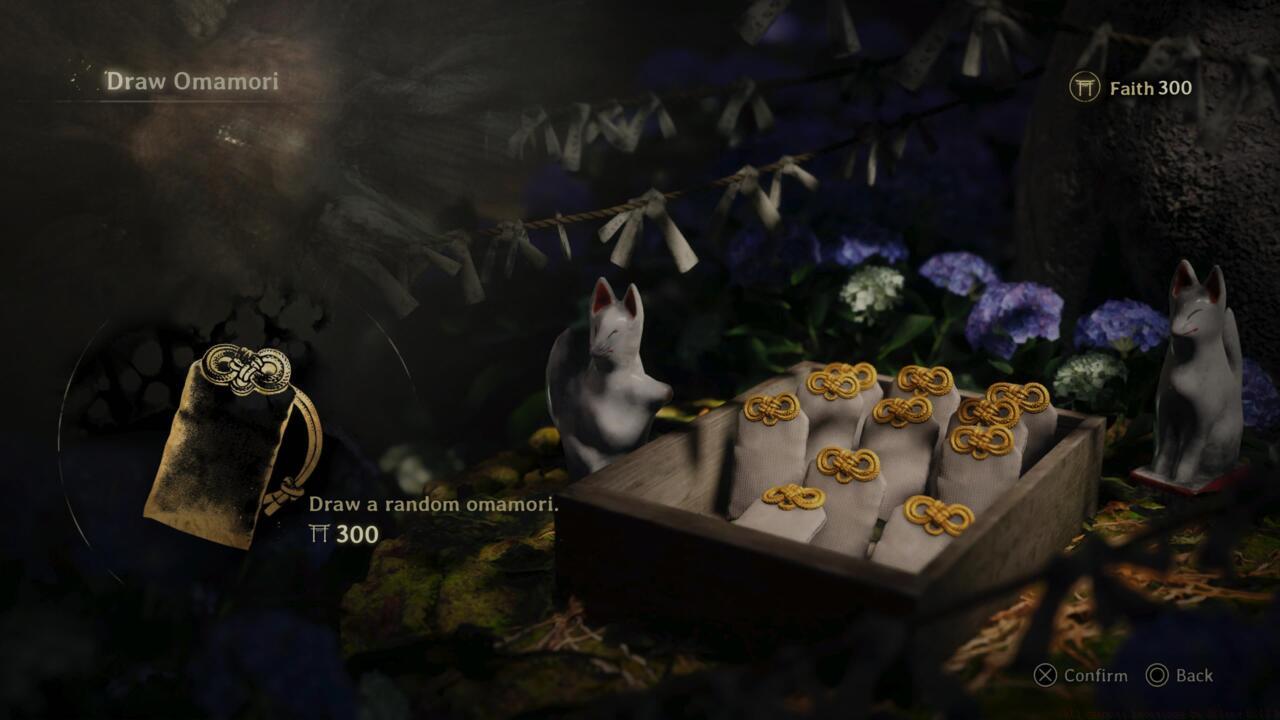
The Shrine shop provides a randomized acquisition method for Omamori, requiring careful resource management. Each purchase begins at 400 Faith currency, with costs escalating by 100 Faith per subsequent acquisition. This progressive pricing structure caps at 1,000 Faith, creating a strategic decision point about when to invest in additional charms.
With 23 total Omamori available through the shop system, understanding the randomization mechanics becomes essential. The distribution appears completely random, meaning players cannot target specific charms through this method. This makes the Shrine shop ideal for filling collection gaps rather than targeting precise builds.
Common mistake: Many players exhaust their Faith resources early on shop purchases, leaving them unable to afford essential items later. A better approach is to balance shop spending with progression needs.
Optimization strategy: Focus on obtaining essential hidden Omamori first, then use leftover Faith for shop rolls to complete your collection efficiently.
The following section details hidden Omamori obtainable during your initial playthrough, presented in approximate acquisition order. Mild spoilers ahead.
Important note: Only certain hidden Omamori are accessible on your first playthrough, while others require New Game Plus completion. NG+ exclusive charms are marked accordingly later in this guide.
During the early game sequence following the initial fog monster encounter, you’ll enter a residence with a secured rear entrance. Proceed to the upper level where two chambers await—one accessible and another obstructed. Enter the available room to secure a key item, which triggers the previously blocked door to open, revealing an enemy encounter. Defeat or evade this threat to retrieve the back door keys from this chamber. Descend to the ground floor, exit through the rear entrance, and climb down a ladder to discover this initial Omamori.
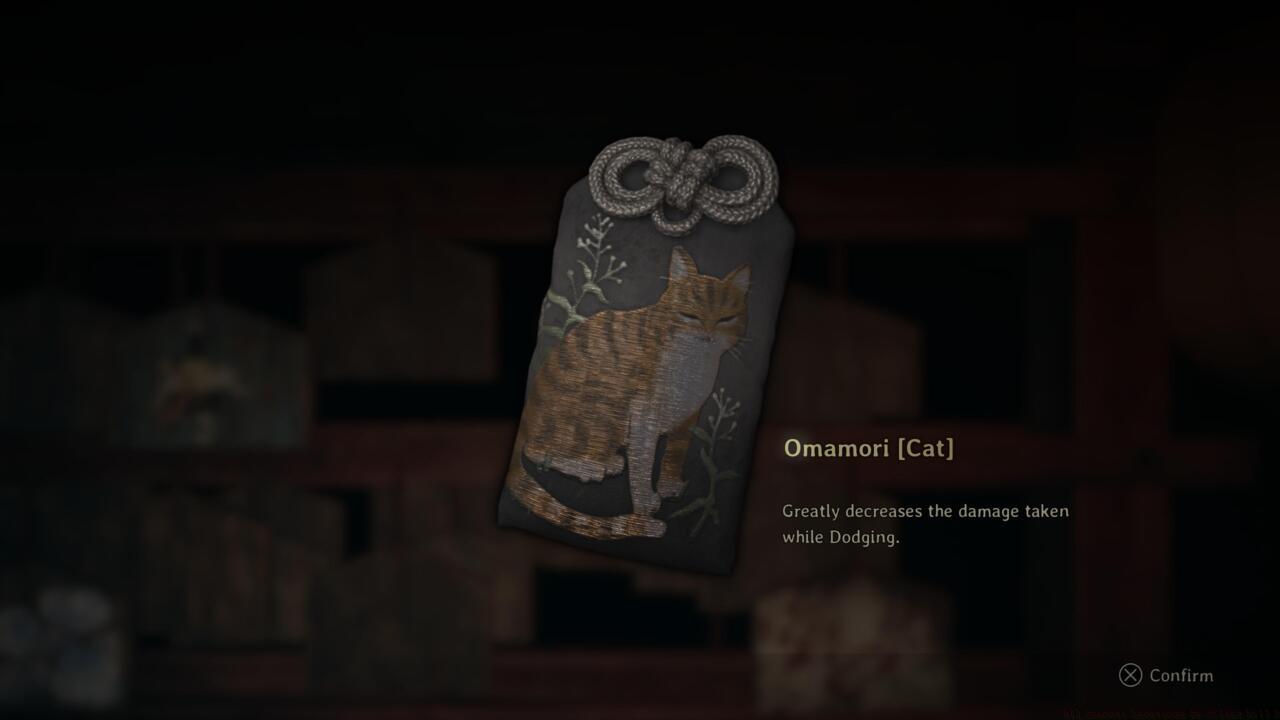
While navigating the Shrine Path area and working through the Shrine Vault Puzzle that demands locating three specific ema tablets, vigilant explorers should search for a fourth hidden ema. This additional tablet resides on a notice board in the southwestern sector, positioned on the same surface housing one of the required puzzle emas. Interact specifically with an ema featuring an orange feline motif against a blue backdrop. Examining the reverse side reveals the concealed Cat Omamori.
En route to Rinko’s residence, you’ll pass the physician’s dwelling situated opposite agricultural fields. Circumnavigate the structure’s exterior to locate a vertical access point enabling second-floor entry. Retrieve a crucial key from a container in the ground-level living area, then utilize this key to access a note from a locked upstairs drawer. This document grants access to the previously inaccessible upper chamber, where the Omamori remains secured within a dresser compartment.
During an early urban segment set within eastern farmlands, make time to visit the northern agricultural shrine. Here you’ll acquire a mailbox key for Sakuko’s residence, identifiable on your map by the pigtailed girl icon in the town’s southwestern district. While this location becomes available during this phase, optimal access occurs later, specifically after revisiting Hinako’s dwelling.
In the second shrine realm sequence, this particular charm awaits discovery in a chamber accessed shortly after reaching the area’s latter half, following the discovery that a missing key is required for main gate entry.
Several Omamori remain inaccessible until you complete the game and begin a New Game Plus cycle. These exclusive charms typically offer more powerful effects or complete specialized sets, providing compelling reasons for additional playthroughs.
Special consideration: The Blessed Hand Mirror represents a unique single-use Omamori. While replacement copies become available after consumption, the initial specimen appears directly in your path progression. Only one acquisition is necessary for completion tracking toward the collect all hidden Omamori achievement/trophy.
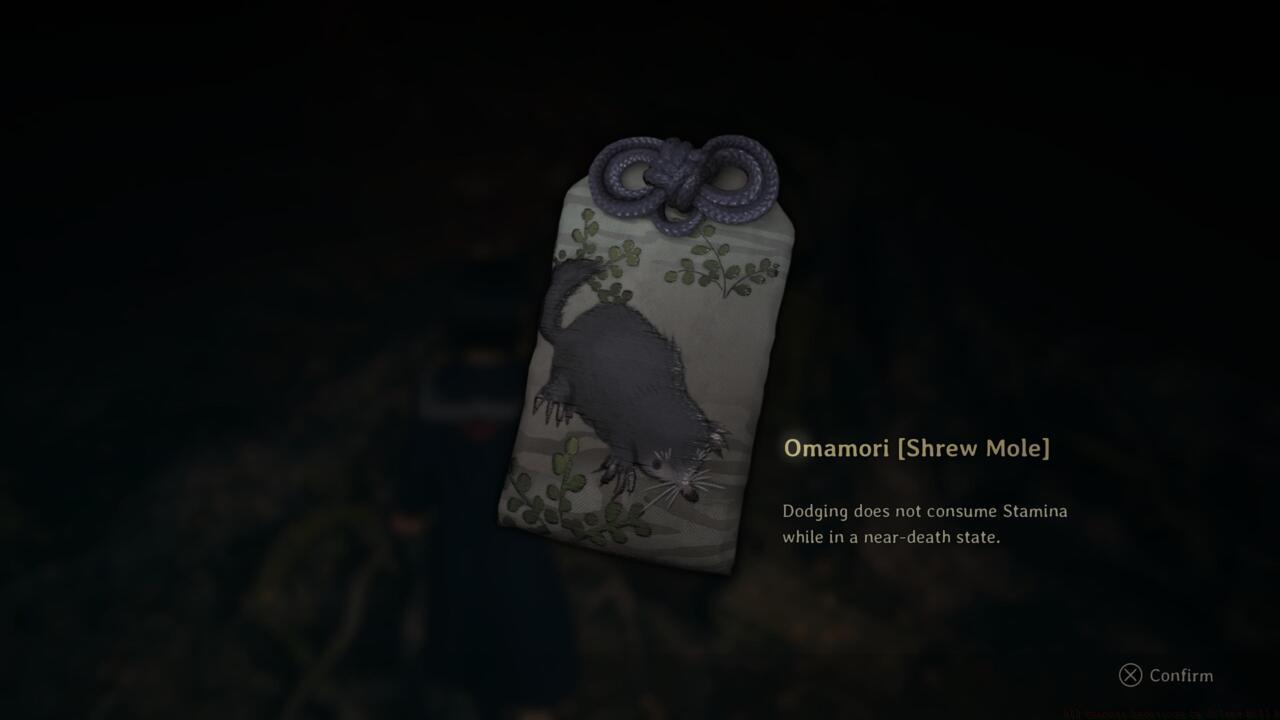
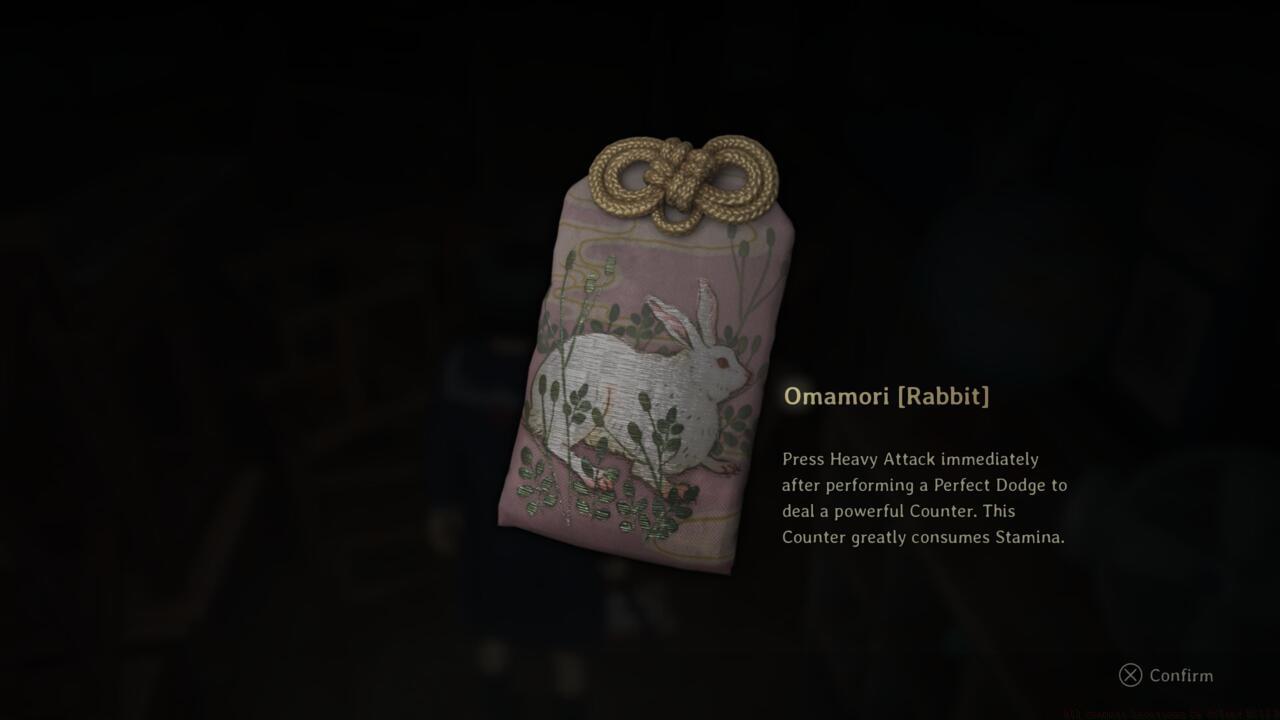
NG+ exclusive Omamori include specialized variants like the Shrew Mole, Rabbit, Swallow, and Goat charms, each providing distinct combat or exploration advantages unavailable during the initial playthrough.
Strategic insight: Plan your NG+ route in advance to efficiently collect these exclusive items while minimizing backtracking. Many NG+ Omamori are positioned in previously visited locations now accessible through new pathways or requiring abilities unlocked in the initial completion.
Mastering Omamori collection requires understanding both spatial awareness and resource economics. Efficient hunters combine thorough exploration with strategic Faith expenditure to maximize their charm collection without unnecessary grinding.
Common collection mistakes include overlooking revisitable areas after obtaining new keys or abilities, spending Faith too aggressively on shop rolls early game, and missing subtle environmental clues indicating hidden compartments.
Time optimization: Most hidden Omamori require 15-30 minutes to locate when following optimal routes, while shop acquisition depends on Faith accumulation rates from combat and exploration.
Advanced tip: Create a mental map of areas to revisit after obtaining specific items. Many late-game Omamori become accessible only after securing particular story progression items.
For comprehensive gameplay guidance, consult our Complete Guide covering all aspects of Silent Hill f mechanics and progression systems.
Action Checklist
- Prioritize finding hidden Omamori over shop purchases to conserve Faith
- {‘step’: ‘2’, ‘method’: ‘Systematic area exploration’, ‘difficulty’: ‘Intermediate’, ‘time_estimate’: ‘4-5 hours’}
- Document all shop purchases to track escalating Faith costs
- Plan New Game Plus route for exclusive Omamori
- Revisit areas after obtaining new keys and abilities
No reproduction without permission:SeeYouSoon Game Club » All Omamori Locations In Silent Hill F Complete guide to finding all Omamori in Silent Hill f with strategic tips and hidden locations