TL;DR
- Four hidden Nameless Mausoleums contain unique champion battles with exclusive gear rewards
- Each location presents distinct combat challenges with healing enemies and no summoning allowed
- Western location is easiest to find while others require exploration and environmental navigation
- Victory grants complete armor sets and specialized weapons with unique combat skills
- Strategic preparation and specific countermeasures significantly improve success rates
GameSpot may receive revenue from affiliate and advertising partnerships for sharing this content and from purchases through links.
Within the vast expanse of Elden Ring: Shadow of the Erdtree, adventurers will encounter numerous valuable treasures and equipment pieces. Certain powerful weapons and complete armor collections become available only after defeating specific elite champions who guard these sacred sites. This comprehensive walkthrough details the precise whereabouts of every Nameless Mausoleum throughout the Lands Between expansion.
Our detailed exploration covers all four confirmed Nameless Mausoleum sites discovered within the DLC landscape. While one location remains relatively straightforward to locate, the remaining three demand thorough exploration and keen observation to uncover their hidden entrances.
These structures differ significantly from traditional dungeons. Instead, they function as compact arenas hosting singular combat encounters against formidable opponents. Your adversaries will utilize healing abilities at minimum once during engagements, and spirit summoning assistance remains disabled throughout these confrontations. Emerging victorious guarantees acquisition of their complete equipment collections.
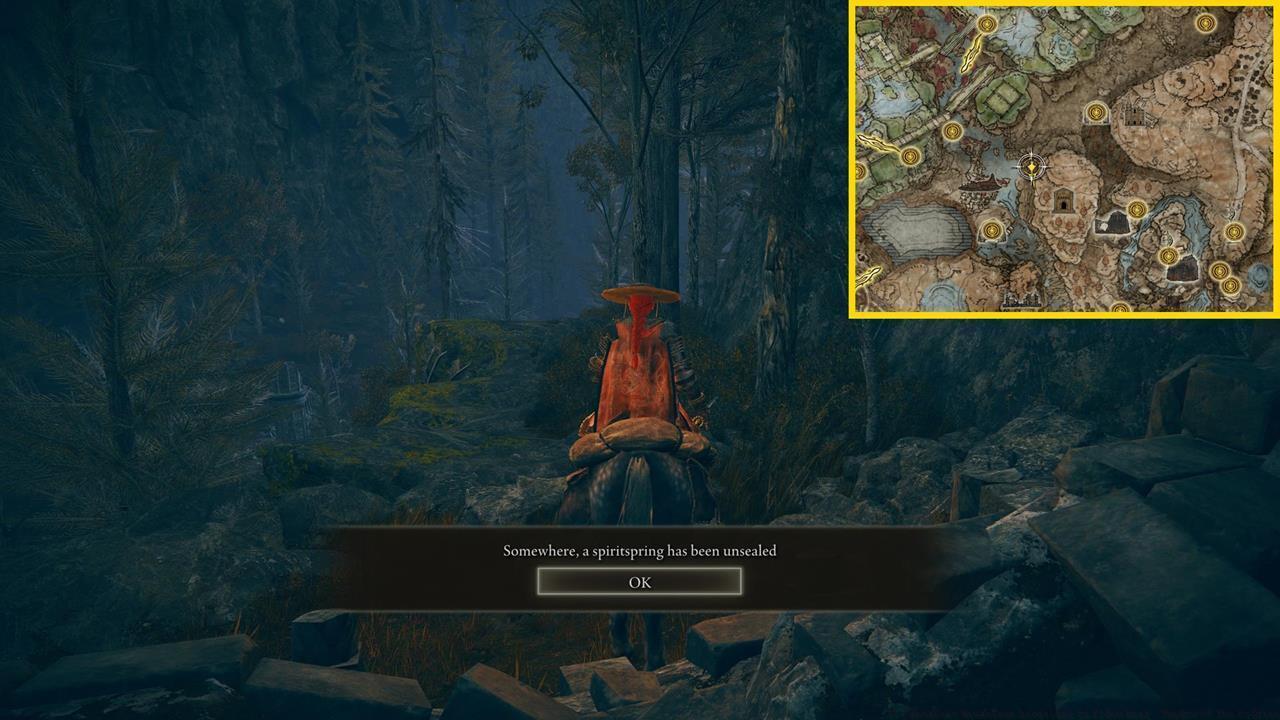
Reference the following map illustration displaying the geographical positions of all four Nameless Mausoleums throughout the Shadow of the Erdtree territories.
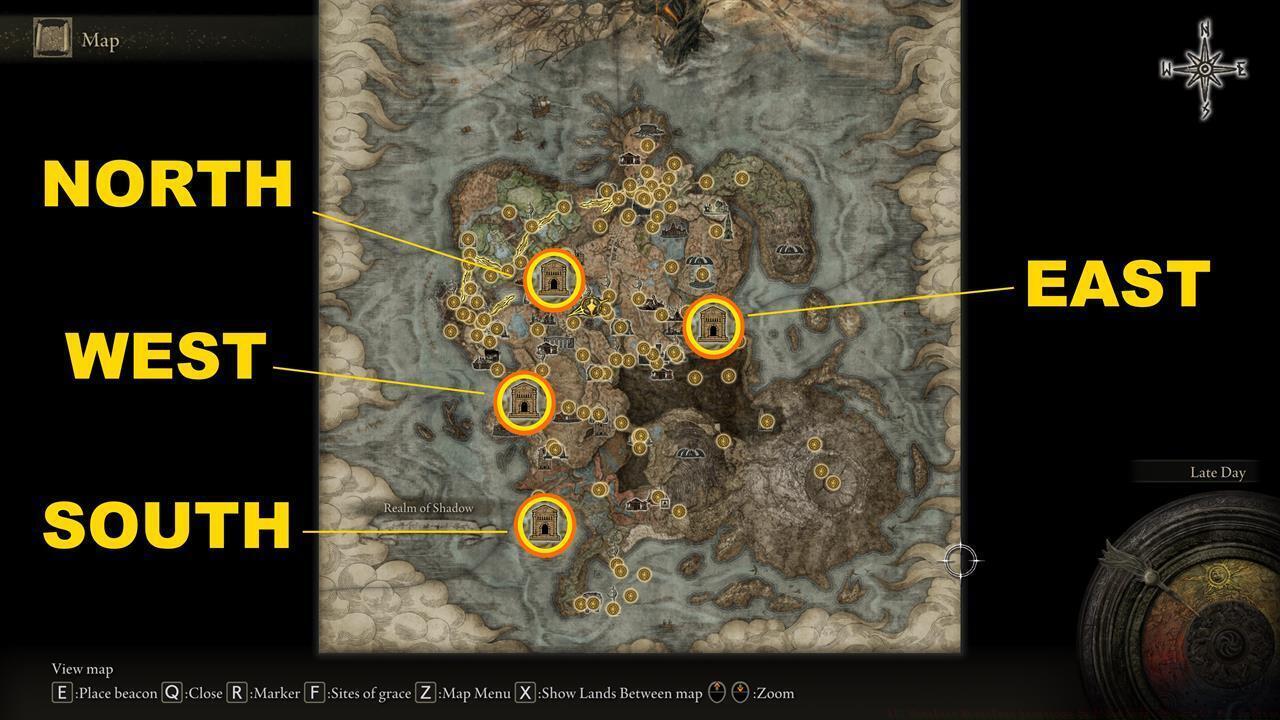
The Western Nameless Mausoleum stands as the most accessible location among all four sites within the DLC content. Its position lies immediately westward from the Scorched Ruins landmark within the Gravesite Plain territorial region.
Blackgaol Knight represents a challenging combatant capable of inflicting substantial damage through his powerful two-handed weapon techniques. Successfully defeating this warrior yields the following valuable rewards:
- Solitude armor set – Helm of Solitude, Armor of Solitude, Gauntlets of Solitude, and Greaves of Solitude.
- Greatsword of Solitude
- Type: Greatsword
- Skill: Solitary Moon Slash
- Stat scaling: Str B and Dex E
- Stat requirements: Str 27 and Dex 13
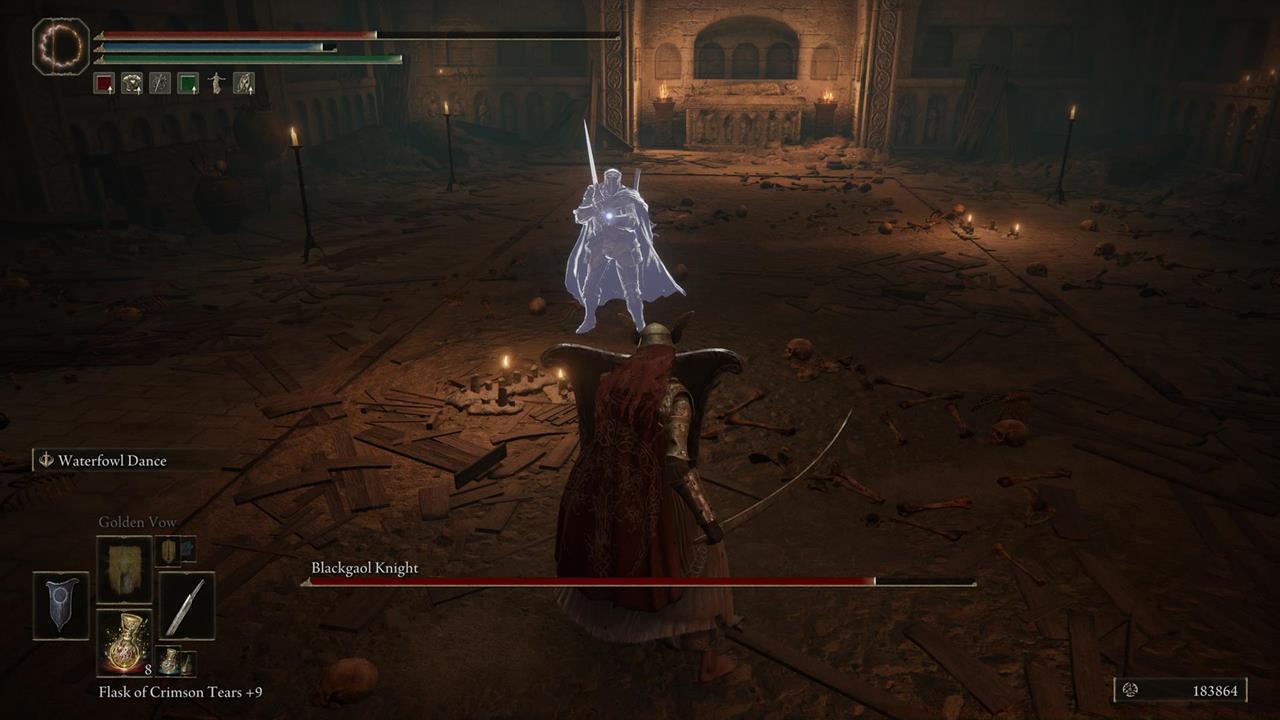
Combat Strategy: The Blackgaol Knight employs aggressive close-quarters combat with wide-arcing swings. Maintain medium distance to bait his charging attacks, then punish his recovery animations. His healing occurs around 50% health – apply pressure during this animation to interrupt the process. The Solitary Moon Slash weapon skill creates a sweeping arc perfect for crowd control situations.
Located within the southern territories, this mausoleum requires navigation through rugged terrain and environmental obstacles. The entrance remains partially concealed behind rock formations, demanding careful exploration to discover.
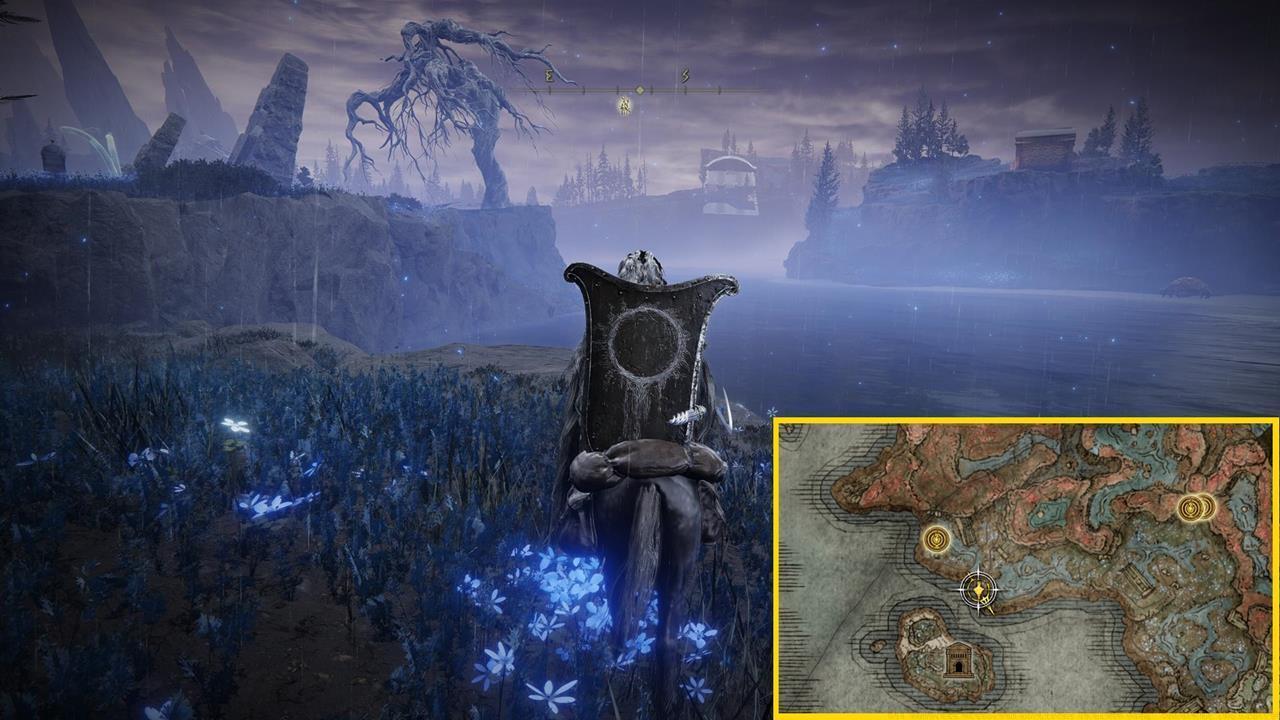
The Dancer of Ranah employs fluid, dance-like movements combined with rapid strikes and magical enhancements. Defeating this elegant combatant rewards adventurers with:
- Ranah’s Dancer Set – Complete lightweight armor collection
- Dancer’s Blades – Paired curved swords with unique attack combinations
- Special ability: Whirling Death Dance – creates a spinning vortex of blades
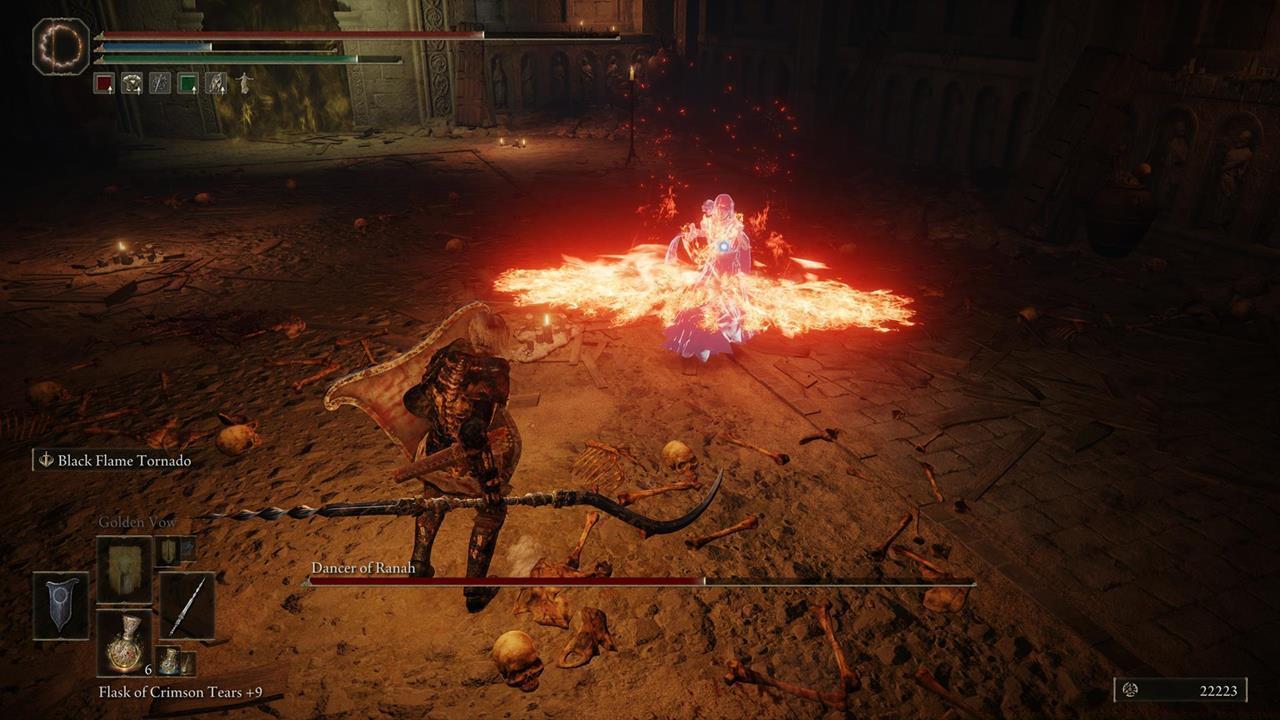
Battle Approach: The Dancer’s speed requires reactive dodging rather than predictive movement. Her healing activation occurs during a spinning animation – use thrusting attacks to break her momentum. The armor set provides exceptional mobility for dex-focused builds.
This concealed location within northern regions demands traversal across treacherous landscapes and discovery of hidden pathways. The entrance remains obscured by environmental elements, requiring thorough investigation.
The Red Bear champion utilizes brute strength and overwhelming force through heavy attacks and area-denial capabilities. Victorious combatants receive:
- Bear Champion Set – Heavy protective armor with poise benefits
- Ursine Great Club – Massive striking weapon with staggering potential
- Special skill: Earthshatter Slam – creates shockwaves that disrupt enemy positioning

Strategic Considerations: The Red Bear’s slow attack patterns create openings for counter-attacks. His healing occurs during a roaring animation – utilize this window for maximum damage output. The gear excels for strength-focused character builds seeking durability.
The eastern mausoleum presents the most challenging discovery process, requiring specific environmental interactions and sequence breaking. Its location remains the most cleverly hidden among all four sites.

Rakshasa employs deceptive tactics, illusionary techniques, and rapid repositioning maneuvers. Success against this elusive foe grants:
- Rakshasa Illusionist Set – Medium armor with magical resistance properties
- Twinblade of Phantoms – Weapon with ethereal damage and combo potential
- Unique ability: Mirror Image – creates temporary duplicates that distract opponents
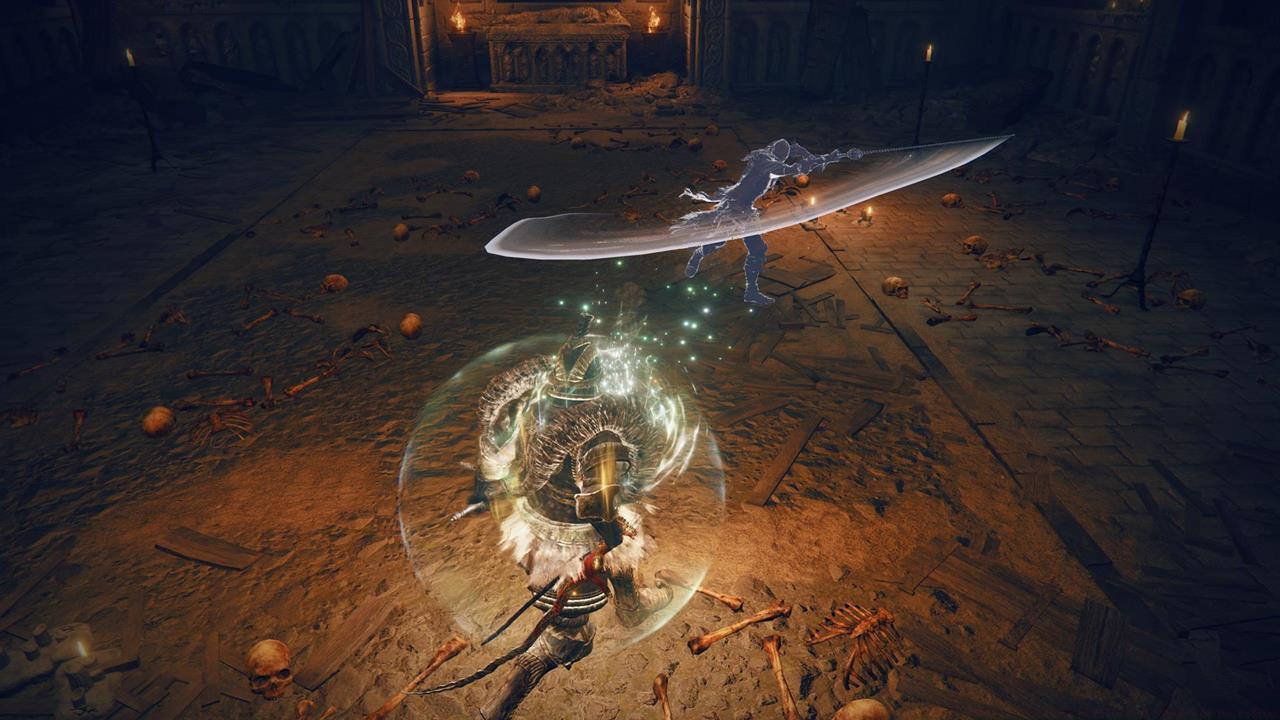
Engagement Methodology: Rakshasa’s illusionary clones can be identified by their slightly transparent appearance. His healing occurs during a teleportation sequence – anticipate his reappearance location for preemptive strikes. This equipment suits hybrid builds combining mobility and magical capabilities.
Healing Countermeasures: All mausoleum champions attempt healing around 50% health. Prepare weapons with high stance-breaking capabilities or ranged options to interrupt these crucial moments. Timing your heavy attacks or spellcasting to coincide with their healing animations dramatically increases success probability.
Build Optimization: For strength builds, focus on the Western and Northern mausoleums. Dexterity characters excel against Southern and Eastern opponents. Always equip talismans that enhance your primary damage type and consider incorporating items from our BF6 Weapons Unlock Guide for complementary equipment strategies.
Common Mistakes: Many players underestimate the aggression required during healing windows. Passive play extends combat duration and increases mistake probability. Learn each champion’s specific healing animation tells through observation during initial attempts.
Time Investment: Each mausoleum encounter typically requires 3-5 attempts for average players. Allocate 45-60 minutes per location for thorough exploration and combat mastery. The complete collection process spans approximately 3-4 hours including travel time between sites.
For comprehensive character building strategies that complement these rewards, consult our detailed BF6 Class Selection Guide covering optimal stat distributions and ability combinations.
Action Checklist
- Begin with Western Mausoleum for Solitude gear practice
- Equip stance-breaking weapons or spells for healing interruption
- {‘step’: ‘3’, ‘approach’: ‘Southern and Northern locations – adapt strategy based on champion speed differences’, ‘difficulty’: ‘Medium-Hard’, ‘time_estimate’: ’60-75 minutes combined’}
- Save Eastern Mausoleum for last, requiring advanced combat awareness
- Integrate acquired gear into your build using our complete system guide
No reproduction without permission:SeeYouSoon Game Club » All Nameless Mausoleum Locations In Elden Ring: Shadow Of The Erdtree Complete guide to finding all four Nameless Mausoleums and defeating their champions for exclusive gear sets