TL;DR
- Activate four water wheels using Sidon’s Water Bubble ability and strategic puzzle solving
- Utilize Hover Stones for elevation challenges and Autobuild for creative solutions
- Master electrical conduction mechanics and bullet time archery for complex wheel access
- Prepare for Mucktorok boss fight with proper weapons and environmental awareness
- Complete temple unlocks main story progression in Zora’s Domain region
Conquering the Water Temple’s intricate puzzles represents a pivotal moment in your Tears of the Kingdom adventure. This challenging segment concludes the primary storyline in Lanayru’s Zora’s Domain, requiring mastery of Prince Sidon’s unique aquatic abilities.
Before attempting the temple, ensure you’ve completed the Clues to the Sky questline and gathered essential resources. The temple’s core mechanic revolves around disabling four massive faucet locks by striking specific water wheels, each protected by distinct environmental puzzles that test your problem-solving skills.
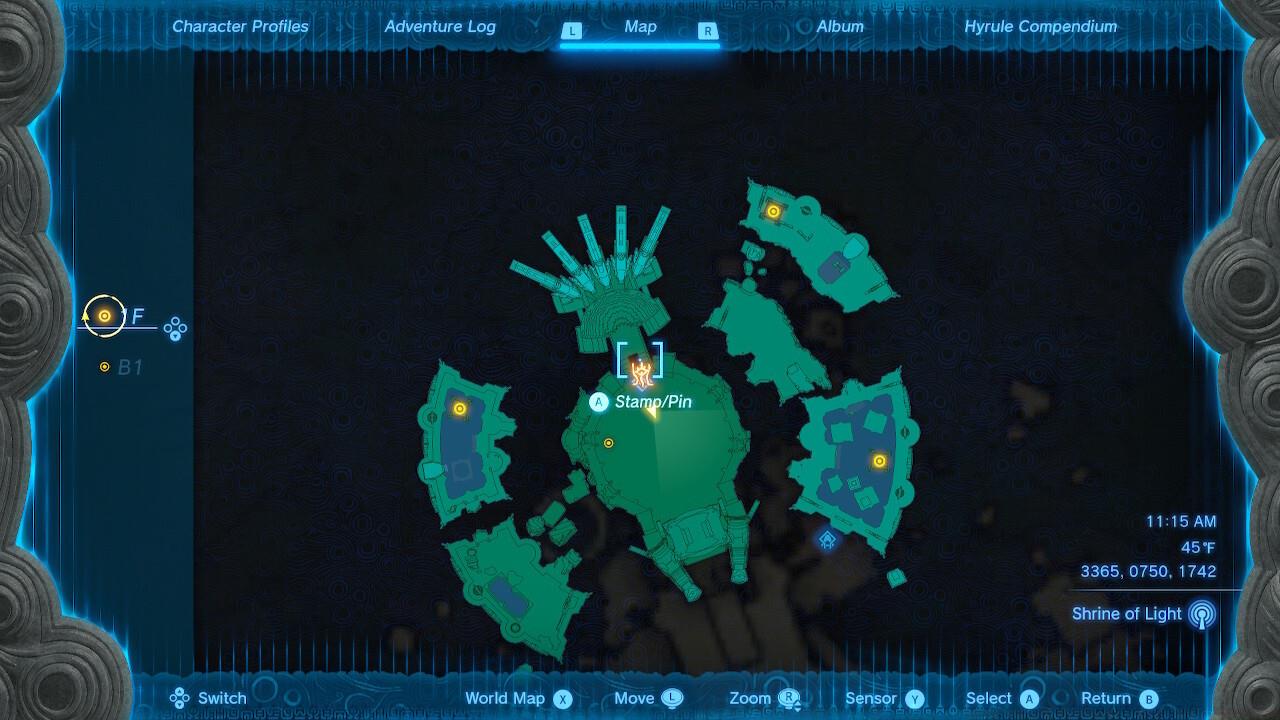
Water Temple map
Pro Tip: Stock up on arrows and Zonai Devices before entering, as several puzzles require precise aiming and creative construction. The temple typically takes 45-60 minutes to complete for first-time players.
Begin your water wheel activation journey in the basement level. From the central fast travel point, scan the arena’s left perimeter to spot a small island featuring a distinctive pond. Descend carefully and follow the carved stone steps leading into a concealed underground chamber.
Employ Sidon’s Water Bubble ability to safely navigate through the fiery obstacles protecting this area. You’ll discover a puzzle ball positioned at the chamber’s far end, with the floor littered with dangerous spikes. Fortunately, strategically placed Hover Stones provide the perfect solution for traversal.
Common Mistake: Many players attempt to carry the ball directly, only to fall victim to the spike traps. Instead, position the Hover Stones to create a safe pathway, then carefully transport the ball back to its designated target area.
B1 water wheel
When properly aligned, forcefully drive the ball into the target’s center until it locks securely. The successful activation triggers a green light confirmation, signaling that the first water wheel is now accessible for striking.
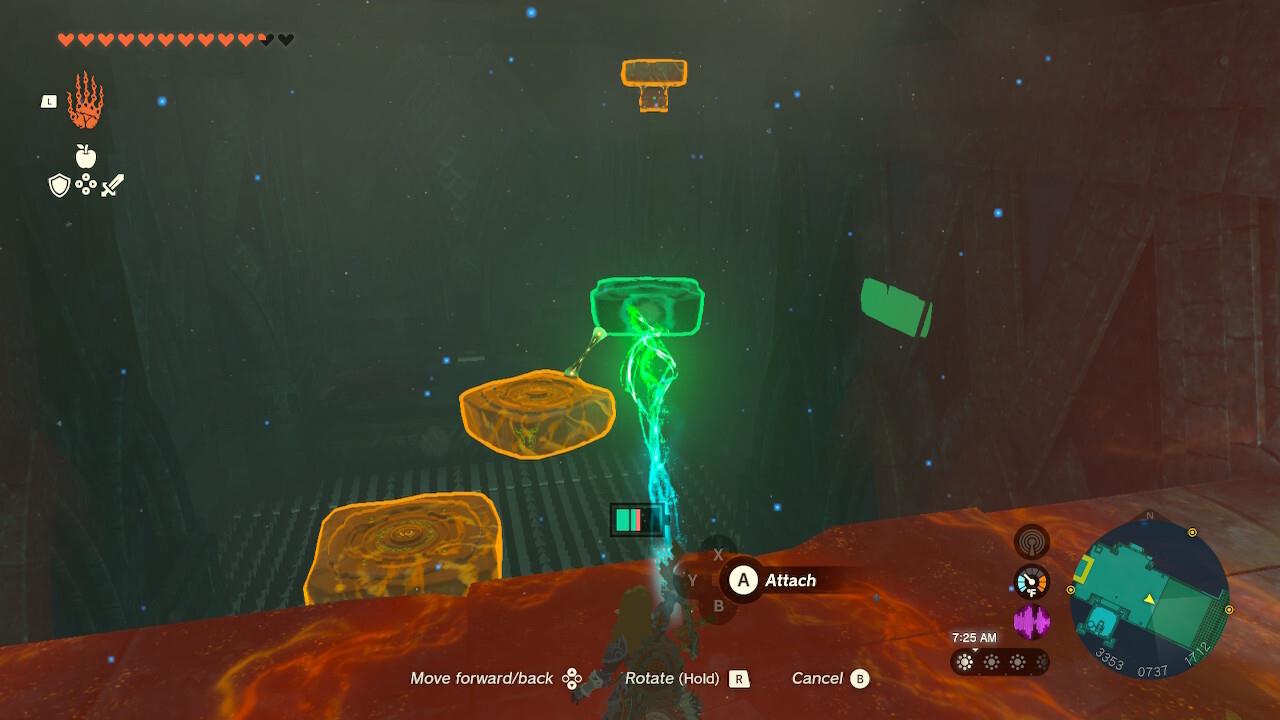
Return to the fast travel nexus and proceed to the temple’s left sector. Here you’ll encounter a substantial spherical object that presents multiple solution approaches. While conventional puzzle methods exist, the Autobuild feature offers an ingenious alternative for creative problem-solvers.
Construct a Zonai Balloon apparatus to elevate the ball to the upper platform. Carefully deposit it into the waiting pool, applying gentle pressure for several seconds until the indicator transitions to green.
Advanced Technique: For optimal efficiency, briefly raise the sluice gate mechanism, then immediately activate the Recall ability to maintain its elevated position. This strategic timing creates a temporary drainage effect, exposing the second water wheel for activation.
1F left water wheel
Optimization Tip: Prepare your Autobuild favorites in advance to streamline this process. The drainage window remains active for approximately 15 seconds, providing ample time to strike the wheel if you’ve positioned yourself correctly beforehand.
Transition from the completed left section to the temple’s right flank by carefully navigating across the monumental faucet structures. Alternatively, deploy additional Zonai Device contraptions for aerial access to this elevated platform.
The primary objective here involves channeling electrical energy to dismantle a protective barricade. Rotate the water wheel mechanism to generate the necessary power, then strategically position one of the floating water bubbles to bridge the central gap.
Mechanics Insight: Water possesses natural electrical conductivity properties in Hyrule’s physics. By placing the aqueous sphere in the strategic position, you create a conductive pathway that forces the obstruction to retract.
1F top-right water wheel
Alternative Strategy: Experiment with Riju’s Lightning Strike ability as a potential shortcut, though results may vary depending on your positioning and timing.
From your current position, advance to the adjacent sector on this side of the complex. The crucial activation mechanism resides atop a rotating architectural element, requiring innovative vertical approach strategies.
Deploy a Hover Stone to achieve the necessary elevation (supplement with Ascend ability if required). As you descend from this heightened position, activate your bow to engage bullet time aiming.
Pro Technique: The slowed temporal perception during aerial descent provides the perfect opportunity to precisely target the activation switch. Once successfully triggered, the pool drains completely, revealing the final water wheel for activation.
1F bottom-right water wheel
Common Pitfall: Many players miss the timing window by attempting ground-level shots. The aerial perspective is essential for clear targeting of the switch mechanism.
With all four water wheels successfully activated, you’ve conquered the Water Temple’s primary challenge. However, your triumph immediately transitions to confronting one of Hyrule’s most notoriously frustrating adversaries.
Boss Strategy: The Mucktorok employs deceptive mobility and environmental manipulation tactics. Equip weapons with extended reach and prepare for rapid directional changes during the encounter.
Recommended Loadout: Bring splash fruit or hydrating weapons to counter the boss’s mud-based attacks. Understanding attack patterns is crucial for survival.
Tears of the Kingdom presents countless intricate systems and gameplay elements to master. For comprehensive guidance on other challenges, explore our guides hub for additional expert strategies and walkthroughs.
Action Checklist
- Complete Clues to the Sky quest and gather Zonai Devices
- Solve B1 water wheel puzzle using Hover Stones and ball placement
- Activate left 1F wheel with Autobuild balloon and Recall timing
- Complete top-right electrical conduction puzzle
- Execute aerial archery for bottom-right wheel activation
- Defeat Mucktorok using recommended strategies and equipment
No reproduction without permission:SeeYouSoon Game Club » Zelda: Tears Of The Kingdom – Water Temple Puzzle Guide Master the Water Temple's four water wheel puzzles and defeat Mucktorok with expert strategies