TL;DR
- Tauyosipun Shrine requires mastery of Recall’s time-reversal mechanics across four progressive puzzles
- Proper timing and positioning are crucial for redirecting rolling orbs to their targets
- Environmental preparation with cold-resistant gear is essential for reaching the Hebra location
- Advanced techniques include Recall cancellation mid-air and dual-object manipulation
- Each puzzle builds on previous mechanics, requiring increasingly precise execution
Navigating to the Tauyosipun Shrine presents its own challenges before you even begin solving puzzles. Situated in the remote western reaches of the Hebra region, this shrine demands careful preparation for the harsh arctic environment.
The Legend of Zelda: Tears of the Kingdom Tauyosipun Shrine can be found in the western edge of the Hebra region. Starting from the Rospro Pass Skyview Tower, you’ll need to travel westward across expansive snowfields. The subzero temperatures in this area require specific gear considerations to ensure Link’s survival during the journey.
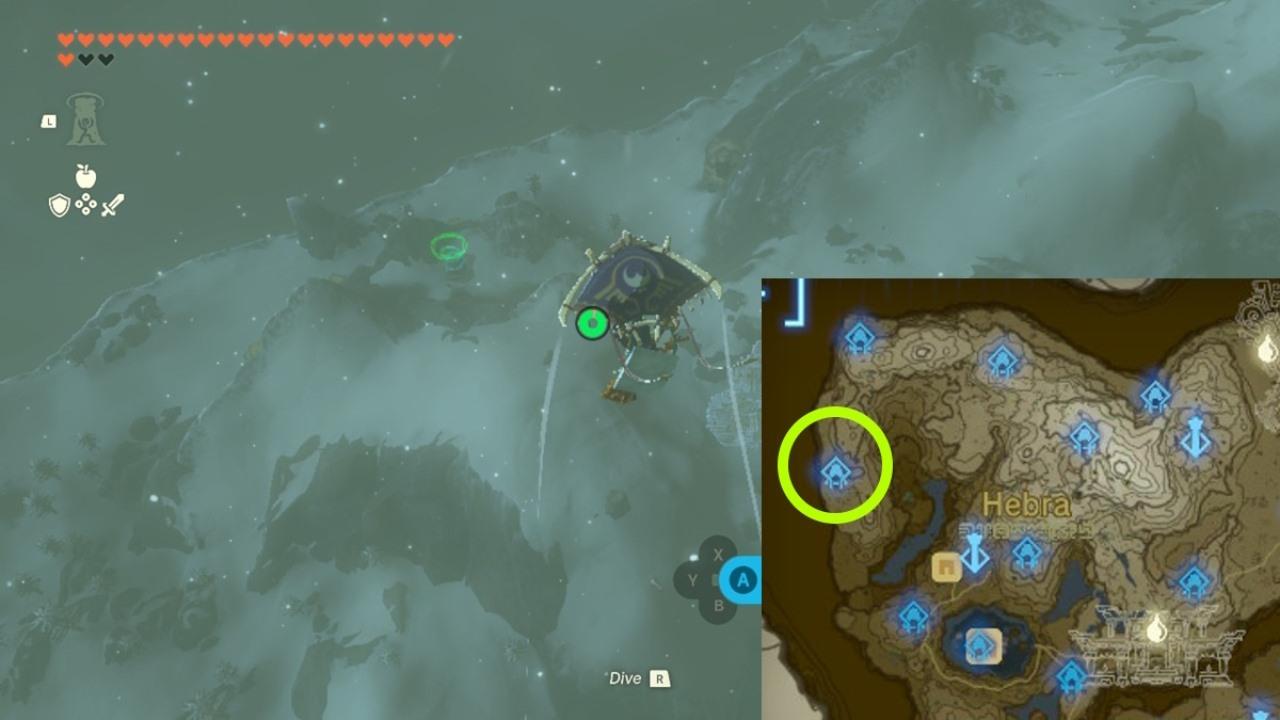
Tauyosipun Shrine location
Environmental hazards make proper equipment essential. Without adequate cold-resistant armor or warming elixirs, Link will rapidly lose health from freezing temperatures. Many players underestimate the distance and find themselves unprepared, forcing them to abandon their shrine attempt midway.
Your initial encounter with the Forward or Backward puzzle immediately introduces Recall’s core mechanics. This ability, which reverses an object’s movement through time, becomes your primary tool for navigating the shrine’s challenges.
As noted earlier, The Legend of Zelda: Tears of the Kingdom Forward or Backward puzzle for the Tauyosipun Shrine requires the usage of Recall. The first chamber presents a straightforward application: a sphere rolling directly toward your position. Activating Recall on the approaching orb reverses its trajectory, creating a safe passage. Timing is forgiving here, allowing you to familiarize yourself with the ability’s activation range and duration.
Don’t overlook the hidden chest containing valuable rewards. To access it, target the rotating mechanism with Recall, causing it to spin backward and reveal the container. Once visible, employ Ultrahand to retrieve your prize. Many players miss this opportunity by rushing through the initial challenge.
The shrine’s second chamber introduces object interaction through Recall manipulation. This puzzle requires coordinating multiple moving elements and understanding how reversed objects affect their surroundings.
For the next puzzle section, you’ll encounter two spheres with distinct roles. One descends continuously along a track while another remains available for manual placement. The objective involves precise timing and spatial awareness to direct the correct sphere to the target.
Activate the floor switch to block one end of the rail system. When the descending ball impacts the barrier, position the second sphere immediately behind it. Then execute Recall on the first orb, causing it to push its companion backward toward the bullseye destination. The key is positioning the second ball close enough to ensure contact but not so close that it interferes with the initial impact.


Left: Second puzzle solution; Right: Third puzzle solution
Left: Second puzzle solution; Right: Third puzzle solution
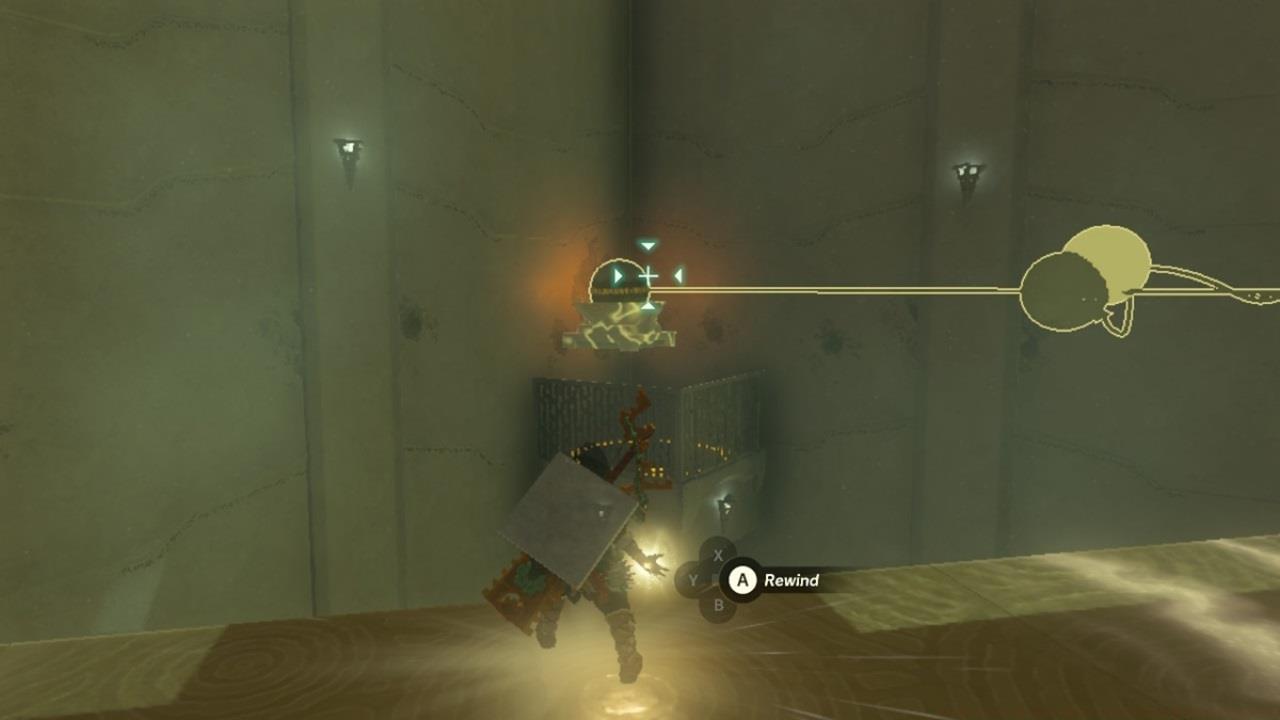
This chamber tests your mastery of Recall’s cancellation feature with a sophisticated rail system. Precision timing becomes paramount as you manipulate a sphere’s trajectory through multiple levels.
For the third puzzle section, you’ll observe dual rails with a sphere moving between them. The orb travels along the upper track until falling into the gap below, then continues on the lower pathway. The solution requires interrupting this cycle at the perfect moment.
Allow the sphere to descend to the second rail level, then activate Recall to reverse its motion. As it returns upward across the gap between rails, cancel the ability mid-transit. This strategic cancellation drops the sphere directly into the target below. Practice the timing, as premature or delayed cancellation will miss the mark.
The culminating puzzle combines all previously learned mechanics with an additional dynamic element. A mobile receptacle moves laterally, requiring advanced timing and prediction skills to successfully deliver the sphere.
This final chamber has a receptacle that’s moving from left to right. There’s also a ball here that you can use. Here’s what you need to do:
Position yourself strategically to account for the receptacle’s movement pattern. The key is anticipating its trajectory and activating Recall with appropriate lead time. Many players fail here by reacting too late or misjudging the timing window.
Last puzzle solution
Advanced strategy involves using the receptacle’s full movement cycle to your advantage. Time your Recall activation so the sphere arrives precisely as the target passes the optimal position. This final test separates casual players from true puzzle masters.
Action Checklist
- Equip cold-resistant gear before traveling to Hebra’s western snowfields
- Practice basic Recall mechanics in the first chamber with the approaching sphere
- Retrieve hidden chest by using Recall on rotating mechanism
- Coordinate dual spheres in second chamber using switch activation and timed Recall
- Master Recall cancellation in third chamber for precise drop targeting
- Complete final moving receptacle challenge with advanced timing prediction
No reproduction without permission:SeeYouSoon Game Club » Zelda: Tears Of The Kingdom – Tauyosipun Shrine Puzzle Guide Master the Recall ability to solve Tauyosipun Shrine's time-based puzzles in Zelda: Tears of the Kingdom