TL;DR
- Position logs vertically stacked rather than horizontally for maximum impact force
- Use Zonai Stakes to create stable mounting points for your constructed bat mechanism
- Time your ball release with the rotating platform’s position for perfect target alignment
- Secure the pressure plate to the ceiling stake for accessing the hidden treasure chest
- Avoid common errors like improper stake placement and miscalculated ball timing
Conquer the Mayachin Shrine’s Fixed Device challenge without frustration using this comprehensive Zelda: Tears of the Kingdom walkthrough. This guide provides detailed mechanical insights and strategic approaches to master the puzzle efficiently.
The Mayachin Shrine presents players with a deceptively complex physics-based puzzle involving a rolling sphere that must strike a distant target. While initially appearing straightforward, the solution requires understanding precise device interactions and timing mechanics unique to this shrine’s design.
Located within Hyrule Field’s southern region below Lookout Landing, the Mayachin Shrine sits adjacent to the Skyview Tower, making it easily accessible once you’ve activated the regional tower system. The shrine’s proximity to this major landmark simplifies navigation and return visits if needed.
Upon entering the shrine chamber, traverse the initial gap and systematically assess the available tools and mechanisms:
Mayachin Shrine location
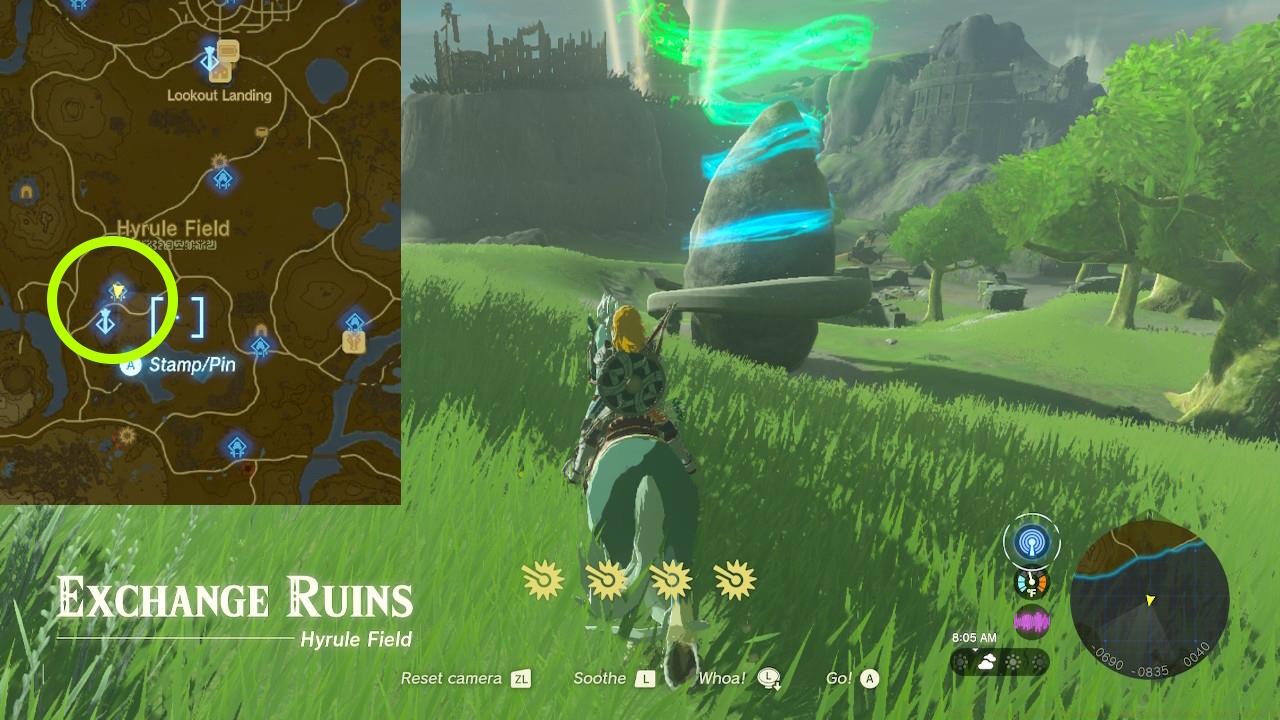
Mayachin Shrine location
Understanding the core mechanics is crucial for solving this shrine efficiently. The rolling ball generates consistent kinetic energy, but its effectiveness depends entirely on your constructed apparatus. The Zonai Stakes provide permanent structural support when driven into surfaces, creating reliable anchor points that won’t shift during operation.
The rotating central device introduces a timing element that many players overlook. This mechanism cycles through positions that either block or enable successful ball trajectories. Observing several complete rotation cycles before building your solution can prevent frustrating misalignments later.
Advanced players should note that the ball’s speed remains constant regardless of construction, meaning impact force must be amplified through structural design rather than velocity increases. This distinguishes Mayachin from other physics-based shrines where momentum manipulation is possible.
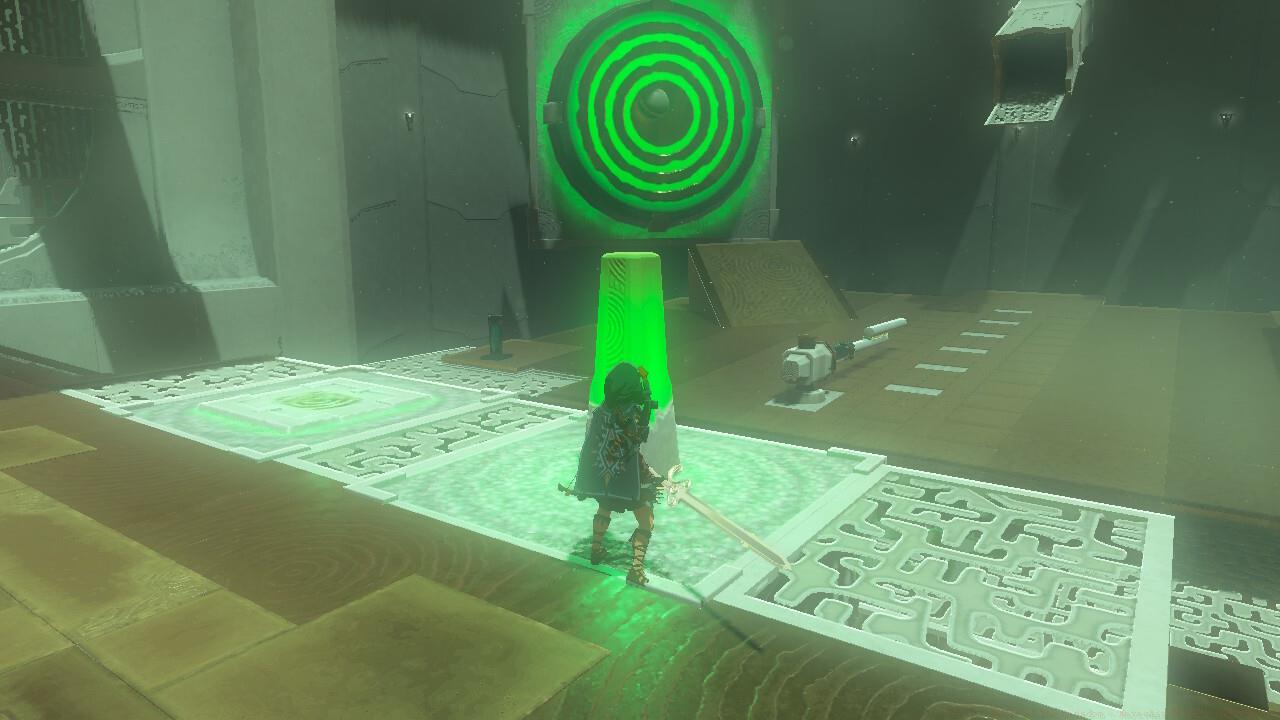
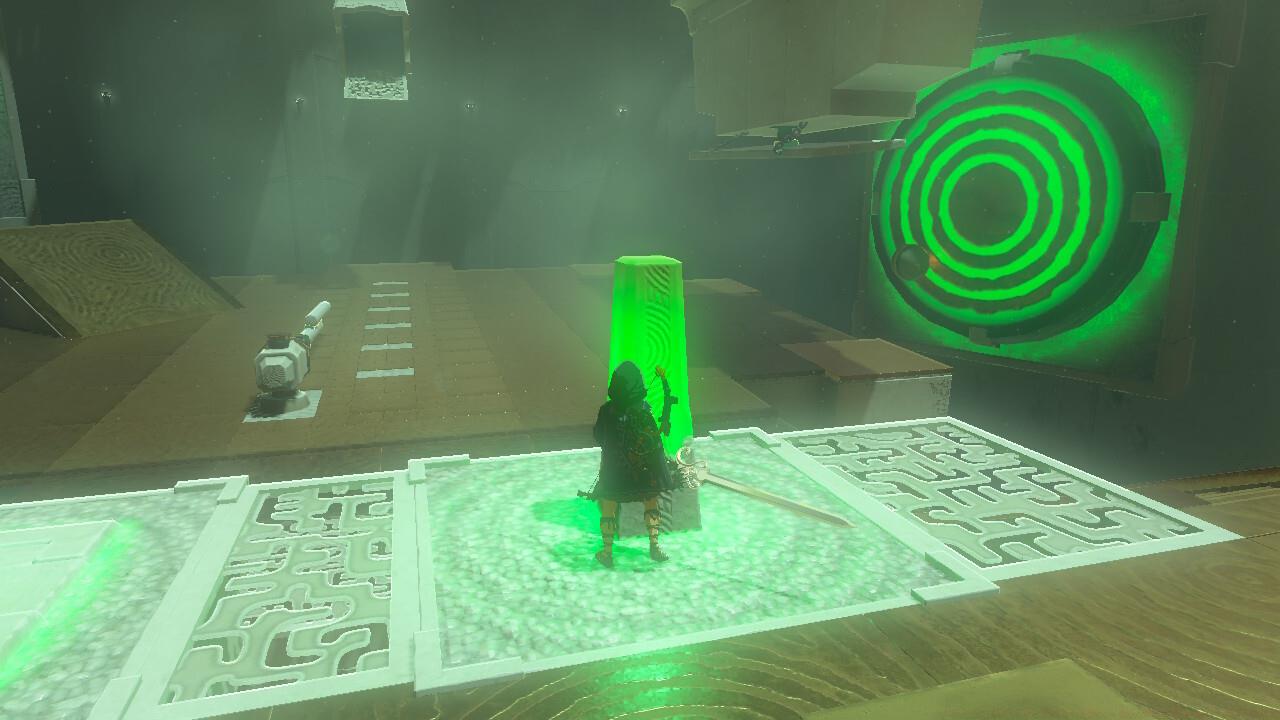
Puzzle completion: Notice how the second log is placed on top of the first? A bigger bat means more impact, as opposed to attaching them end-to-end.
Primary Puzzle Solution: Begin by positioning one log horizontally near the ball’s landing area. Crucially, place a second log vertically on top of the first rather than extending lengthwise – this stacked configuration creates a taller “bat” that transfers significantly more impact force to the target. The vertical alignment increases the striking surface area and momentum transfer efficiency.
Secure this construction using Zonai Stakes driven through the logs into the ground, ensuring stability during ball impact. Position your completed structure so the ball will strike near the top of the vertical log, maximizing leverage and force multiplication toward the target direction.
Hidden Chest Acquisition: To unlock the shrine’s bonus treasure, employ a modified approach using the same core components. Drive a Zonai Stake into the ceiling above the target area, then attach the pressure plate directly to this overhead anchor point. This elevated positioning creates an alternative activation method that reveals the concealed reward chamber.
Chest solution: You’ll mostly do the same steps, but make sure you push the stake through the ceiling, then attach the plate to it.
Optimization Methods: For players seeking efficiency, position your constructed bat at approximately a 45-degree angle relative to the ball’s approach path. This angled configuration creates a more efficient energy transfer while reducing the chance of the ball deflecting unpredictably. The optimal timing for ball release occurs when the rotating platform’s open side faces directly toward your target alignment.
Common Mistakes and Prevention: Many players incorrectly attach logs end-to-end, creating a longer but less effective striking surface. The vertical stacking method provides substantially better results due to increased mass concentration at the impact point.
Another frequent error involves improper Zonai Stake placement. Ensure stakes penetrate completely through logs into solid surfaces beneath; partial anchoring often fails during the ball’s impact, requiring reconstruction and time loss. Testing your structure’s stability before the ball arrives can prevent these setbacks.
For players struggling with timing, observe 2-3 complete rotation cycles of the central device while planning your construction placement. This observation period typically reveals the optimal release timing window, saving multiple attempt cycles. Most players complete the primary puzzle within 5-7 minutes using these optimized approaches.
If you’re enjoying shrine puzzles, our Complete Guide offers additional strategic insights for various gaming challenges.
Action Checklist
- Position first log horizontally near ball landing zone
- Stack second log vertically on top using Ultrahand ability
- Secure construction with Zonai Stakes driven completely through logs
- Time ball release when rotating platform faces target direction
- For hidden chest, mount pressure plate to ceiling stake
No reproduction without permission:SeeYouSoon Game Club » Zelda: Tears Of The Kingdom – Mayachin Shrine Puzzle Guide Master the Mayachin Shrine's mechanical puzzle with strategic positioning and Zonai device optimization techniques