TL;DR
- Locate Marakuguc Shrine in Eldin Canyon’s volcanic region for wheel-based challenges
- Master Ultrahand panel connections across gaps and lava flows with strategic positioning
- Utilize wheel activation mechanics by striking wheels to create functional ramps
- Discover hidden chest using Ascend ability on strategically placed ramps
- Avoid common attachment errors and optimize completion time under 8 minutes
Navigating the volcanic terrain of Eldin Canyon leads adventurers to the Marakuguc Shrine, where wheeled contraptions await your engineering prowess. This shrine specifically tests your mastery of the Ultrahand ability through a series of increasingly complex mechanical puzzles.
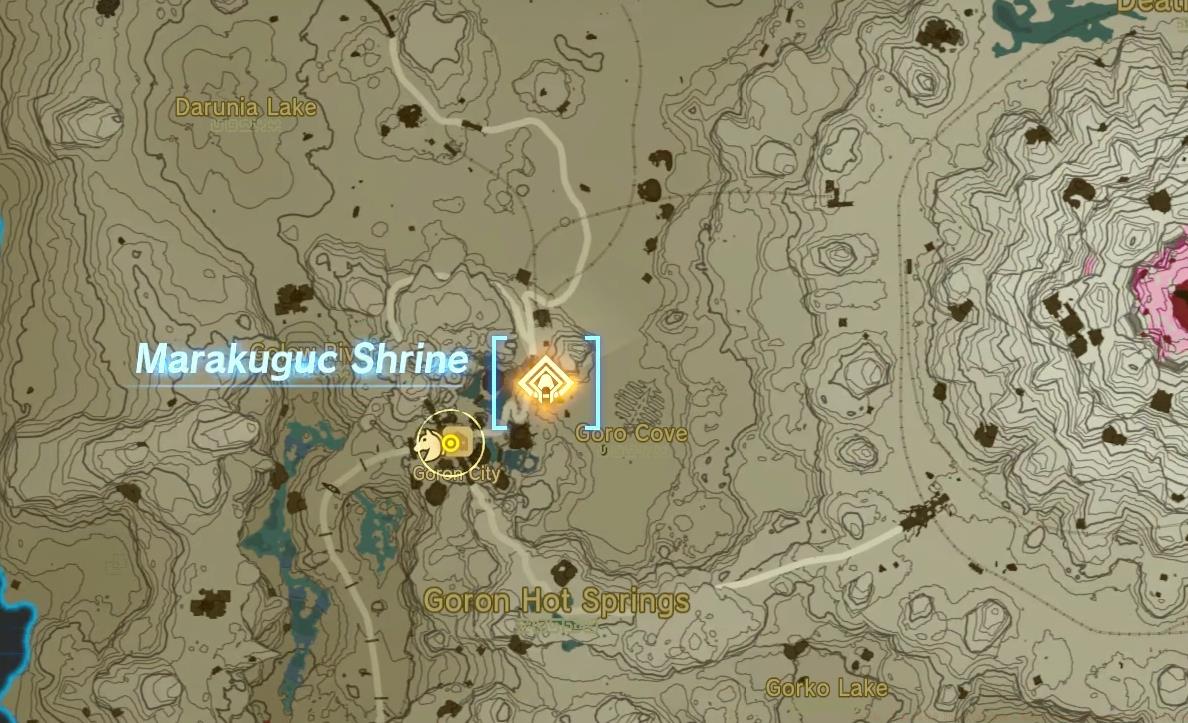
The Marakuguc Shrine entrance blends into Eldin Canyon’s rocky landscape, requiring careful exploration to locate.
The Wheeled Wonders challenges within demand creative application of your Ultrahand skills to attach various objects to wheeled devices, enabling traversal across hazardous gaps and molten lava flows. Understanding the shrine’s mechanical theme early helps prepare for the systematic problem-solving approach needed.
Pro tip: Approach from the northwest to avoid additional enemy encounters, saving valuable resources for the shrine’s puzzles. The region’s thermal updrafts can also assist with aerial reconnaissance if you’re struggling to pinpoint the exact entrance location.
Upon entering the shrine, your first test involves a straightforward gap with a detached panel nearby. Employ your Ultrahand ability to lift and precisely position this panel, creating a stable bridge between the separated platforms.
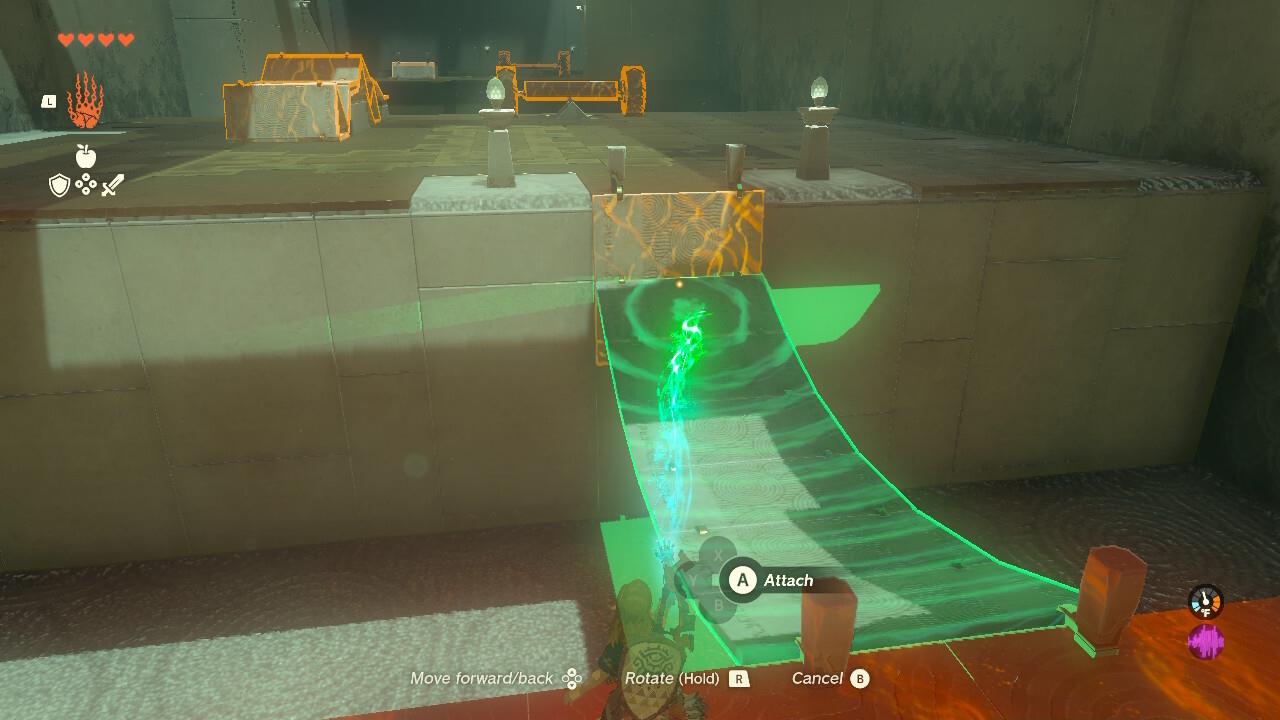
Strategic panel placement creates an optimal crossing angle while maintaining structural stability.
Critical mistake to avoid: Rushing the attachment process often leads to misaligned panels that may detach mid-crossing. Take time to ensure the connection points are firmly secured before attempting to traverse.
Advanced technique: Rotate the panel 45 degrees before attachment to create a more gradual incline, making the crossing significantly easier and reducing the risk of slipping off edges.
This initial puzzle serves as an important warm-up for the more complex mechanical challenges ahead, reinforcing fundamental Ultrahand principles you’ll need to master.
The second chamber introduces molten lava hazards, requiring more sophisticated construction. Here, you’ll find a wheeled platform and several folded panels that must be strategically combined.
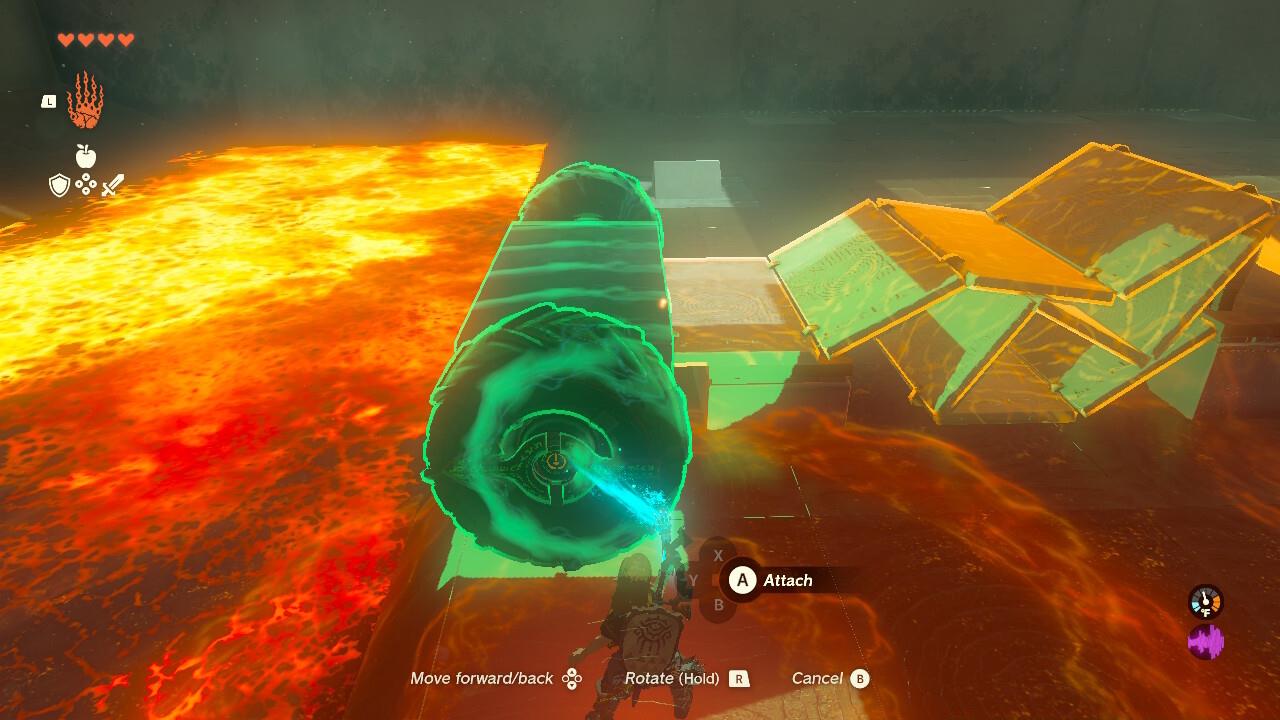
Proper wheeled platform positioning is crucial for successful multi-panel assembly.
Position the mobile platform directly adjacent to the stacked panels, then use Ultrahand to connect the end panel to the rear section of the wheeled base. This creates an extended ramp mechanism when activated.

Multi-panel connections require precise alignment to ensure smooth operation across lava surfaces.
Activation method: Strike any wheel firmly with your sword to initiate movement. The assembled contraption will then rotate forward, forming a functional ramp across the lava flow. Time your strike carefully to avoid premature activation before the assembly is complete.
Pro tip: Stand clear of the wheel path after striking, as the rapid unfolding motion can sometimes launch Link into hazardous areas if positioned incorrectly.
The shrine’s final sections present dual challenges: locating a concealed treasure and solving an additional ball-based puzzle. For the hidden chest, position one of the ramps vertically against the elevated ledge.
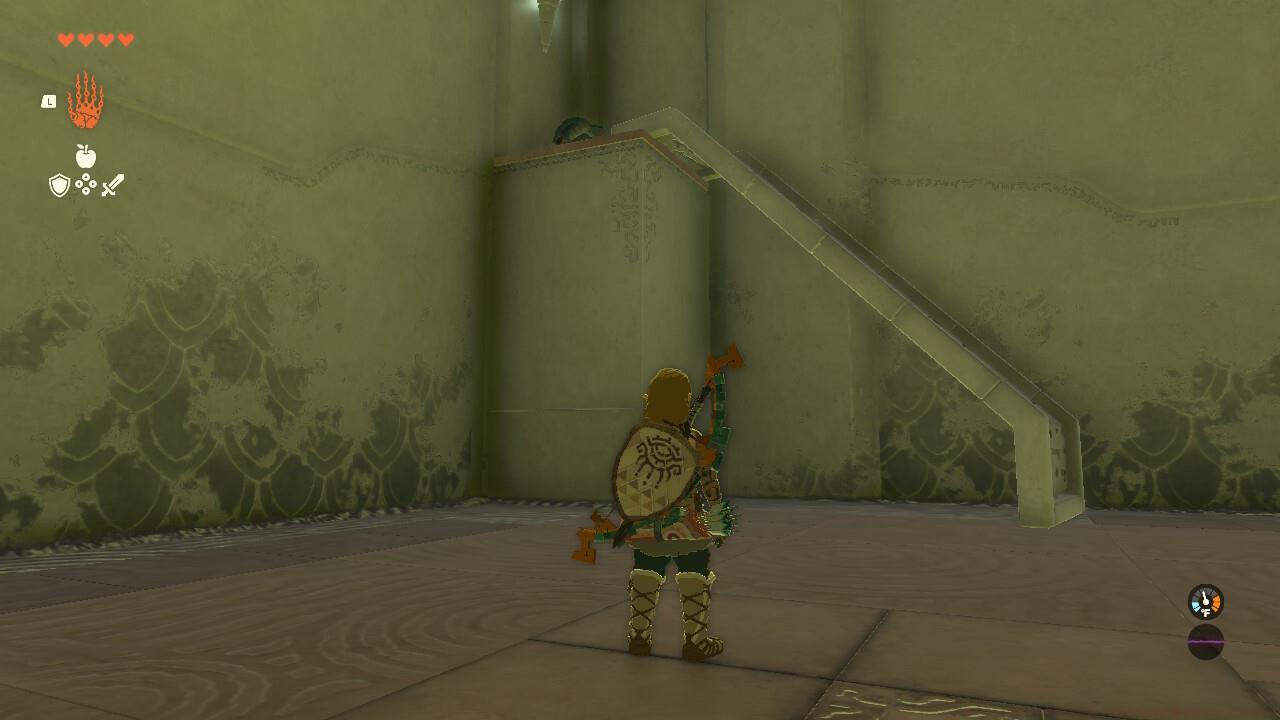
Strategic ramp placement enables Ascend ability usage to access otherwise unreachable areas.
Employ your Ascend ability through the strategically placed ramp to reach the platform above, where a valuable chest awaits discovery. The contents typically include rare materials or specialized equipment beneficial for your journey.
Equipment optimization: Ensure you have at least 3 full Ultrahand battery cells before attempting, as complex multi-object connections drain significant energy.
Action Checklist
- Locate shrine in Eldin Canyon’s northwestern region
- Use Ultrahand to reconnect broken panel across initial gap
- Assemble wheeled platform with folded panels for lava crossing
- Strike wheel with sword to activate ramp mechanism
- Retrieve hidden chest using Ascend ability on vertical ramp
- Solve ball puzzle by adjusting platform capture angle
No reproduction without permission:SeeYouSoon Game Club » Zelda: Tears Of The Kingdom – Marakuguc Shrine Puzzle Guide Master the Marakuguc Shrine's wheeled puzzles with advanced Ultrahand techniques and hidden chest strategies