TL;DR
- Use Ultrahand and Recall to collect three wooden planks for bridge construction
- Avoid direct sand movement to preserve stamina – planks provide safe pathways
- Secure both optional chests before completing the shrine for maximum rewards
- Fuse the small ball to your vehicle for safe transport across moving sands
- Complete the puzzle in under 8 minutes using optimized vehicle routes
The Kudanisar Shrine presents players with the challenging “Bridging the Sands” puzzle that tests both creativity and mechanical skill. Located in the northern Gerudo Desert near Karusa Valley, this shrine requires mastery of Zonai device manipulation.
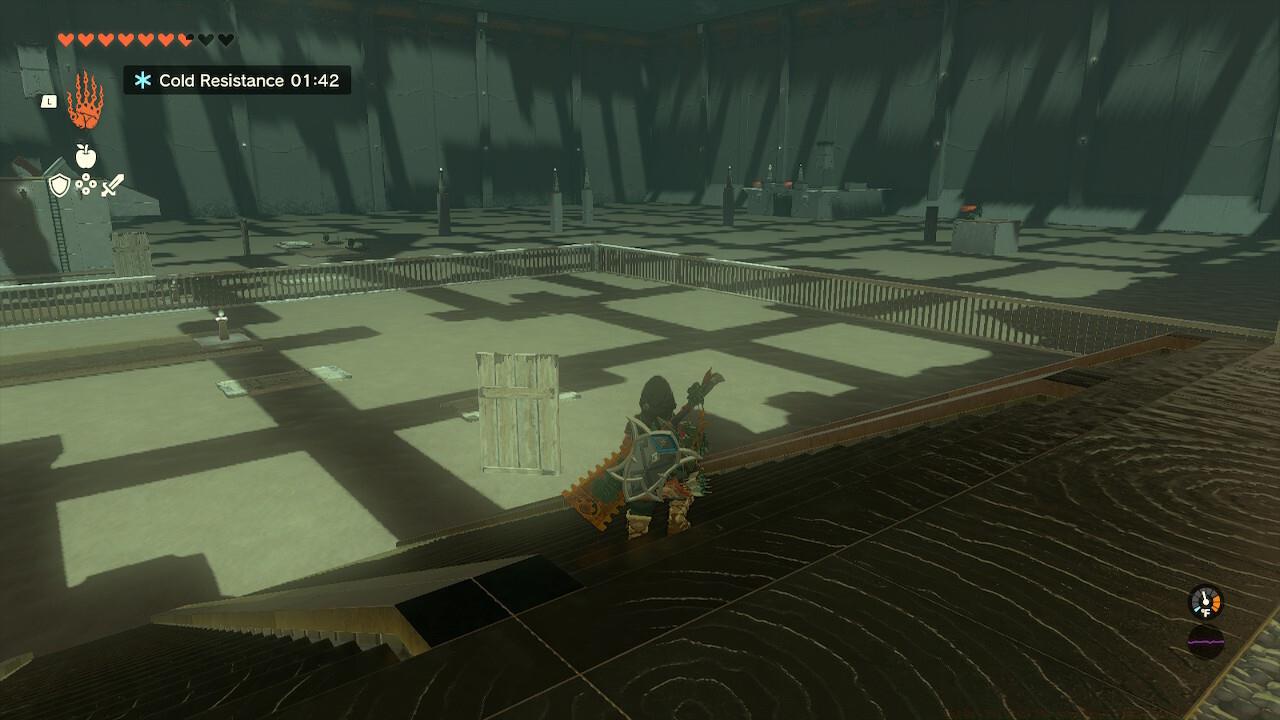
The entire Shrine features moving sands.
This expansive chamber contains constantly shifting sands that rapidly deplete your stamina meter when traversed directly. The primary exit sits directly ahead from your starting position along the left wall’s center section. Across the vast room, you’ll notice two distinct platforms – one hosting multiple Zonai adversaries and a smaller one containing the optional chest with valuable loot.
Your initial challenge involves escaping the enclosed starting zone using clever plank manipulation. At the staircase base, you’ll find one wooden plank standing upright in the sand, while two additional planks continuously cycle through the area, respawning each time they pass beneath the perimeter wall.
Use a plank bridge to exit the fenced area.
Employ Ultrahand to retrieve all three planks, then use Recall to stabilize their positions. Transport both yourself and the collected planks to the stone platform opposite the staircase. Connect the planks sequentially to form an extended bridge, then position it against the fencing to create your escape route.
Many players waste time by attempting to cross the sand directly instead of using the pre-positioned planks. The optimal strategy involves collecting all three planks before bridge construction for maximum stability.
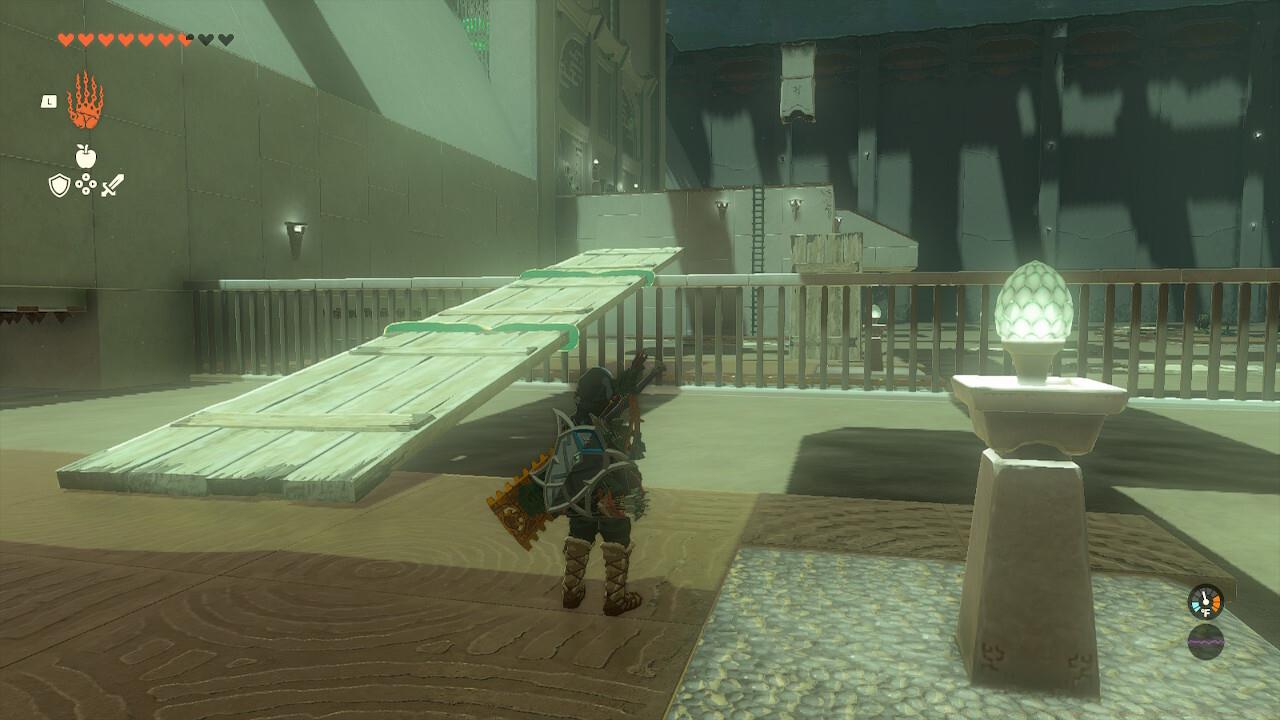
After escaping the initial enclosure, you’ll encounter another sandy section containing a vertically positioned plank. Exercise caution as an enemy lurks behind this obstacle. Your objective involves reaching the distant ladder to access Zonai vehicles for sand navigation.
You can use the same bridge to reach the ladder across the way.
The most efficient approach utilizes your previously constructed bridge rather than building anew. Position the bridge to create a direct pathway to the ladder, conserving both time and resources.
Ascend the ladder to discover the shrine’s sealed exit mechanism. You’ll find a ground receptacle for a small ball alongside an activation button. Stepping on the button releases the ball, launching it toward the stone platform across the chamber. Now descend to operate the Zonai vehicles for sand traversal.
Before proceeding to the main objective, experienced players should secure both optional chests containing valuable rewards. The first chest requires careful enemy management while the second demands precise platform navigation.
Knock the chest down with an arrow and use Ultrahand to grab it out of the sand.
Navigate to the chamber’s rear left corner to locate the second optional chest. You’ll discover a suspended chest adjacent to a compact platform. Position yourself on the platform, sever the rope with an arrow shot, then employ Ultrahand to retrieve the chest before the sand consumes it.
Use the wooden planks to reach the top of this platform to get the second optional chest.
The second chest typically contains rare materials or powerful equipment that significantly enhance your capabilities. Missing these chests represents one of the most common oversights in shrine completion.
Master players can complete the Kudanisar Shrine in approximately 6-8 minutes using optimized routes and advanced techniques. The key involves minimizing unnecessary movement and pre-planning your vehicle path.
Fuse the ball to the Zonai vehicle to make sure it makes the journey safely.
When transporting the small ball to the exit receptacle, always fuse it directly to your vehicle using Ultrahand. This prevents accidental loss in the shifting sands and ensures successful completion.
Build one final wooden bridge to reach the exit of the Shrine with the small ball.
Common pitfalls include attempting to carry the ball manually (which drains stamina rapidly) or building overly complex vehicle designs that get stuck in sand currents. For comprehensive shrine strategies, consult our Complete Guide to master similar environmental puzzles.
Advanced players should note that the shrine’s moving sands follow predictable patterns. Observing these patterns for 30-45 seconds before acting can reveal optimal timing windows for vehicle deployment and chest retrieval.
Action Checklist
- Collect all three wooden planks using Ultrahand and Recall
- Construct extended bridge to escape starting enclosure
- Retrieve both optional chests before main objective
- Activate ball mechanism and secure ball with Ultrahand fusion
- Navigate vehicle with fused ball to shrine exit
No reproduction without permission:SeeYouSoon Game Club » Zelda: Tears Of The Kingdom – Kudanisar Shrine Puzzle Guide Master the Kudanisar Shrine's moving sands puzzle with expert strategies and hidden chest locations