TL;DR
- Jiukoum Shrine is southeast of Popla Foothills Skyview Tower
- First two puzzles are straightforward with basic construction
- Shield surfing provides an excellent alternative to complex building
- Third puzzle requires creative workarounds due to Ultrahand control issues
- Multiple alternative strategies exist beyond the intended vehicle method
Discover how to conquer the challenging Built For Rails puzzle within the Jiukoum Shrine in The Legend of Zelda: Tears of the Kingdom. This shrine presents unique rail-based obstacles that test your construction skills and creativity.
The Jiukoum Shrine’s Built For Rails challenge can indeed prove frustrating for many players. Fortunately, several clever methods exist to bypass the intended mechanics and reach your goal efficiently. This comprehensive guide provides detailed strategies to help you overcome this shrine’s obstacles.
To locate the Jiukoum Shrine, navigate to the region just southeast of the Popla Foothills Skyview Tower. From this vantage point, utilize the launch mechanism and glide southeastward until you spot the shrine positioned prominently on a ridge.
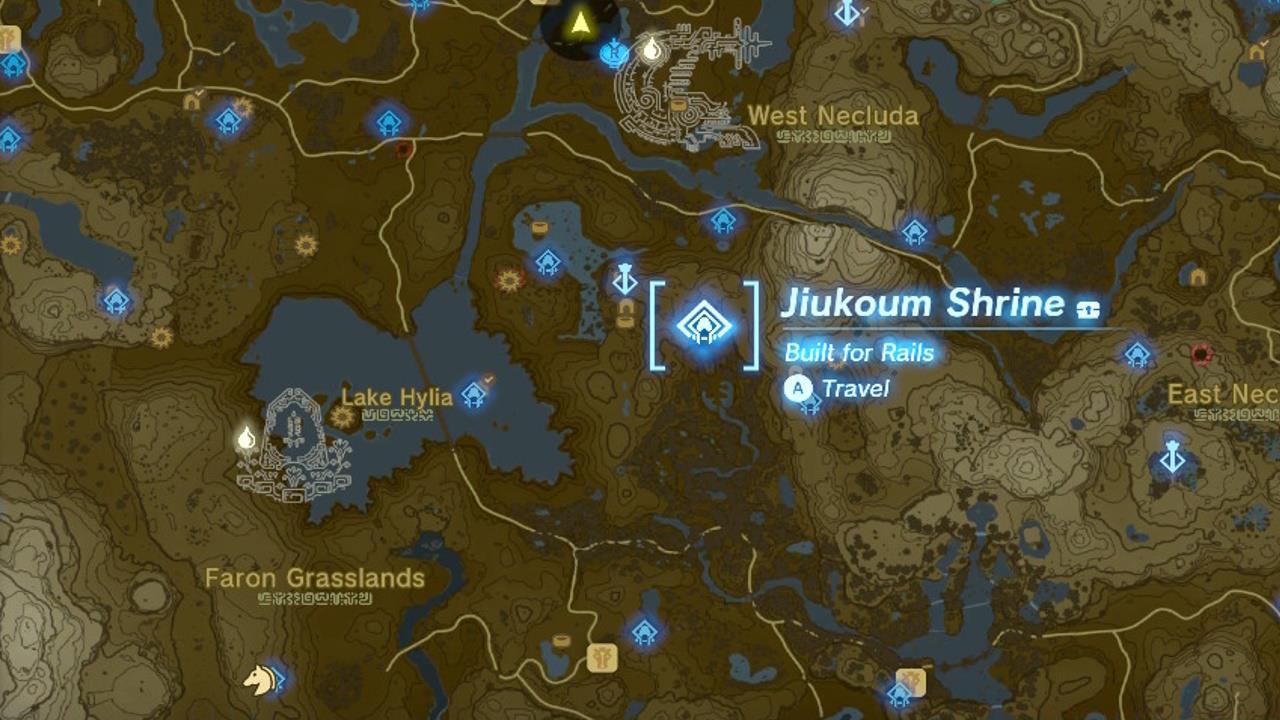
Jiukoum Shrine map
The initial two puzzle sections typically present minimal difficulty for most players. The first challenge involves simply riding a metal plate along the rails, requiring basic understanding of the game’s physics system.
For the subsequent section, construct a configuration resembling a desk structure. The additional components beneath this formation prevent it from dislodging from the rails during transit, as demonstrated in the accompanying visual reference.
Second puzzle section solution
Alternatively, consider employing the Shield Surf technique. Execute this maneuver by first equipping any shield and holding ZL to deploy it defensively. Then, press X to jump followed immediately by A. When performed correctly, Link will utilize his shield as either a surfboard or skateboard, enabling seamless traversal across the rail pathways.
Many players overlook that shield surfing consumes durability at a reduced rate on rails compared to rough terrain, making this an economically viable strategy.
The third segment represents where the Zelda: Tears of the Kingdom Built for Rails puzzle becomes genuinely demanding. Fundamentally, the game expects players to assemble two separate fan-propelled miniature plate vehicles. The initial conveyance facilitates navigation along the primary track section, while the secondary vehicle must be rapidly positioned on the subsequent rails, allowing you to disembark and proceed toward the conclusion.
Regrettably, this process proves cumbersome, mainly attributable to imprecise control responsiveness when the Ultrahand ability is engaged. The sensitivity of Ultrahand adjustments often leads to frustration during precise placement maneuvers.
Consequently, mirroring approaches used in the Tukarok Shrine, we adopted a straightforward brute-force methodology. Several techniques can assist your progression:
- In our testing, we constructed an elevated apparatus utilizing plates connected sequentially, incorporating certain segments positioned at horizontal angles. This configuration permitted activation of the Ascend ability for superior positioning when either (a) operating the subsequent miniature vehicle, or (b) engaging in Shield Surfing.
- We’ve also confirmed the feasibility of constructing merely one vehicle sufficient to transport you to the opposing rail, subsequently executing a combined shield surf and glide maneuver.
- Advanced players can utilize a single fan attached diagonally to a plate, creating a more stable and controllable vehicle that navigates both rail sections successfully.


Third puzzle solution
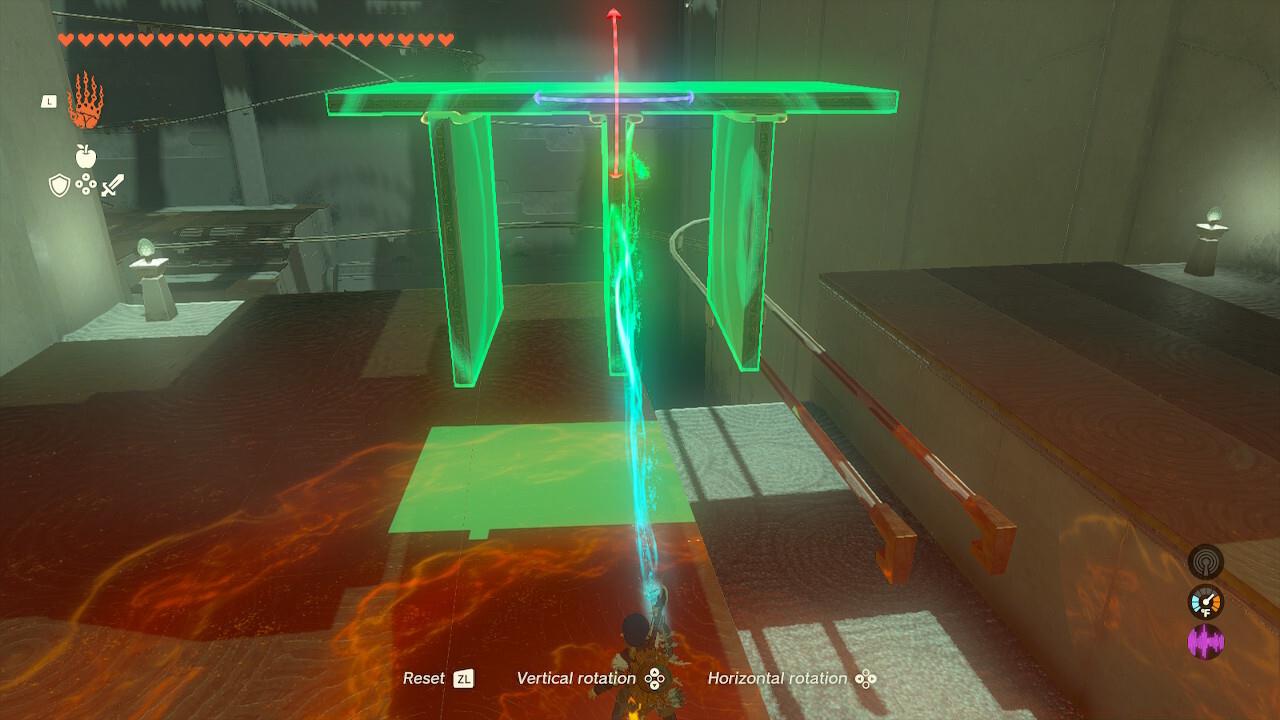
When constructing vehicles, ensure all connections show as green during Ultrahand assembly – yellow or red connections indicate weak bonds that may fail during operation. This fundamental check prevents mid-puzzle disasters.
A common mistake involves placing fans at incorrect angles, resulting in vehicles that either fail to move or immediately derail. Position fans to push downward and forward simultaneously for optimal rail adhesion.
For players struggling with the intended mechanics, consider exploring our Complete Guide for additional puzzle-solving approaches that translate well across different game challenges.
Time-conscious players should note that the shield surfing method typically completes the shrine in 3-5 minutes, while vehicle construction approaches may require 7-12 minutes depending on proficiency with Ultrahand controls.
Mastering these rail mechanics provides valuable skills applicable to numerous other shrine challenges and overworld puzzles throughout Hyrule.
Action Checklist
- Locate shrine southeast of Popla Foothills Skyview Tower
- Complete first puzzle by riding metal plate on rails
- Build desk-like structure for second puzzle or use shield surfing
- For third puzzle, construct fan-powered vehicles or use alternative methods
No reproduction without permission:SeeYouSoon Game Club » Zelda: Tears Of The Kingdom – Jiukoum Shrine Puzzle Guide Master the Jiukoum Shrine's rail puzzles with creative solutions and time-saving techniques