TL;DR
- Three unmarked Mortal Kombat landmarks require precise navigation and offer unique combat opportunities
- Scorpion spawns randomly at locations with epic Kombat Kits available when he’s absent
- Each location features environmental hazards requiring specific survival strategies
- Optimal landing approaches vary by location with different risk-reward profiles
- Team coordination enhances loot acquisition while minimizing environmental dangers
Discovering the complete guide to locating every Mortal Kombat landmark in Fortnite Chapter 6 Season 2 requires strategic navigation and environmental awareness.
Mortal Kombat has launched a full-scale invasion of Fortnite, bringing iconic characters and legendary battlegrounds directly into the Chapter 6 Season 2 gameplay experience. This crossover introduces authentic fighting game environments that transform standard battle royale tactics.
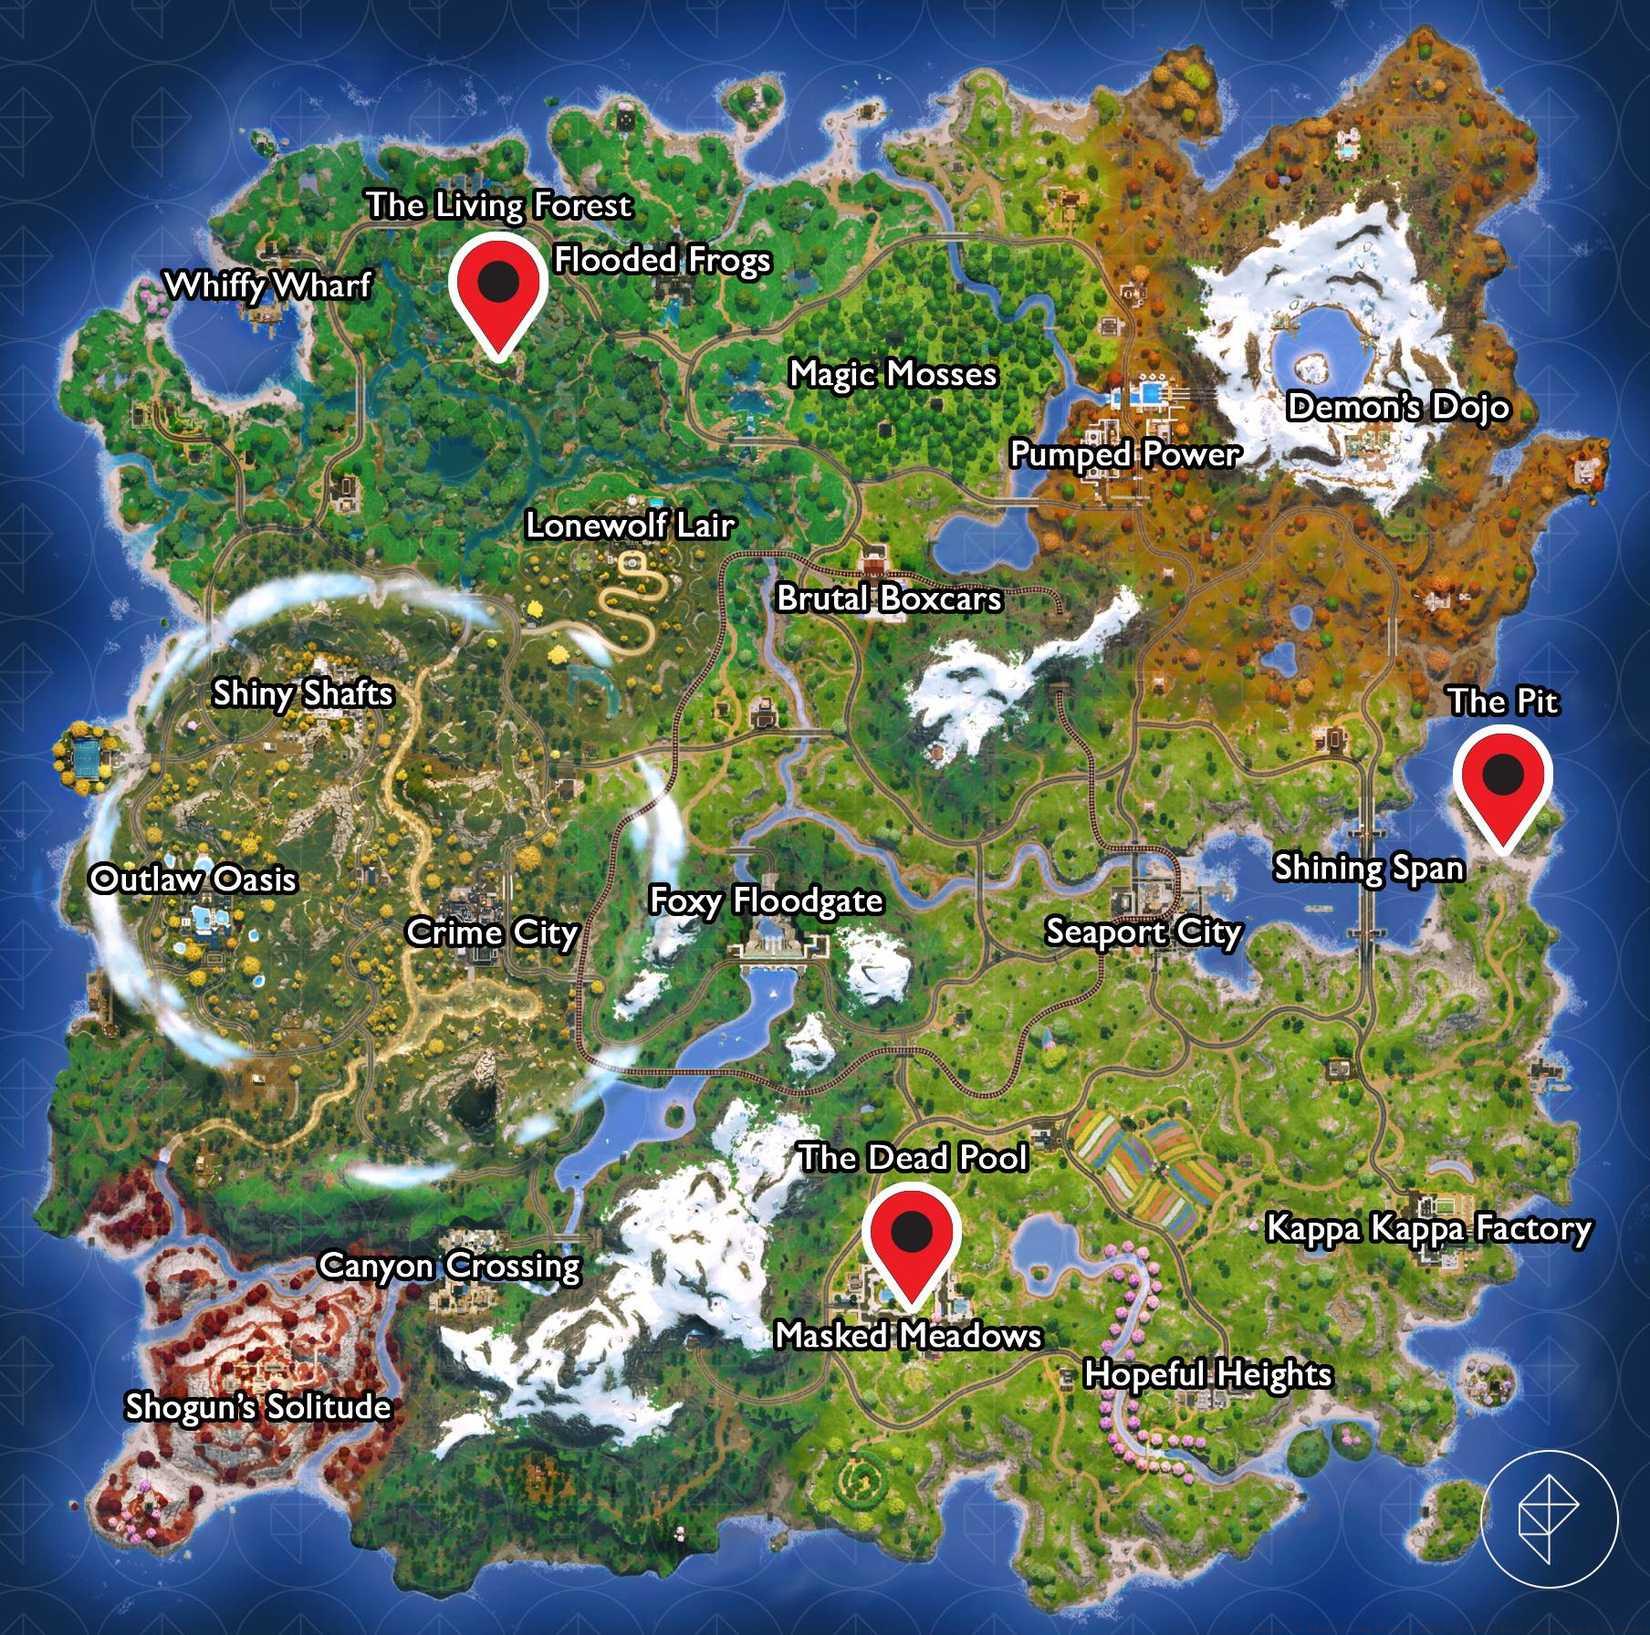
Three distinct Mortal Kombat-inspired landmarks now populate the current map: The Pit, The Living Forest, and The Dead Pool. The primary challenge lies in their unmarked status on the standard Fortnite map interface, making systematic discovery essential for completionists and competitive players alike.
To streamline your exploration process, we’ve precisely charted all three Mortal Kombat destinations on the Chapter 6 Season 2 map visualization below, complemented by detailed navigation instructions for each specific location.
Since these significant landmarks lack map labels, methodical searching replaces random exploration. Our comprehensive markings eliminate guesswork while maximizing efficiency during match progression.
Additionally, strategic awareness includes understanding that Scorpion possesses a randomized spawn chance at any of these three locations when matches commence—dramatically increasing combat intensity. When the spectral ninja remains absent, players can discover epic-tier versions of both Scorpion’s and Sub-Zero’s specialized Kombat Kits as consolation rewards.
For granular positional data and advanced tactical considerations, consult each location’s dedicated analysis in subsequent sections.
Graphic: Julia Lee, Johnny Yu | Source images: Epic Games via Polygon
Strategic navigation begins with understanding the spatial relationships between Mortal Kombat landmarks and established Points of Interest. Optimal landing approaches vary significantly based on your squad size, preferred playstyle, and current match objectives.
Pro Tip: Deploy early when targeting these locations—experienced players often prioritize them for their unique loot and combat opportunities. Consider approaching from elevated positions when possible to survey activity levels before committing to a landing zone.
Movement between locations requires careful route planning, as the distances span considerable portions of the map. Incorporating vehicles or utilizing rift interactions can dramatically reduce transition times between The Living Forest, The Pit, and The Dead Pool.
Graphic: Johnny Yu | Source images: Epic Games via Polygon
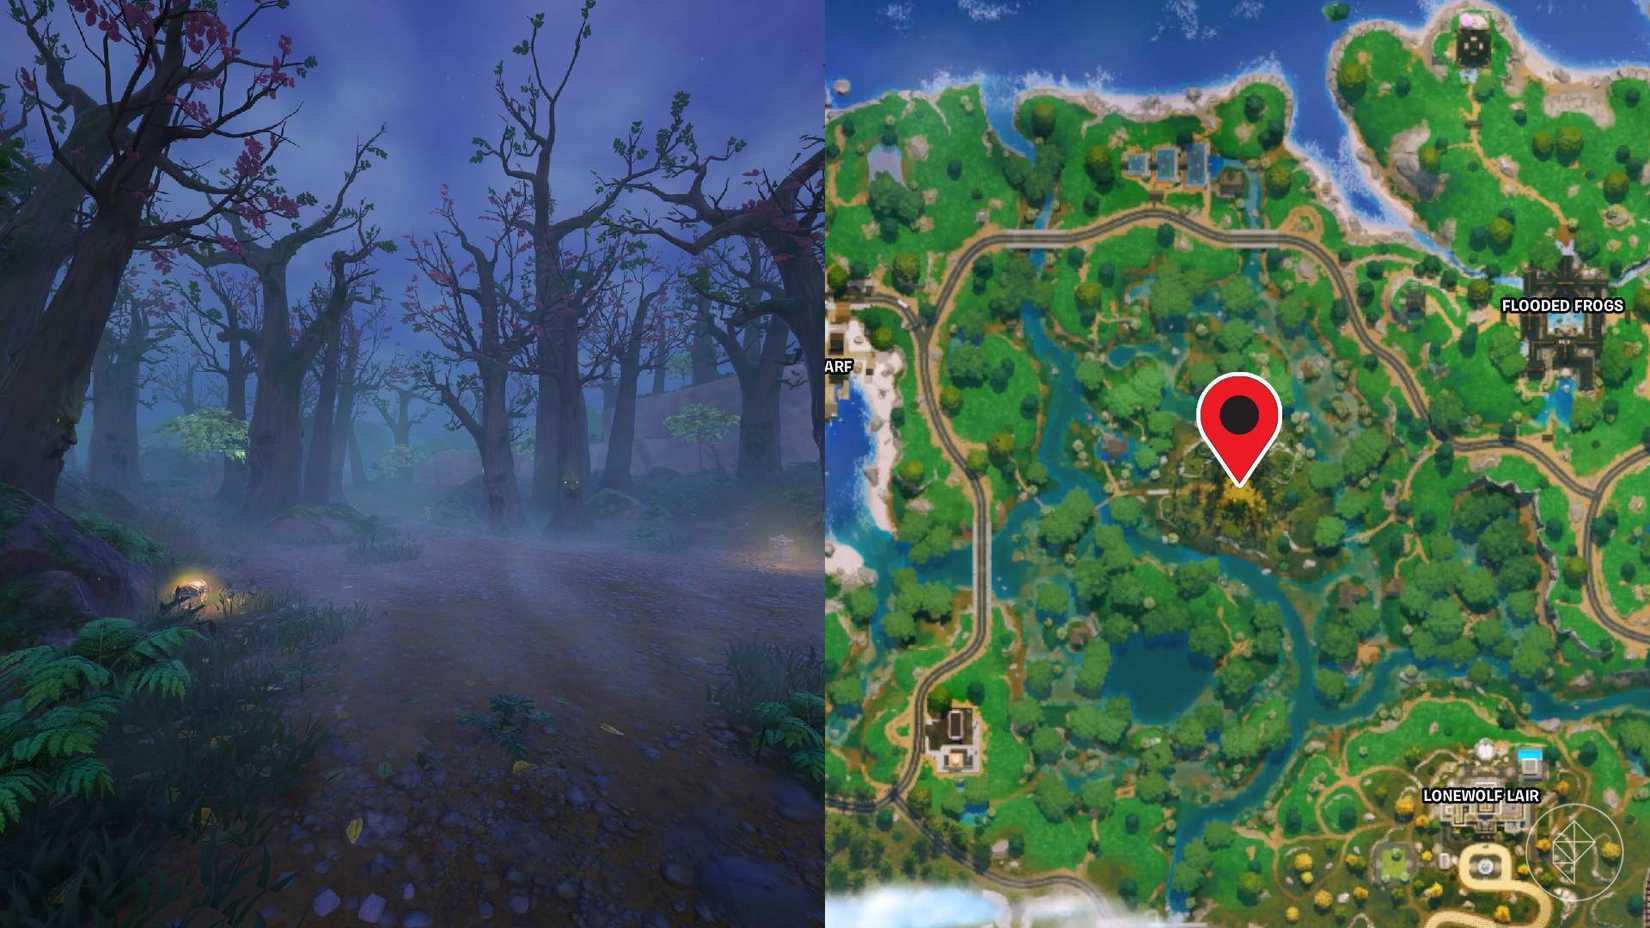
The Living Forest occupies the former territory of Sleepwalker’s Perch, a demolished campsite area. This woodland battleground positions itself southwest of Flooded Frogs and northwest of Lonewolf Lair, creating a strategic midpoint between these established locations.
Navigation Insight: Approach from the northeastern ridge to gain superior sightlines before engaging. The forest density provides excellent cover for stealth maneuvers but limits long-range sightlines—adjust your weapon selection accordingly.
Combat in this area favors agile players who utilize the natural terrain for unexpected flanking routes. The numerous trees and uneven ground create dynamic engagement opportunities that reward positional creativity and movement skill.
Common Mistake: Many players underestimate the verticality opportunities here. Building upward through the canopy can provide unexpected tactical advantages against ground-bound opponents.
Graphic: Johnny Yu | Source images: Epic Games via Polygon
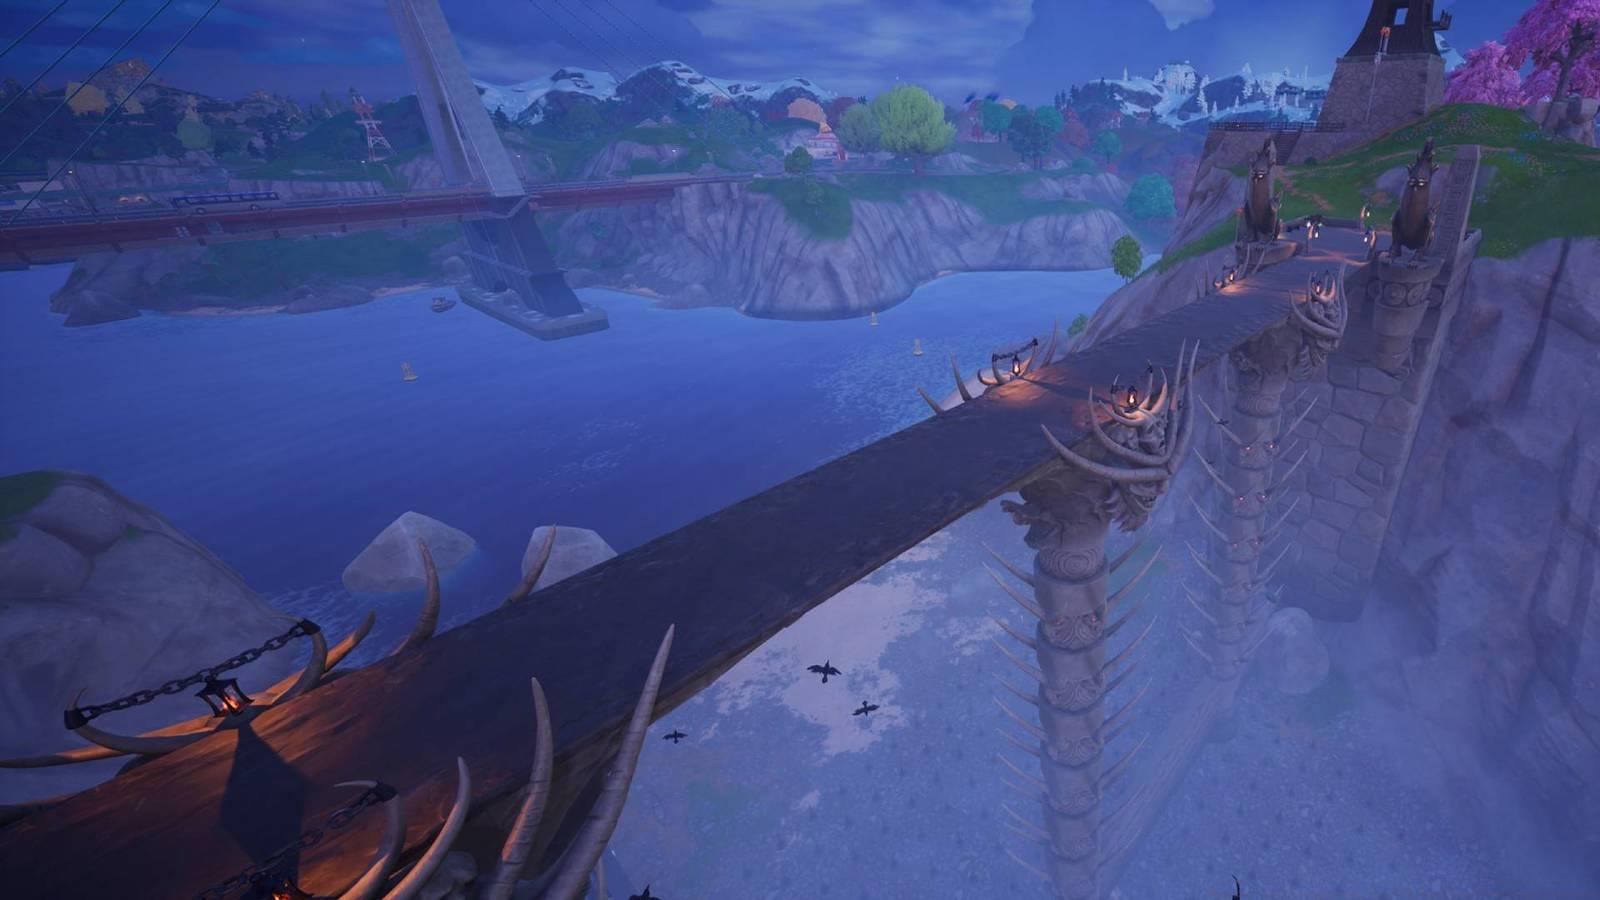
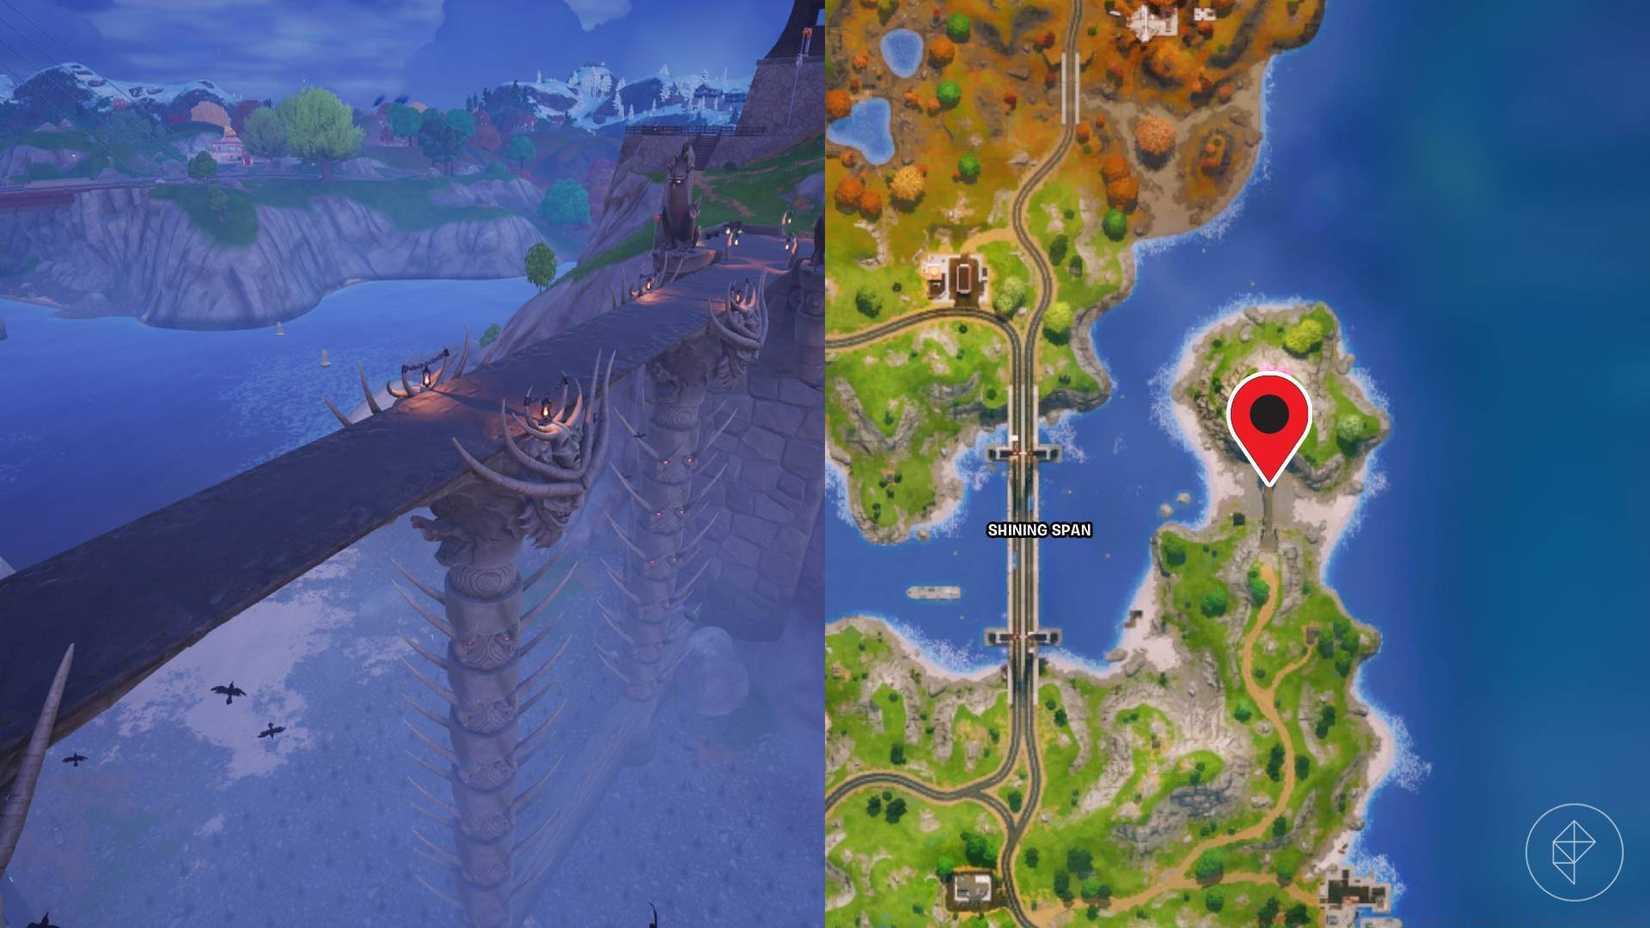
The Pit establishes its presence east of Shining Span bridge, recreating the classic Mortal Kombat arena with deadly authenticity. Exercise extreme caution within this location—precipitous drops onto the arena’s spike traps result in immediate elimination regardless of shield or health levels.
Environmental Hazard: The perimeter spikes instantly eliminate players upon contact. Maintain spatial awareness during firefights, as backward movement during intense engagements frequently proves fatal.
This location offers exceptional sightlines for ranged combat, making it ideal for sniper specialists. The central platform provides a powerful positional advantage, though it makes you highly visible to surrounding opponents.
Advanced Tactic: Use the elevated walkways for hit-and-run attacks. The multi-level design enables creative engagement strategies that can disorient less experienced opponents.
 Graphic: Johnny Yu | Source images: Epic Games via Polygon
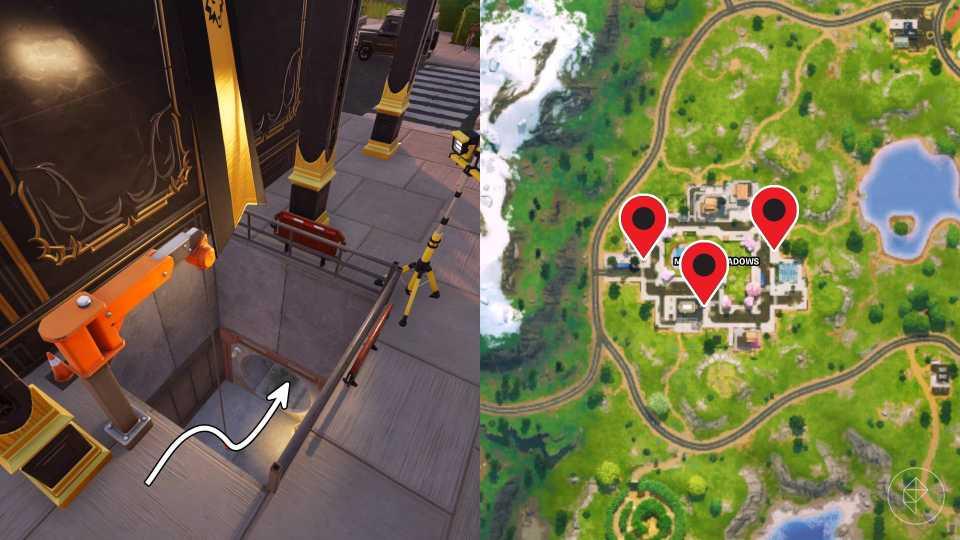 Graphic: Johnny Yu | Source images: Epic Games via Polygon
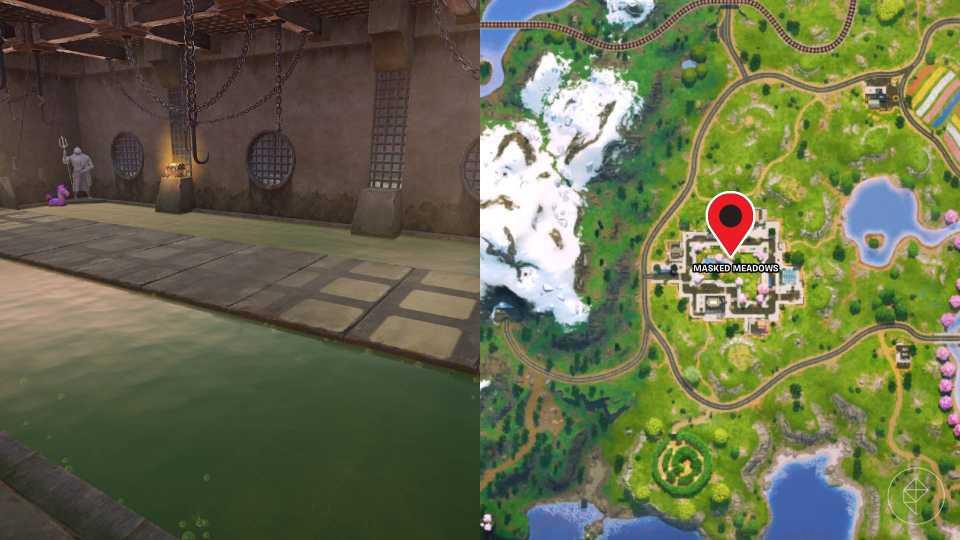
The Dead Pool conceals itself within the sewer systems beneath Masked Meadows. Access requires descending any of the three designated ziplines then following the illuminated pathway into the toxic chamber. Extreme vigilance remains essential—the corrosive pools inflict 10 damage per second upon contact.
Access Strategy: The central zipline typically offers the most direct route, though it attracts the most player traffic. Consider using the eastern or western entries for surprise approaches with reduced early-game conflict.
The narrow walkways create intense close-quarters combat scenarios. Shotguns and SMGs outperform longer-range weaponry in these confined spaces. Team coordination becomes critical here, as covering fire across platforms can control movement effectively.
Loot Priority: The elevated platforms often contain higher-tier loot. Secure these positions early while teammates cover the access points to maximize resource acquisition.
Mastering Mortal Kombat locations extends beyond simple navigation—advanced tactical understanding separates proficient players from experts. These environments demand specialized approaches that leverage their unique characteristics.
Scorpion Encounter Protocol: When Scorpion spawns, immediate coordination becomes essential. His teleportation attacks can disorient entire squads if approached haphazardly. Designate one player to draw aggression while others position for flanking attacks. His elimination typically rewards exceptional loot, justifying the increased risk.
Kombat Kit Acquisition: When Scorpion remains absent, systematically check the spawn locations for epic Kombat Kits. These typically appear near the central features of each arena and provide combat advantages that persist throughout the match.
Rotation Timing: Plan your movement between locations during storm phases when player concentration decreases. The Dead Pool particularly benefits from late-game visits when fewer opponents remain to contest the confined spaces.
Loadout Specialization: Tailor your inventory to the specific location you’re targeting. The Living Forest benefits from shotguns and assault rifles, The Pit favors snipers, while The Dead Pool demands close-quarters weaponry.
For comprehensive weapon strategies that complement these locations, explore our BF6 Weapons Unlock Guide to maximize your combat effectiveness across all engagement ranges.
Action Checklist
- Study the marked map to understand spatial relationships between locations
- Practice landing at each location in different match scenarios
- Master environmental hazard avoidance at The Pit and Dead Pool
- Develop Scorpion encounter strategies with your squad
- Optimize loadouts for each location’s specific combat requirements
No reproduction without permission:SeeYouSoon Game Club » Where to find Living Forest, The Pit, Dead Pool locations in Fortnite Complete guide to finding all Mortal Kombat locations in Fortnite Chapter 6 Season 2 with strategic tips