Master the Swarmkeeper Ranger in BG3 with optimal builds, multiclass strategies, and advanced combat tactics
Swarmkeeper Ranger Overview and Playstyle
The Swarmkeeper Ranger represents one of the most tactically diverse subclasses introduced in Baldur’s Gate 3’s Patch 8, offering players unprecedented battlefield control through symbiotic nature spirits. This archetype transforms the traditional ranger into a master of environmental manipulation, capable of adapting to both ranged engagements and close-quarters skirmishes with strategic precision.
Strategic Note: This comprehensive guide incorporates advanced tactics discovered through extensive gameplay testing and community optimization. We continuously update strategies as new meta developments emerge.
Swarmkeeper Rangers operate around a core combat loop that maximizes Hunter’s Mark synergy with their gathered swarm. The Prey’s Scent feature creates dynamic combat flexibility, allowing tactical adjustments based on enemy vulnerabilities and encounter requirements. Advanced players can leverage the Resonance Stone from Act 2 to amplify psychic damage output with Flurry of Moths, creating devastating damage combinations.
However, strategic awareness is crucial when deploying Swarmkeeper builds. Their primary limitations manifest in close-range engagements where positioning becomes critical, and they require careful action economy management to avoid being overwhelmed in melee combat. Understanding these tactical constraints enables players to mitigate weaknesses through proper party composition and positioning strategies.
Combat Advantages:
- Exceptional battlefield control through swarm push and reposition abilities
- Flexible damage types adapting to enemy resistances
- Strong synergy with Hunter’s Mark for sustained damage
- Versatile tactical teleportation for positioning
- Multiple damage type options counter various enemy defenses
Strategic Limitations:
- Vulnerable to being pinned in melee range
- Demands careful bonus action management
- Concentration-dependent playstyle
- Requires tactical foresight for optimal swarm utilization
- Multiclassing necessary for maximum potential
Character Creation Fundamentals
Race selection fundamentally impacts your Swarmkeeper’s combat effectiveness and tactical flexibility. Wood Elf remains the optimal choice for ranged-focused builds, providing essential weapon proficiencies, enhanced mobility, and superior darkvision for navigating dimly lit environments. The extra movement speed proves invaluable for maintaining optimal engagement distances and repositioning during complex encounters.
Githyanki offers compelling alternatives through innate Misty Spell access and enhanced jumping capabilities, facilitating unique vertical combat approaches. Meanwhile, Duergar Dwarves provide superior survivability tools with at-will invisibility and expanded darkvision ranges, excellent for players preferring stealth-oriented approaches or Honor Mode challenges.
Attribute Priority Strategy:
Your primary attribute distribution should maximize combat effectiveness while maintaining survivability:
- Dexterity (17): Maximizes ranged damage, attack accuracy, initiative rolls, and armor class
- Constitution (16): Bolsters hit points and concentration saving throws for sustained Hunter’s Mark
- Wisdom (14): Enhances spell effectiveness and key skill checks
- Strength (8): Minimized as ranged focus reduces melee dependency
- Intelligence (8): Non-essential for combat effectiveness
- Charisma (10): Baseline for social interactions
Advanced Attribute Management: While Strength remains your dump stat, strategic use of the Hill Giant Club or Elixir of Hill Giant Strength provides temporary solutions for strength-based challenges like jumping puzzles or carry capacity issues. This approach maintains combat optimization while offering situational flexibility.
Skill Proficiency Selection:
Your skill choices should complement your attribute strengths and party role:
- Animal Handling: Wisdom-based skill crucial for animal interactions and certain dialogue options
- Insight: Essential Wisdom skill for detecting deception and narrative exploration
- Survival: Wilderness navigation and tracking capabilities aligning with ranger themes
Skill Strategy: These selections leverage your high Wisdom score while providing practical utility throughout Baldur’s Gate 3’s various environments. Consider complementing with Perception if party composition permits, as passive detection proves invaluable for avoiding ambushes and discovering hidden content.
Comprehensive Leveling Guide (Levels 1-12)
Levels 1-2: Foundation Establishment
Your early game focuses on establishing core combat fundamentals before accessing the Swarmkeeper specialization at level 3. Prioritize survival and positioning while learning basic ranger mechanics.
Level 1 Features:
- Favored Enemy — Bounty Hunter: Grants Investigation proficiency and enhances Ensnaring Strike effectiveness by imposing saving throw disadvantages
- Natural Explorer — Wasteland Wanderer: Cold: Provides resistance to cold damage, reducing incoming cold damage by 50%
Level 2 Specialization:
This level introduces your combat style and initial spell selection:
- Archery Fighting Style: Essential +2 bonus to ranged attack rolls significantly improves hit chance
- Hunter’s Mark: Core damage amplification spell adding 1d6 weapon damage to marked targets
- Longstrider: Utility spell increasing movement speed by 3 meters/10 feet without concentration
Combat Rotation: Establish consistent opening sequences applying Hunter’s Mark as a bonus action followed by ranged attacks. When concentration isn’t required for other spells, maintain Hunter’s Mark throughout encounters for maximum damage efficiency.
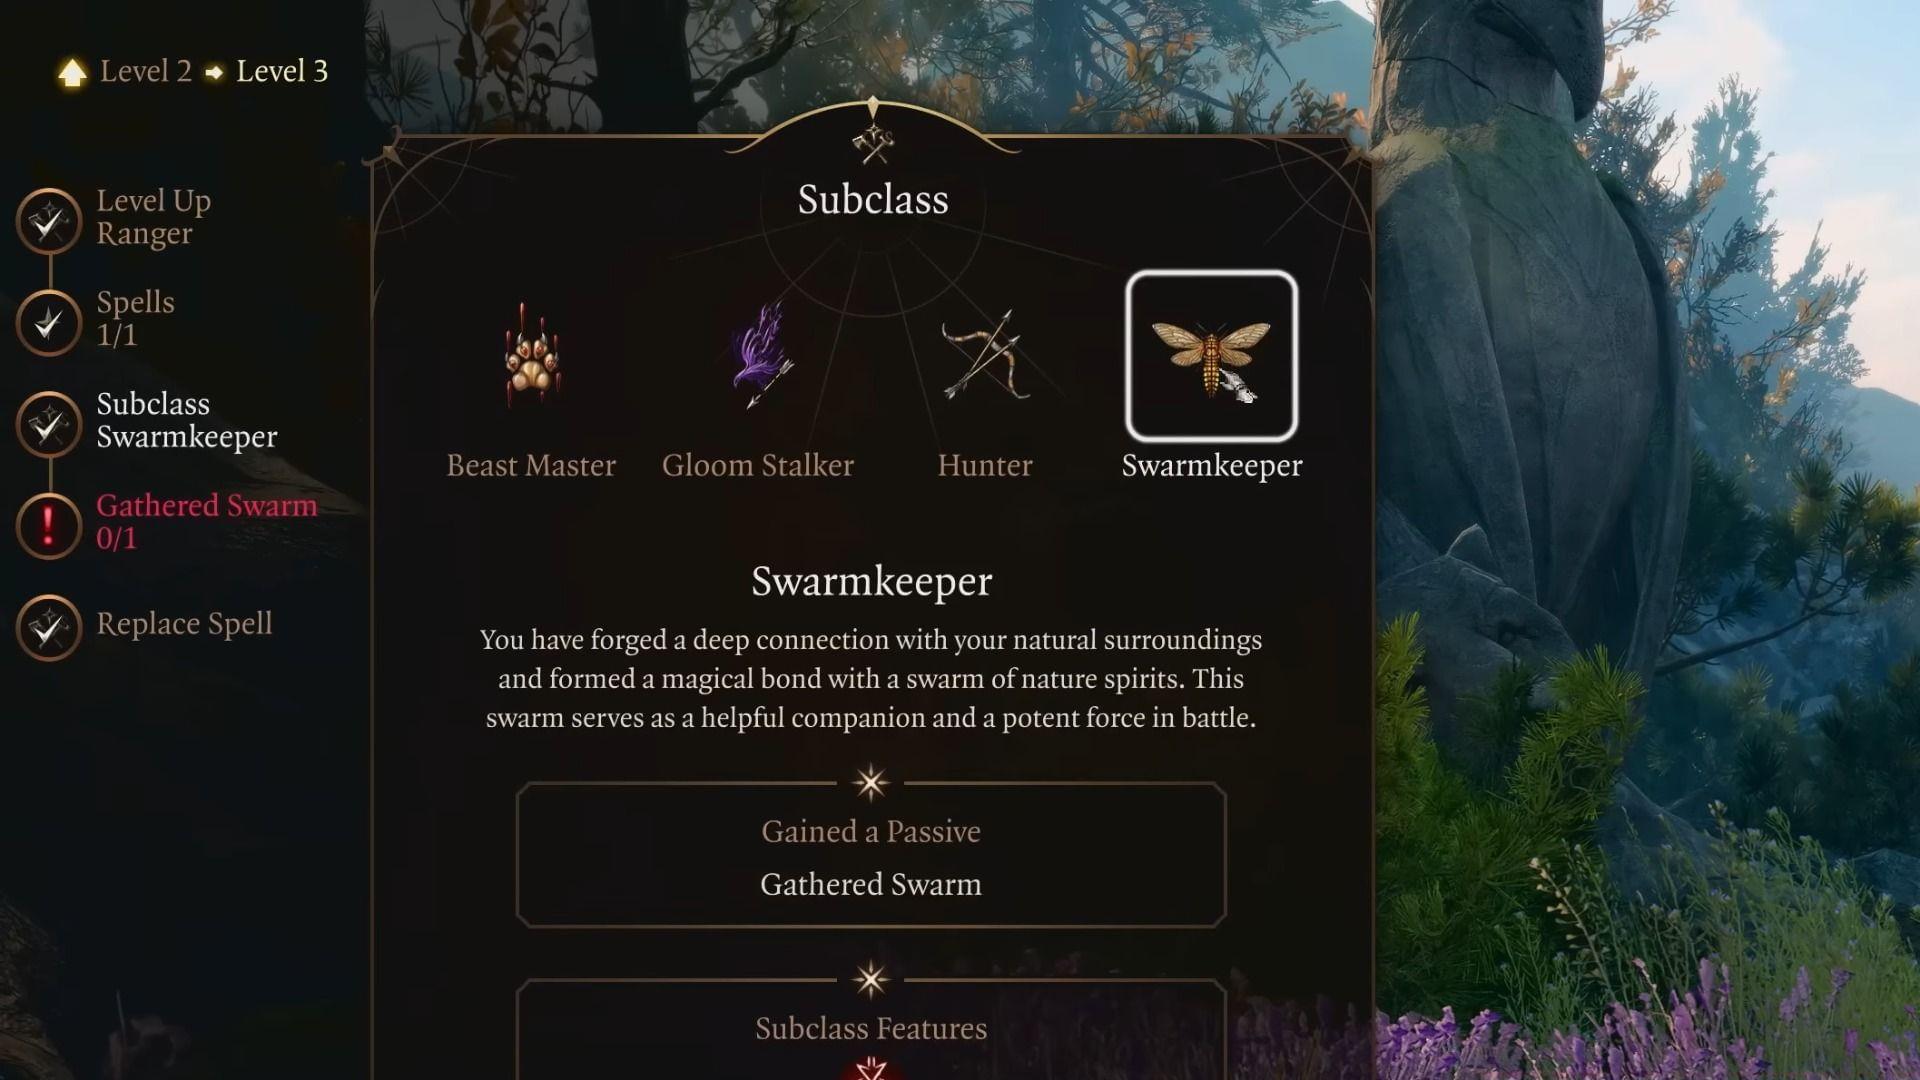
Level 3: Swarmkeeper Specialization
This milestone unlocks your signature abilities and defines your combat identity:
- Prey’s Scent: Swarm deals additional damage to Hunter’s Marked targets
- Gathered Swarm: Choose your nature spirit companions with three distinct options:
Swarm Selection Analysis:
- Legion of Bees: Reliable piercing damage with push utility for battlefield control
- Cloud of Jellyfish: Lightning damage with shock application for crowd control
- Flurry of Moths: Psychic damage with blinding capability, synergizes with Resonance Stone
Spell Access:
- Mage Hand: Utility cantrip for environmental interaction and puzzle solving
- Faerie Fire: Combat control spell granting advantage against affected targets
- Ensnaring Strike: Recommended spell choice for additional crowd control
Level 4: Feat Selection
Sharpshooter: The definitive feat for ranged builds, removing high ground penalties while offering optional +10 damage at -5 attack roll cost. Advanced tactic: Disable this passive when facing high-armor targets, then reactivate against vulnerable enemies.
Accuracy Compensation: Offset the hit penalty through Bless spells, high ground advantages, and equipment bonuses. Act 3’s Permanent Bless availability eventually negates this drawback entirely.
Level 5: Power Spike
This level dramatically increases your combat effectiveness:
- Extra Attack: Doubles your damage output with additional attacks
- Lesser Restoration: Vital support spell removing debilitating conditions
- Web: Area control spell complementing your battlefield manipulation
Advanced Rotation: Optimize your action economy by applying Hunter’s Mark turn one, then conserving bonus actions for consumables or repositioning on subsequent turns. This maximizes damage while maintaining tactical flexibility.
Levels 6-9: Multiclass Foundation
Begin your Rogue multiclass at level 6, acquiring Sneak Attack for advantage-based damage amplification. Understand Sneak Attack triggers: hiding successfully or engaging enemies within 1.5m with allies while not suffering disadvantages.
Rogue Level 2: Access Cunning Action utilities:
- Disengage: Safe retreat without opportunity attacks
- Hide: Stealth positioning for advantage generation
- Dash: Enhanced mobility for positioning
Rogue Level 3 (Assassin): Unlock devastating opening capabilities:
- Assassin’s Alacrity: Restore action and bonus action at combat start
- Assassinate Initiative: Advantage against enemies who haven’t acted
- Assassinate Ambush: Automatic critical hits against surprised targets
Level 10-12: Final Optimization
Complete your build with Fighter levels for combat supremacy:
Fighter Level 1:
- Second Wind: Bonus action healing sustaining longevity
- Defense Fighting Style: +1 AC enhancing survivability
Fighter Level 2:
- Action Surge: Additional action per short rest for burst damage
Fighter Level 3 (Champion):
- Improved Critical: Critical hits on 19-20, stacking with other crit enhancements
Final Build: Ranger 5 / Rogue 4 / Fighter 3 provides optimal damage, utility, and survivability balance.
Advanced Multiclassing Strategies
The Swarmkeeper Ranger achieves maximum potential through carefully orchestrated multiclassing that amplifies strengths while mitigating inherent limitations. The optimal progression combines martial prowess from Fighter with tactical precision from Rogue, creating a devastating combat specialist.
Rogue (Assassin) Synergy:
Assassin Rogue provides unparalleled opening burst potential that complements the Swarmkeeper’s sustained damage approach. The combination creates a versatile damage profile capable of handling both extended engagements and quick eliminations.
Key Benefits:
- Sneak Attack damage amplification against advantaged targets
- Cunning Action for unparalleled battlefield mobility
- Assassin features for devastating first-turn damage
- Expertise potential for skill specialization
Advanced Tactics: Utilize Assassin’s Alacrity to apply Hunter’s Mark and make two attacks immediately upon combat initiation. Combine with Surprise rounds for automatic critical hits maximizing your opening damage potential.
Fighter (Champion) Integration:
Champion Fighter enhances your critical hit potential and provides essential combat utilities that round out your capabilities.
Strategic Advantages:
- Action Surge for burst damage windows
- Improved Critical expanding damage potential
- Second Wind for sustain without spell slots
- Additional Fighting Style for defense
Critical Hit Optimization: Combine Improved Critical with equipment like Killer’s Sweetheart ring and Dead Shot bow to reduce critical threshold to 17-20, creating frequent critical hit opportunities that synergize with your multiple attacks.
Alternative Multiclass Options:
While Ranger 5/Rogue 4/Fighter 3 represents the optimized build, several variations suit different playstyles:
- Ranger 8/Fighter 4: Maximizes ranger features and feats at the cost of burst damage
- Ranger 5/Rogue 7: Enhances sneak attack damage and evasion capabilities
- Ranger 5/Cleric 7: Adds spellcasting utility and support options
Feat Selection Strategy:
Your multiclass approach influences optimal feat selection:
- Sharpshooter: Essential for ranged damage optimization
- Alert: Critical for Honor Mode to prevent surprise rounds
- Ability Improvement: Maximizes Dexterity for damage and accuracy
- Mobile: Enhances positioning and kiting capabilities
Gear and Equipment Optimization
Equipment selection dramatically enhances your Swarmkeeper’s combat effectiveness, with specific items providing exponential power increases when combined with your class features.
Essential Gear by Slot:
- Head: Helm of Balduran – AC bonus, damage reduction, and healing
- Cape: Deathstalker Mantle – Invisibility on kill for tactical repositioning
- Chest: Armour of Agility – Maximum AC potential with high Dexterity
- Gloves: Legacy of the Masters – +2 attack and damage rolls
- Boots: Helldusk Boots – Fire resistance and teleportation utility
- Necklace: Surgeon’s Subjugation Amulet – Paralysis on critical hits
- Rings: Killer’s Sweetheart (guaranteed crit) and Ring of Free Action (condition immunity)
- Weapons: Blood of Lathander (mace) and Viconia’s Walking Fortress (shield) for melee options
- Utility: Resonance Stone – Psychic damage amplification for Flurry of Moths
Act Progression Guide:
Act 1 Priorities: Acquire The Grace Cloth for permanent +1 Dexterity and temporary +2 Dexterity bonus. Secure the Hill Giant Club for strength requirements and begin collecting Archery-enhancing equipment.
Act 2 Optimization: Obtain the Resonance Stone to amplify psychic damage with Flurry of Moths. This dramatically increases your damage output against most enemies while providing tactical flexibility.
Act 3 Completion: Secure end-game equipment like the Armour of Agility and Killer’s Sweetheart ring to maximize your critical hit potential and survivability.
Advanced Stat Optimization:
Combine permanent stat increases from the Mirror of Loss with equipment bonuses to achieve exceptional attribute scores. With optimal gear, you can reach 22 Dexterity without consuming attunement slots, creating a character with superior accuracy, damage, and initiative.
Consumable Strategy:
Strategic use of consumables provides temporary power spikes for challenging encounters:
- Elixir of Hill Giant Strength: Overcomes strength requirements for jumping and equipment
- Elixir of Bloodlust: Additional actions after kills for snowball potential
- Speed Potions: Enhanced mobility and additional actions
- Arrow Variety: Special arrows for situational damage types and control
Optimal Party Composition and Strategy
Strategic party construction maximizes your Swarmkeeper’s effectiveness while covering inherent weaknesses. The ideal composition provides frontline durability, magical support, and additional damage sources.
Core Companions:
- Lae’zel (Battlemaster Fighter): Creates frontline presence and control through maneuvers, drawing enemy attention while you attack from range
- Shadowheart (Life Cleric): Provides healing, buffs like Bless, and spiritual weapon for additional battlefield control
Advanced Party Synergy:
Your party should facilitate your combat style by creating advantageous situations for your abilities:
Frontline Coordination: Position melee companions to engage enemies, triggering your Sneak Attack consistently while preventing enemies from reaching your position. Use your swarm’s push ability to maintain distance when enemies break through.
Spell Support: Coordinate with spellcasters to create surfaces and control zones that complement your abilities. Web spells combined with your swarm pushes create deadly area denial combinations.
Initiative Stacking: Build your party with high-initiative characters to control encounter pacing. Your Assassin features benefit tremendously from acting before enemies, making initiative optimization crucial.
Tactical Formations:
Standard Engagement: Position your Swarmkeeper on high ground with clear sightlines, supported by frontline companions below. This maximizes your damage through high ground bonuses while providing protection.
Mobile Formation: When terrain prevents ideal positioning, utilize your superior mobility to kite enemies while companions control choke points. Your teleportation ability provides emergency repositioning.
Advanced Combat Tips:
- Use Mage Hand to create environmental advantages before combat initiation
- Coordinate Faerie Fire with your attacks to guarantee advantage
- Switch swarm types based on enemy resistance profiles
- Conserve Action Surge for priority target elimination
- Utilize stealth positioning to initiate combat with Surprise rounds
Honor Mode Considerations:
In Honor Mode, adjust your strategy to prioritize survivability and consistency:
- Select Alert feat to prevent surprise round disasters
- Maintain multiple healing options and escape abilities
- Conservative positioning with fallback plans
- Thorough enemy reconnaissance before engagements
No reproduction without permission:SeeYouSoon Game Club » Swarmkeeper Ranger build: Baldur’s Gate 3: Best Swarmkeeper Ranger Build Guide Master the Swarmkeeper Ranger in BG3 with optimal builds, multiclass strategies, and advanced combat tactics