TL;DR
- West Office safe: 9L-15R-7L; Waiting Room safe: 6L-2R-11L
- Dial lock combinations: CAP (Shower), DCM (West Hall), SZF (Control Room)
- Film rolls require Dark Room development but reveal high-value weapon upgrades
- Pocket safes contain keypad keys for Safety Deposit Room access
- Plan routes strategically to minimize backtracking between puzzle locations
Resident Evil 2 contains numerous optional resources that significantly enhance your survival capabilities, including inventory-expanding hip pouches and specialized ammunition for your most powerful firearms. These valuable items are typically concealed within combination safes, letter dial lockers, or revealed through photographic clues. Understanding these hidden mechanics provides crucial advantages during your Raccoon City ordeal.
Whether controlling Leon Kennedy or Claire Redfield, the solutions to these puzzles remain identical across both campaigns. Most combinations can be accessed without locating the corresponding memos, though finding these documents provides helpful context for completionists. The single exception involves film roll development, though even this has one notable workaround that experienced players can exploit.
For additional survival strategies, consult our Complete Guide for comprehensive gameplay insights.
The Raccoon Police Department contains two primary safes that yield substantial rewards for those who solve their numerical combinations. Both containers offer resources that dramatically improve your combat effectiveness and storage capacity.
West Office (RPD 1F)
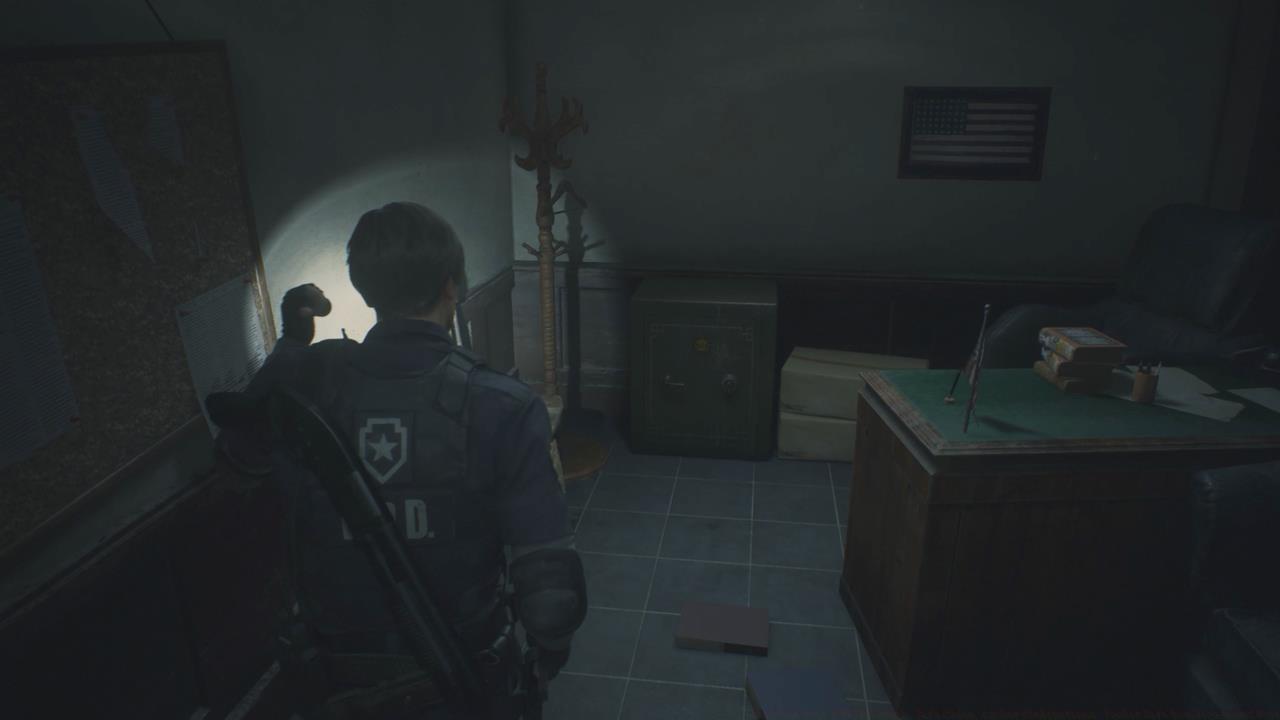
The West Office safe requires this precise sequence: 9 Left, 15 Right, 7 Left. Completionists seeking the original documentation can locate Captain Wesker’s memo within the S.T.A.R.S. Office on the second floor. This location becomes accessible after obtaining the Club Key or through alternative routing strategies.
Waiting Room (RPD 2F)
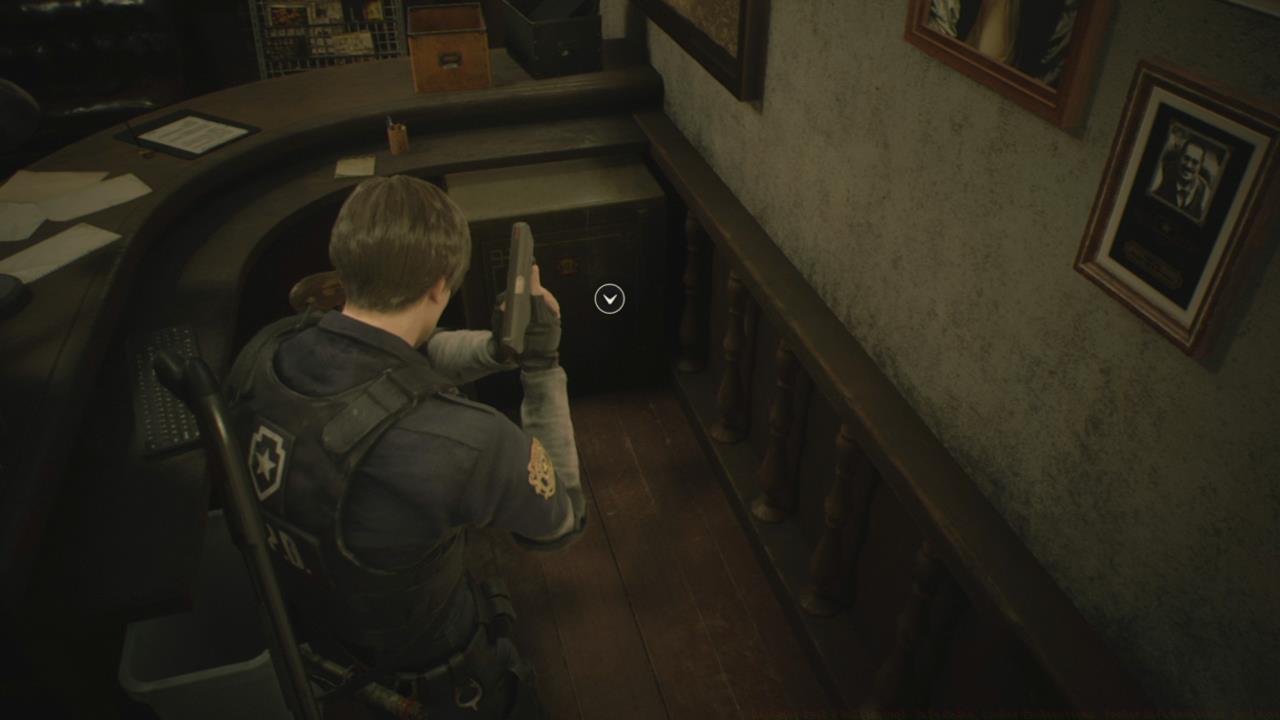
Access the Waiting Room safe using this combination: 6 Left, 2 Right, 11 Left. The associated memorandum resides in the first-floor Observation Room, though this intelligence isn’t mandatory for successful unlocking.
Three separate lockers secured by alphabetical dial mechanisms contain premium ammunition that can decisively turn difficult encounters in your favor. These resources become increasingly valuable as you progress through the game’s challenging later sections.
Shower Room (RPD 2F)
The Shower Room dial lock solution is CAP. This combination appears inscribed on a whiteboard within the connecting chamber between the Operations Room and Records Room on the first floor.
West Hallway (RPD 3F)
Located in the third-floor western hallway adjacent to the damaged wall and distinctive mannequin shadow, this locker’s combination is DCM. This represents the sole film roll-related item obtainable without prior photographic development.
Control Room (Upper Sewers)
The Control Room locker, situated near a workstation in the Upper Sewers, requires SZF to unlock. The solution originates from a Jazz festival promotional flyer located in the Workers’ Break Room area.
Certain exclusive items remain invisible until you develop photographic film rolls that pinpoint their precise locations. Whenever discovering undeveloped film, process it in the Dark Room on the police station’s western side. The rewards from these elaborate scavenger hunts typically justify the additional effort required.
Commemorative Photo
This particular film roll functions differently by directing you toward an intermediary object rather than immediate resources. Located within the Safety Deposit Room, retrieve the film by entering the correct electronic code for its container.
After developing the film in the Dark Room, it reveals an image of the Art Room statue. Before proceeding, acquire the Red Book from the Library near the Spade-marked door on the second floor. Return to the Art Room, retrieve the stone arm positioned beside the statue, and combine it with the Red Book. Reinsert the enhanced arm into the statue to release the scepter from its grasp.
Inspect the scepter thoroughly to obtain the Red Jewel. This gemstone interfaces with the Bejeweled Box, obtainable from the Interrogation Room. Accessing this area mandates possession of the Club Key, so continue narrative progression if currently lacking this item. Combine the Bejeweled Box with the Red Jewel to acquire the S.T.A.R.S. badge, which serves dual purposes.
The badge unlocks the white containment case housing weapon components for either Leon’s Magnum or Claire’s Sub-machine Gun in the Underground Stairs. Before utilizing the badge with the computer terminal in the S.T.A.R.S. Office, meticulously examine its reverse side to discover a concealed USB device. This hidden component subsequently grants access to the specialized armory.
Hiding Place Photo
Locate this film roll in the Upper Sewers Work Room, positioned between a cardboard container and toolkit on a compact table. Develop the film at the RPD’s Dark Room to reveal a photograph indicating two distinct locations.
The initial photograph indicates Captain Wesker’s desk within the second-floor S.T.A.R.S. Office. Access the drawer to obtain a wooden case containing a firearm component.
The secondary photograph directs you to a stereo unit located in the first-floor Press Room. Open the compartment to secure your valuable prize.
The Safety Deposit Room contains numerous valuable resources, though several remain initially inaccessible. To unlock all electronically secured lockers, you must acquire two replacement keypad keys concealed within Pocket Safes distributed throughout the police facility. To access a Pocket Safe, examine it carefully and input the correct button configuration. This process involves some experimentation, but persistence yields success.
Shower Room
This typically represents your initial Pocket Safe discovery. Positioned within the second-floor Shower Room, immediately turn right upon entry to locate it atop a storage unit adjacent to several lockers.
Linen Room
The secondary Pocket Safe resides within the second-floor Linen Room. Accessing this chamber requires the Diamond Key, so advance the primary narrative if currently unable to enter.
Seasoned players should implement route optimization to minimize unnecessary backtracking between puzzle locations. Group safes and dial locks geographically when planning your exploration route through the RPD.
Common Mistakes to Avoid: Attempting to solve puzzles without adequate inventory space, overlooking environmental clues in adjacent rooms, and developing film rolls before securing necessary key items for associated quests.
Inventory Management: Prioritize hip pouch acquisitions before pursuing ammunition caches. Consider temporarily storing less critical items in storage boxes when approaching high-value puzzle solutions.
Time Estimates: Allow 15-20 minutes for comprehensive safe and dial lock clearing, and 30-45 minutes for complete film roll development chains, including necessary item collection.
For weapon-specific strategies that complement these hidden items, explore our Weapons Unlock guide for tactical loadout recommendations.
Action Checklist
- Solve West Office safe (9L-15R-7L) and Waiting Room safe (6L-2R-11L)
- Unlock dial lockers: CAP (Shower), DCM (West Hall), SZF (Control Room)
- Develop Commemorative Photo film and complete statue puzzle chain
- Retrieve Hiding Place Photo film and loot both Wesker’s desk and Press Room boombox
- Solve both Pocket Safes for Safety Deposit Room keypad keys
- Utilize S.T.A.R.S. badge at both Underground Stairs and S.T.A.R.S. Office
No reproduction without permission:SeeYouSoon Game Club » Resident Evil 2 Walkthrough: Safe Codes, Locker Combinations, Pocket Safe Locations, And More Master Resident Evil 2's hidden safes, dial locks, and film roll puzzles for maximum inventory expansion and firepower