TL;DR
- Greninja appears January 27-29 and February 10-12 in 7-Star Tera Raids
- Slowbro with Stored Power build provides optimal counter strategy
- Max HP and Special Attack EVs with Iron Defense and Nasty Plot setup
- Solo battles reduce timer penalties from teammate knockouts
- Leftovers item combined with Slack Off ensures sustained healing
This comprehensive guide delivers everything required to successfully capture Greninja during the limited-time 7-Star Tera Raid event in Pokémon Scarlet and Violet. We cover optimal timing, strategic preparation, and battle execution to ensure your success.
The highly anticipated Greninja Tera Raid returns for one final weekend, presenting your ultimate opportunity to add this fan-favorite Pokémon to your collection. Greninja’s exceptional Water/Dark typing provides outstanding defensive coverage and offensive versatility, complemented by a well-balanced stat distribution and diverse movepool that makes it valuable for both Elite Four challenges and competitive team building.
Greninja Raid Event Schedule
Similar to previous Charizard and Cinderace events, this Tera Raid unfolds across two distinct weekends. Mark your calendars for these specific event periods:
- January 27 – 29
- February 10 – 12
During these event windows, trainers can also encounter 4- and 5-Star Bronzong and Lucario, both possessing type advantages against Greninja’s Water/Dark/Poison combination.
Essential Preparation Steps
Before engaging Greninja, complete all prerequisite 7-star Tera Raid preparation detailed in our Complete Guide to high-level raiding. Once foundational requirements are met, focus on constructing a specialized Pokémon capable of countering Greninja’s unique moveset and typing.
Several Pokémon demonstrate effectiveness against Greninja, including Lucario, Clodsire, and Bronzong. However, our recommended strategy centers on Slowbro utilizing a Stored Power configuration. This approach enables extended survivability while delivering massive supereffective damage when properly set up.
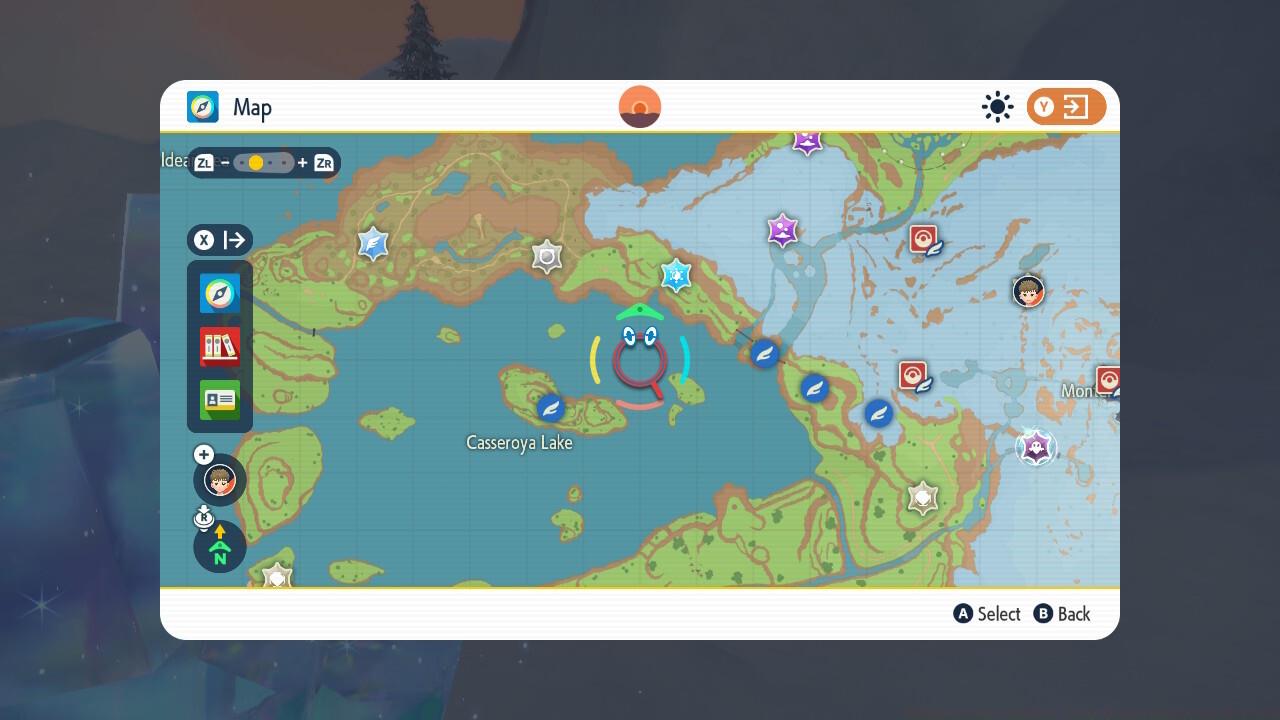
High-level Slowbro with guaranteed 3 perfect IVs spawn in Casseroya Lake’s northwestern waters.
Tera type selection proves less critical than proper move execution. While Grass Tera type functions adequately without Terastalizing, Psychic Tera type doubles Stored Power damage at the cost of Hydro Pump resistance.
Optimized Slowbro Construction
Capture Tera Slowbro in Casseroya Lake’s northwestern region, where they swim openly. After acquisition, travel to Montenevera’s Hyper Trainer in the northern glacial city to maximize all stats except Attack.
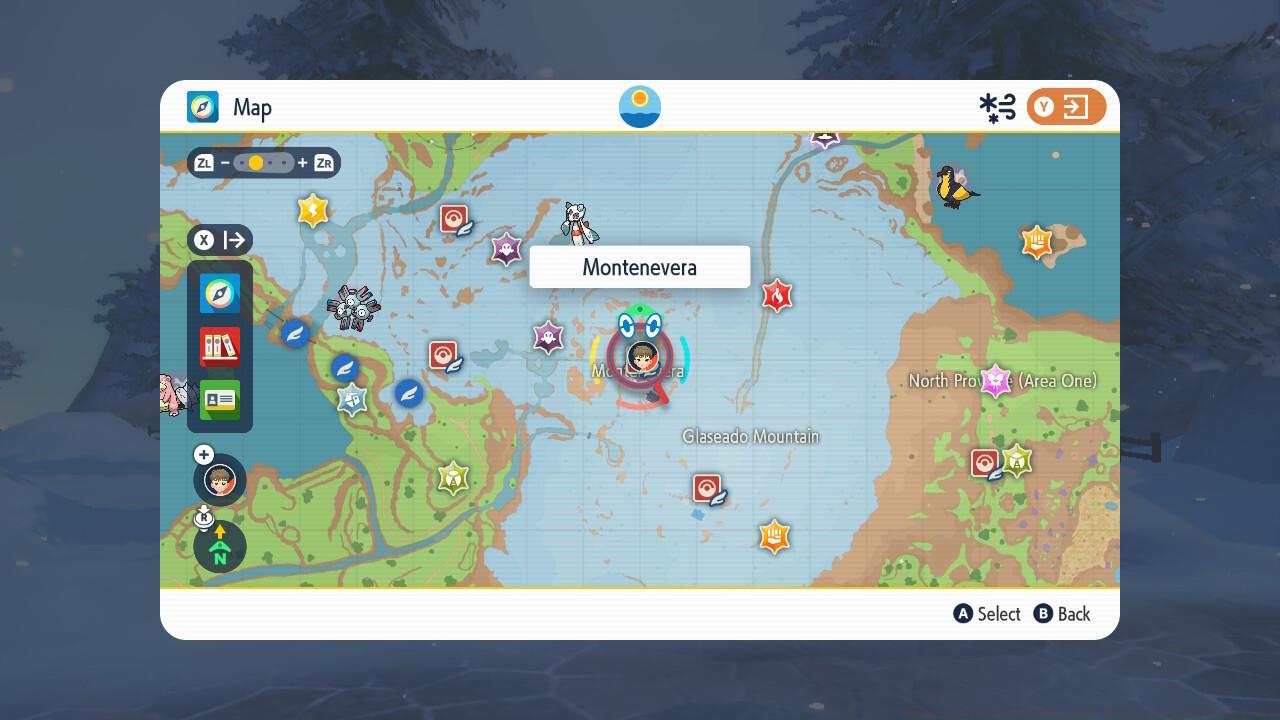
The Hyper Trainer in Montenevera enables stat maximization using Bottle Caps acquired from high-level raids, academy tournaments, or Porto Marinada auctions.
Slowbro EV Distribution Strategy
Following IV optimization (excluding Attack), focus on EV training. Maximum HP and Special Attack investment requires 26 HP UP and 26 Calcium items, available at Mezagoza’s Chansey Supply (East). A single Iron provides minor Defense enhancement to complete EV allocation.
EV training items are conveniently available at Chansey Supply locations throughout Paldea.
Utilize Exp. Candy XL from Tera Raid rewards to achieve Level 100, then finalize your moveset configuration.
Essential Move Locations and Acquisition
- Stored Power (TM41)
- Iron Defense (TM104)
- Nasty Plot (TM140)
- Slack Off (Learned at Level 33)
Slowbro naturally learns Slack Off at Level 33, providing crucial healing during extended battles. The remaining moves require Technical Machine acquisition.
Stored Power TM resides west of Los Platos in the initial game area.
Nasty Plot TM location: Area Zero, ledge above Research Station No. 2. Teleport there, exit the station, turn around, scale the cliff using your Legendary mount, then access a small ledge containing the TM. Alternative acquisition: Complete Professor Raifort’s history curriculum, pass the examination, capture all four legendary Pokémon, then consult the Professor.
Iron Defense TM position: East Province (Area Three), east of the corresponding fast travel point, situated on an elevated mesa within a depression.
Complete your configuration with the Leftovers held item. Multiple world locations offer this item, or purchase it economically at Delibird Presents.
Visit Delibird Presents in eastern Cascarrafa (western Paldea) to acquire Leftovers for 20,000 yen, then equip it for battle readiness.
Step-by-Step Battle Execution
While online co-op remains viable, this Slowbro build demonstrates sufficient strength to defeat Greninja with CPU assistance. Solo battles minimize timer reduction penalties when teammates faint compared to player knockouts.
Identify Greninja raids by locating black and purple Poison Tera icons on your map.
Greninja initiates combat with Double Team and Toxic Spikes, poisoning any fainted Pokémon (including teammates). This proves manageable with Leftovers and Slack Off healing capabilities.
Solo battles provide simplified execution while maintaining online co-op compatibility.
Battle sequence: Begin with three consecutive Iron Defense uses, monitoring health and substituting Slack Off when HP approaches 50%.
Following three Iron Defense applications, execute Nasty Plot three times. Subsequently, access the Cheer menu and deploy “Go All Out” once, then commence Stored Power attacks.
Meanwhile, you’ll sustain minimal damage while maintaining passive and active healing capabilities. This methodology enables first-attempt solo Greninja capture.
Captured Greninja features perfect IVs, Level 100, and the exclusive Mightiest Mark designation.
Enhanced success probability: CPU teammates with Intimidate ability. During my initial solo attempt, Tauros, Arcanine, and Staraptor provided three Intimidate activations pre-battle.
For additional strategic depth, consult our Weapons Unlock guide for advanced battle techniques. Additionally, our Class Guide offers complementary team building strategies.
Best of luck in your Greninja capture endeavors!
Action Checklist
- Verify event dates and prepare 7-star raid prerequisites
- Capture Slowbro in Casseroya Lake and hyper train stats in Montenevera
- Acquire essential TMs: Stored Power, Iron Defense, Nasty Plot
- Max HP and Special Attack EVs using Chansey Supply items
- Execute battle sequence: 3x Iron Defense, 3x Nasty Plot, then Stored Power
No reproduction without permission:SeeYouSoon Game Club » Pokemon Scarlet and Violet: 7-Star Poison Greninja Tera Raid Guide Master the 7-Star Greninja Tera Raid with expert Slowbro strategies and battle timing guide