Master the Miscarcand quest with expert navigation tips, combat strategies, and key item collection techniques for The Elder Scrolls IV: Oblivion.
Quest Overview & Key Objectives
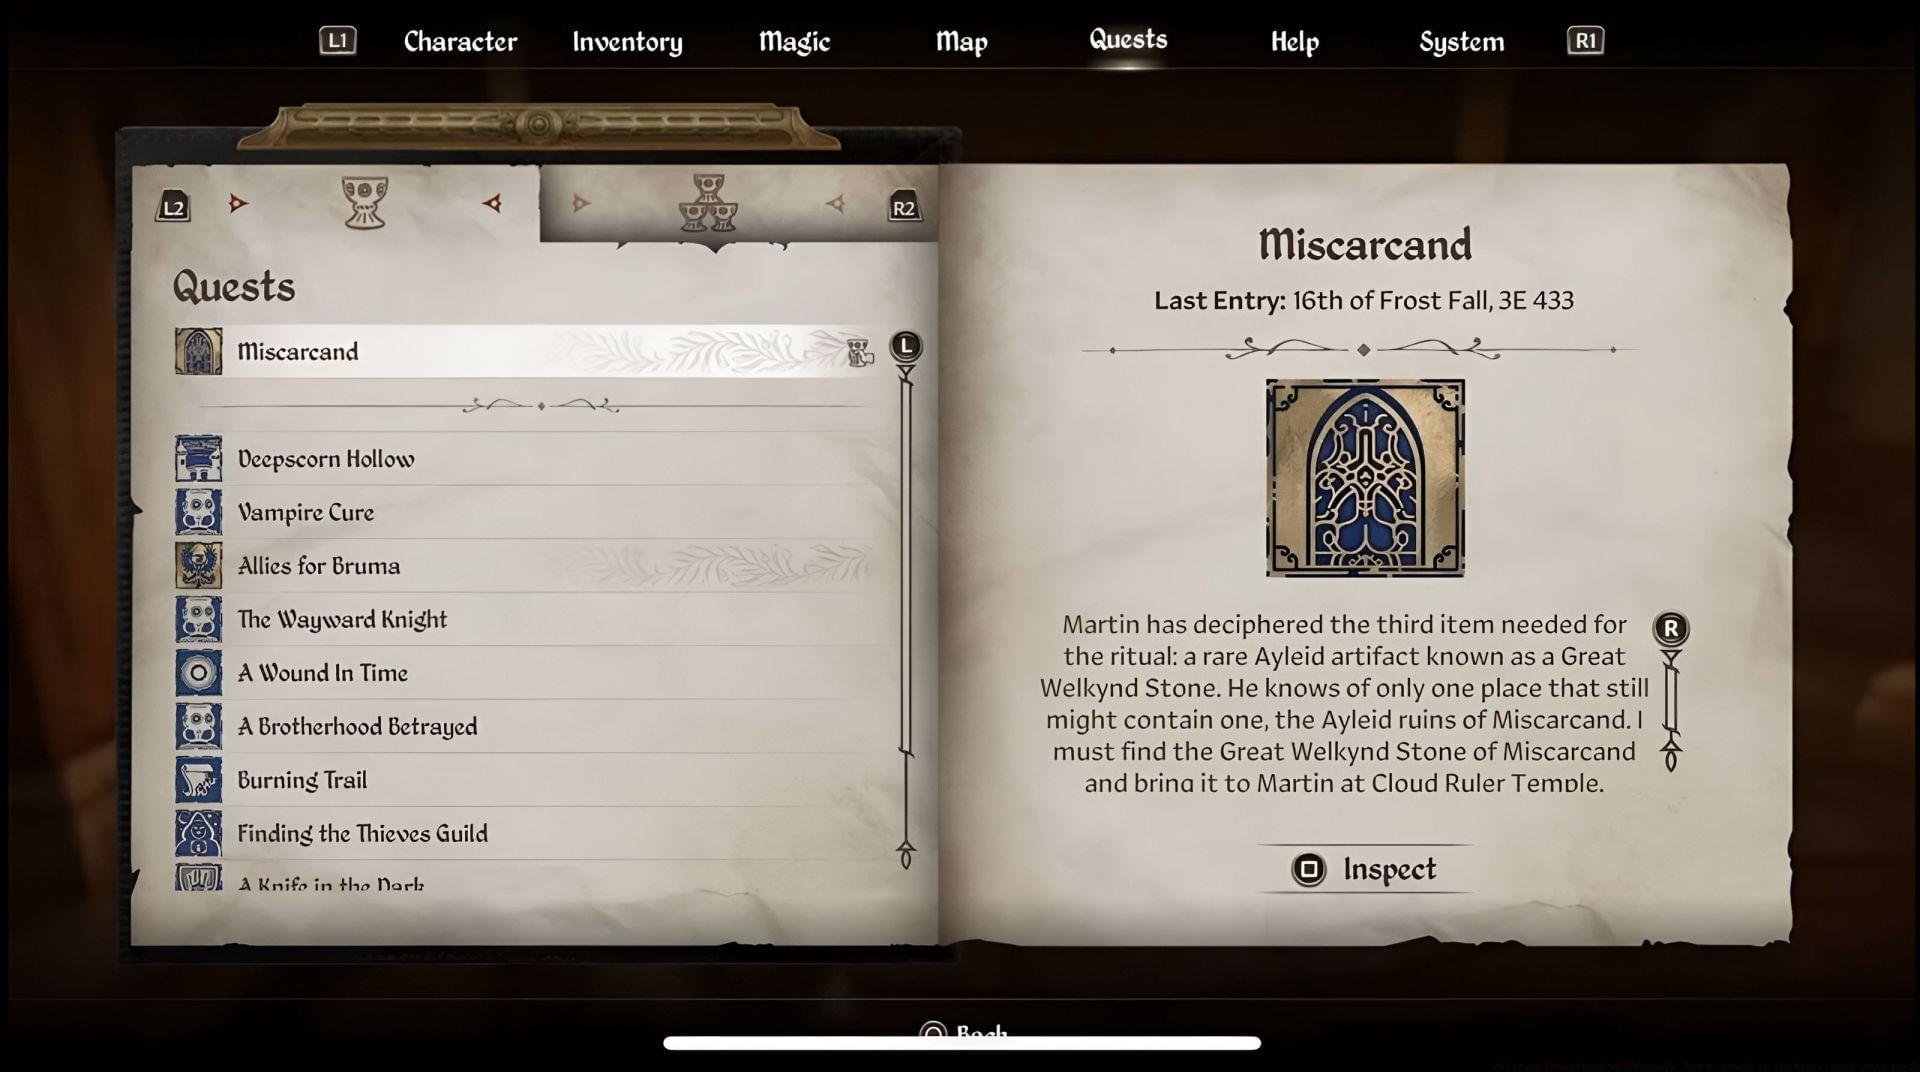
Within the myriad adventures of The Elder Scrolls IV: Oblivion Remastered, the Miscarcand quest stands out as a pivotal task tied to the main narrative. Your objective is to recover a legendary artifact known as the Great Welkynd Stone, a powerful and rare variant of the common Welkynd Stones found throughout Cyrodiil. This quest is initiated by Martin Septim, the last heir to the Empire, during a critical juncture in the main story. Successfully navigating the ancient Ayleid ruin of Miscarcand is essential not only for quest progression but also for understanding a piece of the game’s deep lore concerning the Ayleid Wells.
Detailed Dungeon Navigation Walkthrough
- Initial Descent: Upon entering Miscarcand, immediately descend the staircase ahead. Be prepared to engage and defeat the guardian enemy at the bottom to secure your path forward. Continue westward until the corridor forks.
- Path Selection & Bridge: Take the left fork and proceed through the gate. You will arrive at a bridge. Here, you must jump off the bridge to the lower level and immediately scout the western wall for a discreet doorway.
- Staircase Puzzle: Enter the door and climb the stairs. In the chamber above, locate and activate the button on the upper platform. Immediately to the button’s left, ascend another staircase. At the summit, turn right and step onto the pressure plate embedded in the floor.
- Gate Mechanism: Activating the plate will cause a square portcullis to rise. Pass through this newly opened gate and head south. This route will loop you back to the base of the bridge you previously jumped from.
- Stone Door Access: From the bridge foundation, follow its length until you discover the ‘Stone Door to Miscarcand, Sel Vanua.’ This magically sealed door is your gateway deeper into the ruin.
Combat & Goblin Chamber Strategy
After passing through the Stone Door, advance into a vast, open chamber heavily infested with goblins. Your primary goal is to eliminate all hostiles. A highly effective strategy is to kite the goblins back into the narrower hallway you just exited. This funnels them into a chokepoint, allowing you to deal with them one or two at a time, conserving health and magicka. This is especially useful on higher difficulty settings.
Once the chamber is secure, navigate to its southeastern quadrant and pass through the gate there. Descend the next set of stairs into an expansive, multi-level room. For optimal navigation, hug the southern wall. Traverse the walkway and enter the awaiting hallway. Continue eastward, keeping to the southern edge, until you locate an interactive block or lever.
Acquiring the Great Welkynd Stone
Interact with the block to trigger a mechanism. Your next destination is the ‘Stone Door to Miscarcand, Morimath.’ Proceed through the connecting tunnel, taking the first left at the intersection, followed by another immediate left to orient yourself west. Go through the subsequent gate and continue straight ahead. You will find the Great Welkynd Stone glowing prominently. Unlike its common counterparts, this stone is a unique quest item. Approach and collect it to update your journal.
Important: Do not confuse this with regular Welkynd Stones; it serves a specific ritual purpose for Martin Septim. After securing the stone, turn around and retrace your steps back across the bridge.
Boss Fight & Quest Completion
Your return journey is halted by the King of Miscarcand, a powerful boss enemy. Engage him carefully, using the environment to avoid his attacks. Upon defeating him, loot his corpse to obtain a key. Scan the northern wall of this area for a small alcove or room containing another pressure plate.
Stepping on this plate will unveil a new passage heading west, leading to a previously locked gate. Use the key from the King to open it. Traverse the ensuing tunnels; they will ultimately lead you to the final ‘Stone Door to Miscarcand.’ Exiting through this door will place you back in the open world. From here, simply follow your active quest marker to return to Martin Septim and complete the mission.
Pro Player Tips & Common Pitfalls
Optimization Strategies
- Resource Management: Clear the goblin chamber by kiting to preserve potions and spell charges for the King of Miscarcand fight.
- Shortcut Awareness: After jumping off the bridge, the door on the west wall is easy to miss. Look for subtle Ayleid architectural cues.
- Combat Preparation: The King uses powerful melee attacks. Enchant your weapon with Shock or Frost damage, to which many undead Ayleid guardians are vulnerable.
Mistakes to Avoid
- Missing the Pressure Plate: After defeating the King, failing to find and activate the pressure plate on the north wall will halt progress. Search thoroughly.
- Wrong Stone Door: Ensure you enter ‘Stone Door to Miscarcand, Sel Vanua’ initially, and ‘Stone Door to Miscarcand, Morimath’ later. They lead to different zones.
- Ignoring the Southern Wall: In the large room after the goblins, straying from the southern wall can lead to unnecessary combat with respawned enemies or dead ends.
No reproduction without permission:SeeYouSoon Game Club » Oblivion Remastered walkthrough: How to complete the Miscarcand quest guide Master the Miscarcand quest with expert navigation tips, combat strategies, and key item collection techniques for The Elder Scrolls IV: Oblivion.