TL;DR
- Soil fertility is crucial – prioritize green zones and implement crop rotation to maintain productivity
- Strategic crop selection determines your settlement’s food and trade capabilities – wheat for bread, barley for ale, flax for clothing
- Livestock requires separate infrastructure including pastures and trading posts, with breeding enabling self-sufficiency
- Development upgrades like Heavy Plow and Irrigation dramatically improve farming efficiency and yield
- Proper seasonal planning with surplus storage prevents starvation during winter months
Maximizing agricultural productivity in Manor Lords begins with understanding the fundamental relationship between soil quality and crop performance. The game’s sophisticated soil fertility system directly impacts your settlement’s food security and economic stability.
When establishing your agricultural operations, the initial soil assessment becomes your most critical decision. Navigate to the Construction → Farming menu and select the Field placement tool to reveal color-coded terrain indicators. Green zones represent optimal fertility with maximum yield potential, while orange and red areas indicate progressively poorer soil conditions that will severely limit crop growth.
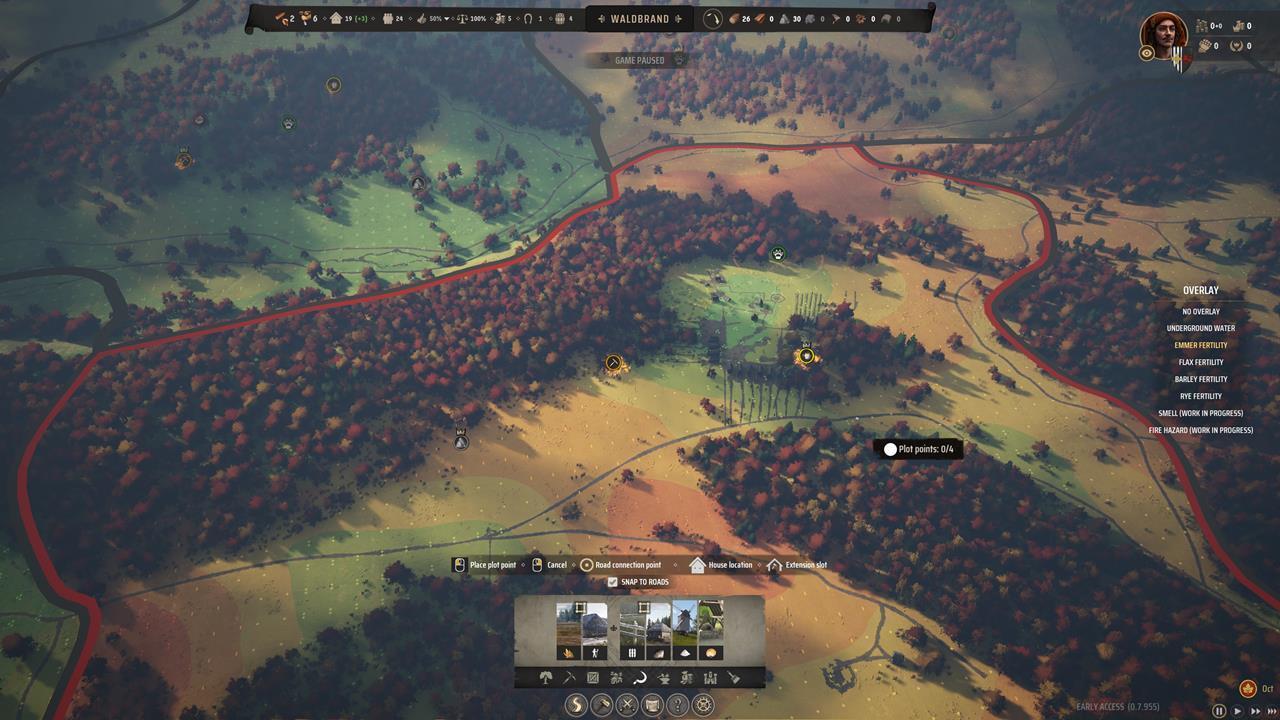
Strategic field placement in fertile green zones significantly boosts initial harvest yields.
Field creation mechanics involve defining four-sided agricultural plots using the medieval “morgen” measurement system. Larger fields demand proportionally more labor for complete cultivation, creating important trade-offs between operational scale and workforce allocation. Each field supports cultivation of specific crops with distinct economic purposes:
- Wheat – The foundation of bread production through milling and baking processes; essential for basic food supply
- Barley – Primary ingredient for ale manufacturing; crucial for tavern operations and settlement happiness
- Flax – Raw material for clothing and linen production; supports population growth and trade
- Rye – Requires Rye Cultivation technology; functions as wheat alternative in lower fertility soils
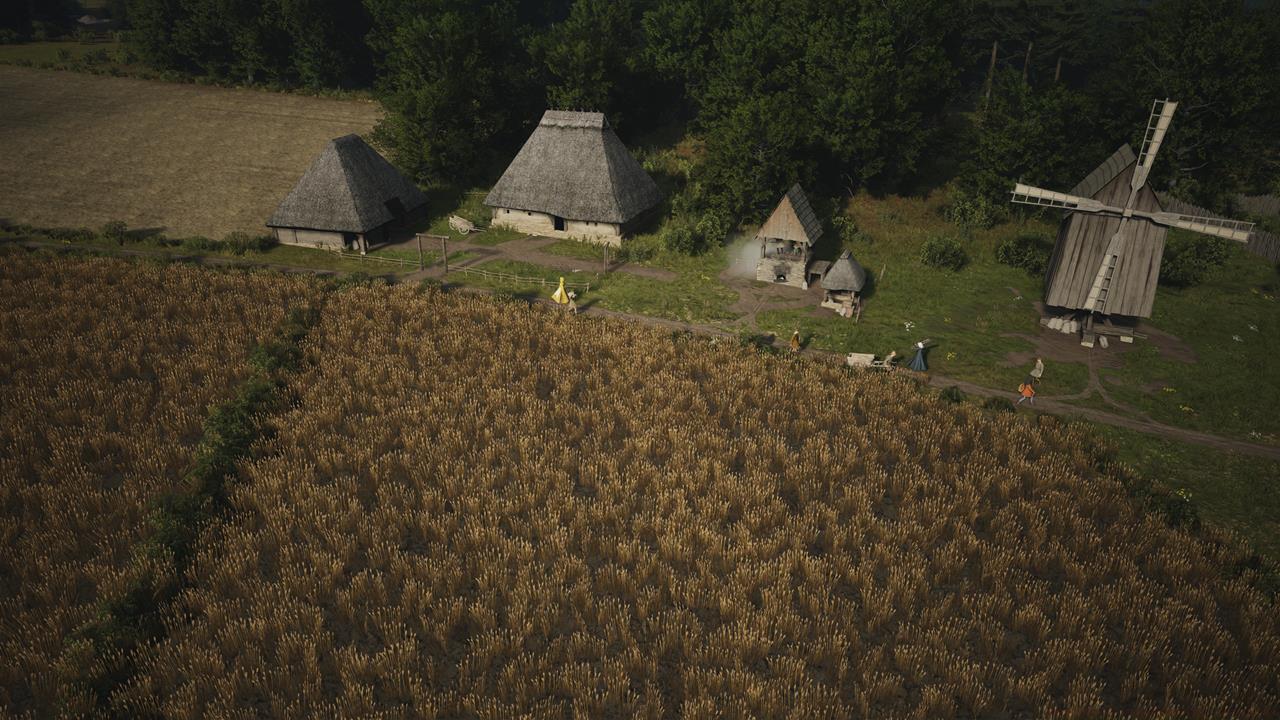
Essential agricultural infrastructure begins with the Farmhouse, requiring 3 Timber units for construction. This central hub coordinates farming activities and supports assignment of up to eight workers across connected fields. Additional processing structures include:
- Windmill (4 Timber) – Converts grain into flour; requires open terrain without tree obstruction for optimal performance
- Communal Oven (2 Timber) – Transforms flour into bread; basic food processing facility
Crop selection directly determines your settlement’s economic specialization and resource flow.
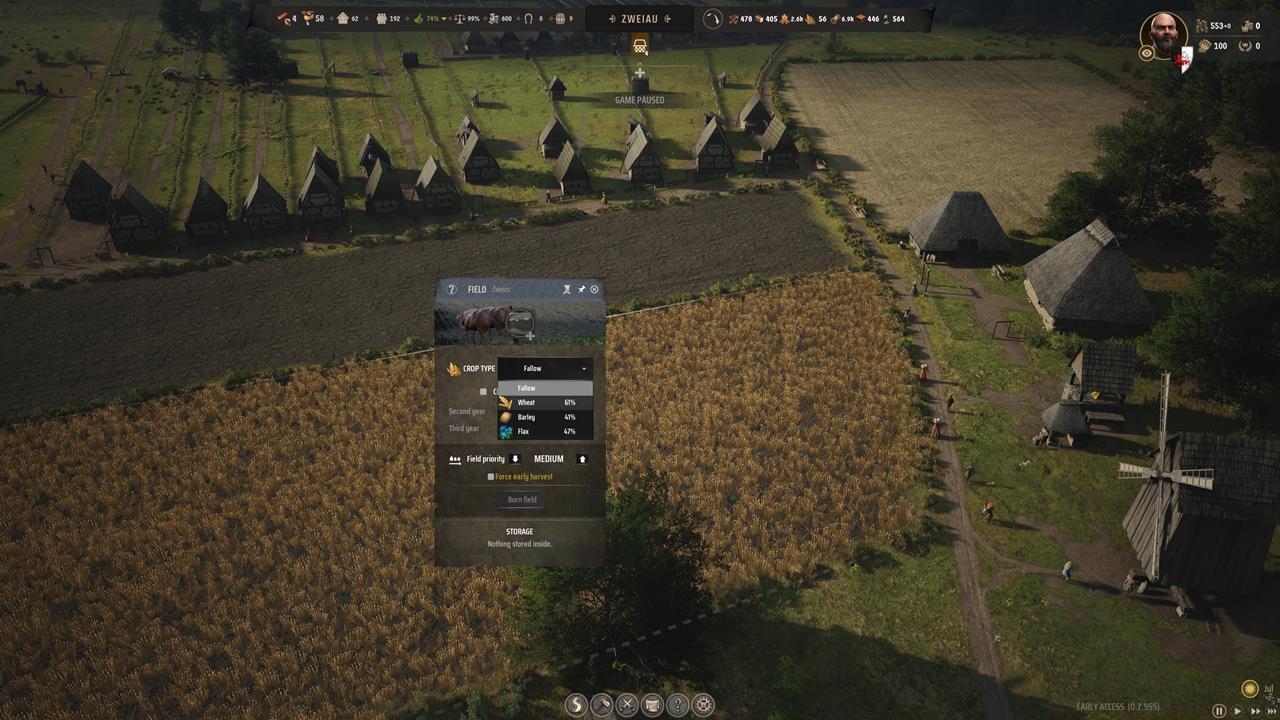
Maintaining long-term agricultural sustainability requires implementing sophisticated crop rotation systems to combat soil depletion. Continuous monoculture farming rapidly degrades fertility, making rotation not just optimal but necessary for maintaining productivity across growing seasons.
The crop rotation mechanic enables strategic field management across multiple years. During initial setup, designate specific crops for the first and second years of cultivation. The third year presents a critical decision point where selecting the Fallow option allows soil recovery without immediate production. This three-year cycle culminates in resumed planting during the fourth year with restored fertility levels.
- Year 1-2 Planting – Establish primary crop cycles for wheat, barley, flax, or rye based on settlement needs
- Year 3 Fallow Period – No harvest yield but significant fertility restoration; consider staggered fallow scheduling across fields
- Year 4 Resumption – Return to productive cultivation with improved soil conditions
Seasonal harvesting operations typically conclude by November, though the “Force Early Harvest” option provides flexibility during emergency situations. Winter months completely halt agricultural production, making surplus food storage absolutely critical for preventing starvation. Advanced players should maintain at least six months of food reserves to withstand poor harvests or unexpected events.
Patient seasonal planning and surplus management separate successful settlements from those facing winter famine.
Common Mistake: New players often prioritize immediate production over rotation planning, leading to severe fertility depletion by the third year that cripples long-term food production capabilities.
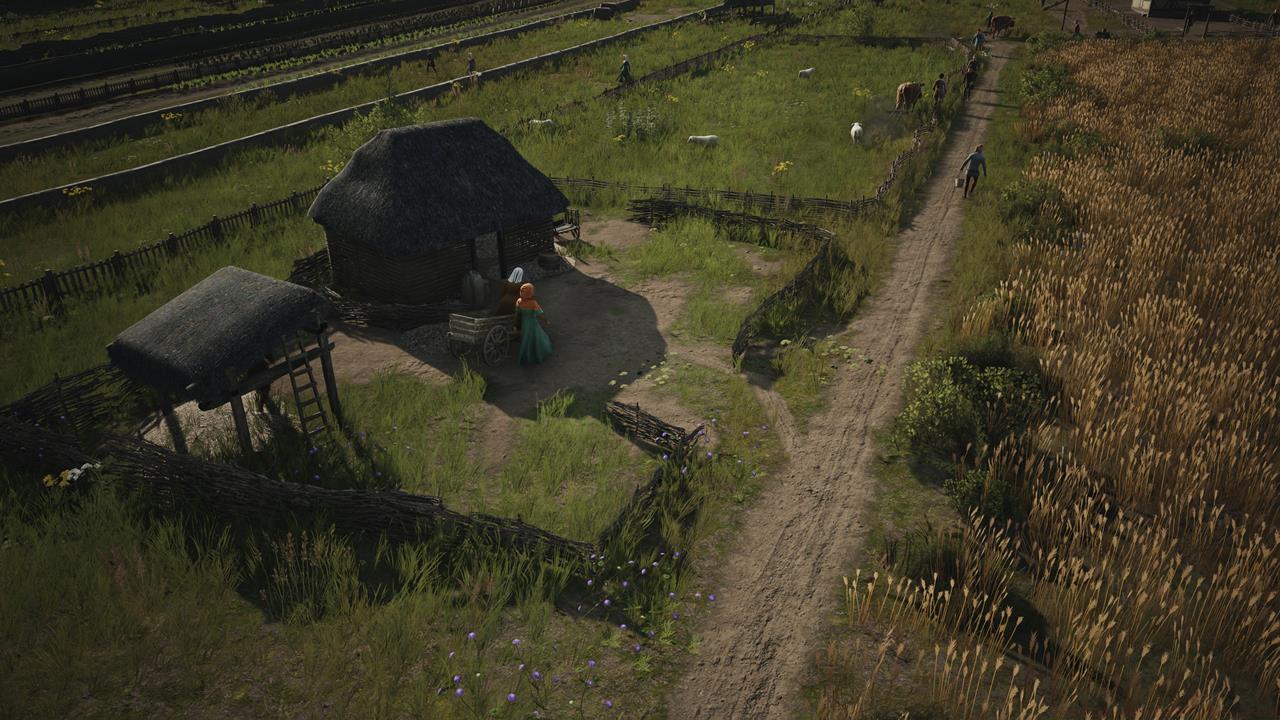
Livestock management operates through completely separate mechanics from crop farming, requiring dedicated infrastructure and specialized knowledge. Unlike field cultivation, animal husbandry begins with accessing the Construction → Farming menu to establish specialized facilities.
Initial livestock infrastructure includes the Sheep Farm (1 Timber) for assigning animal caretakers and Pastures for creating grazing areas. These complementary structures form the foundation of your settlement’s meat, wool, and secondary production capabilities.
- Sheep Farm – Core staffing structure for livestock operations; assigns workers to animal management
- Pasture – Designated grazing zones; size determines maximum herd capacity
Acquiring animals requires constructing a Livestock Trading Post (2 Timber) and configuring import settings. Select your desired animal type from the dropdown menu and adjust surplus targets to attract monthly merchant visits. This acquisition process consumes Regional Wealth resources, requiring careful economic planning.
Strategic livestock acquisition transforms your settlement’s economic diversity and resource stability.
Pro Tip: Establish multiple small pastures rather than one large enclosure to minimize disease spread risks and optimize grazing efficiency.
Progressive farming improvements become available through Development Points earned during settlement advancement. These technological investments dramatically transform agricultural productivity and operational efficiency.
Key farming-related upgrades accessible through the development system include:
- Sheepbreeding – Enables natural herd multiplication through pasture grazing; reduces dependence on expensive imports
- Heavy Plow – Unlocks Plowing Stations; utilizes oxen at Farmhouses for accelerated field preparation and goods transportation
- Fertilization – Activates Fence Up enhancement; transforms fallow fields into temporary pastures for accelerated fertility recovery
- Irrigation – Provides substantial protection against drought damage; critical for climate resilience
- Bakeries – Provides Burgage Plot Bakery Extensions; significantly outperforms Communal Ovens in bread production efficiency
Strategic technology prioritization should align with your settlement’s specific challenges and economic goals. Arid regions benefit tremendously from Irrigation, while settlements focusing on textile production should prioritize Sheepbreeding.
That completes our comprehensive Manor Lords farming and agricultural management guide. For foundational game knowledge, explore our beginner’s guide to establish solid settlement basics.
As an early access title, Manor Lords continues evolving its mechanics and systems. Stay current with emerging strategies through our regularly updated guides hub.
Action Checklist
- Conduct thorough soil fertility assessment using color-coded terrain indicators
- Establish optimally sized fields in green fertility zones with Farmhouse construction
- Implement three-year crop rotation cycles with staggered fallow periods
- Develop livestock infrastructure with pastures and trading posts for animal acquisition
- Prioritize development upgrades based on settlement specialization and environmental conditions
No reproduction without permission:SeeYouSoon Game Club » Manor Lords – Farming And Harvests Guide Master Manor Lords farming with soil optimization, crop rotation strategies, and livestock management techniques