TL;DR
- The Path of Shuttered Lanterns requires precise floor switch activation to access the Muramasa sword chamber
- Bloodthirsty Samurai is the chapter’s toughest boss requiring corner positioning and status effect strategies
- Always save before attempting the fight and consider returning with The Prisoner companion
- The Muramasa sword offers the highest damage output but carries permanent party member risks
- Advanced preparation and level grinding significantly improve success chances
Claim the legendary Muramasa blade as your exclusive weapon through careful exploration and tactical combat.
Live A Live’s Twilight of Edo Japan chapter stands apart with its non-linear design that encourages player discovery. Unlike more guided scenarios, this segment places you at Ode Castle’s entrance with minimal direction, requiring you to uncover pathways and complete objectives independently. The chapter contains several well-hidden secrets, with the most challenging puzzle leading to both the game’s most powerful equipment and its most formidable adversary. This comprehensive walkthrough provides detailed guidance for navigating the Edo Japan chapter, specifically focusing on locating the Muramasa blade and defeating the Bloodthirsty Samurai.
Strategic positioning and preparation are essential before engaging the Bloodthirsty Samurai.
Your approach to Ode Castle determines whether you’ll discover the Path of Shuttered Lanterns naturally. By scaling the residential building’s rooftop, you gain access to the outer defensive structures. Look for a climbable tree along this route that provides descent to ground level. Once below, a sizable lantern positioned directly south serves as the activation mechanism—interacting with it reveals the hidden passageway.
The Path of Shuttered Lanterns appears largely empty initially, but careful attention reveals its secrets. As you progress southward, you’ll hear distinct clicking sounds from pressure plates in the floor. The critical technique involves entering from the northern doorway, crossing the initial trigger point, then halting movement the instant the second click occurs. Immediately reverse direction, recross the first plate, and exit through your entry point to discover a previously inaccessible chamber.
Be aware that stepping on the southern switch twice completely resets the puzzle sequence. You must avoid triggering the bottom mechanism more than once by turning around promptly after the second auditory cue. Hearing an additional click indicates you’ve overshot the turning point, requiring a complete restart from the beginning.
Advanced players should note the audio cues provide the most reliable timing indicators rather than visual landmarks. The pressure plates have a brief activation delay, so pausing momentarily after each click ensures proper sequencing. Many players fail this puzzle by moving too quickly between triggers.
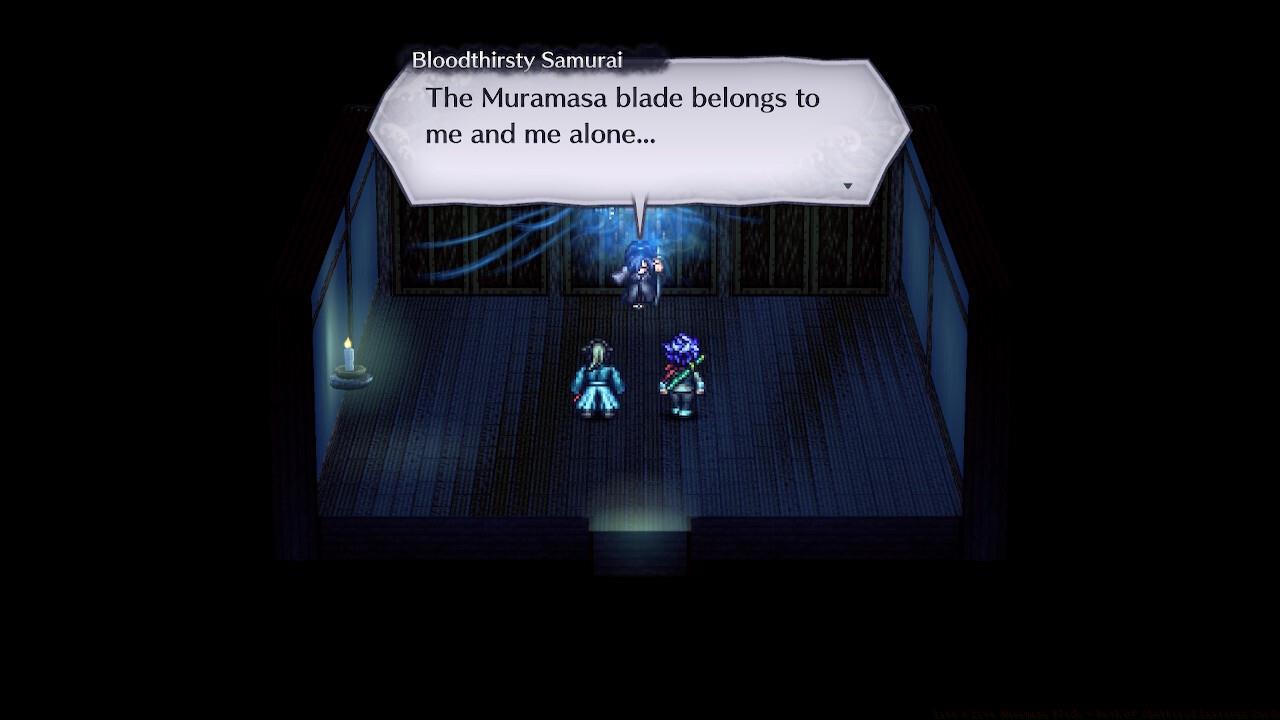
Within the newly revealed chamber, you’ll discover a sword mounted on the wall. Interaction summons a spectral warrior who delivers a clear warning—heed his advice seriously, as he represents the most challenging opponent in this entire chapter. Even confident players should create a save file before re-engaging him. Ideally, return later at enhanced character levels with The Prisoner as your ally. Without proper preparation, this confrontation will conclude rapidly in your defeat.
When prepared for battle, the optimal approach involves positioning yourself in distant corners away from your adversary. The Bloodthirsty Samurai possesses a devastating area attack that extends to both his flanks, making alignment on his row certain death. Employ abilities that impair enemies and hope for favorable status application. Phantom Butterflies can create crucial openings by inducing sleep, while Dust Veil (if you manage to close distance safely) reduces his accuracy for improved survival chances.
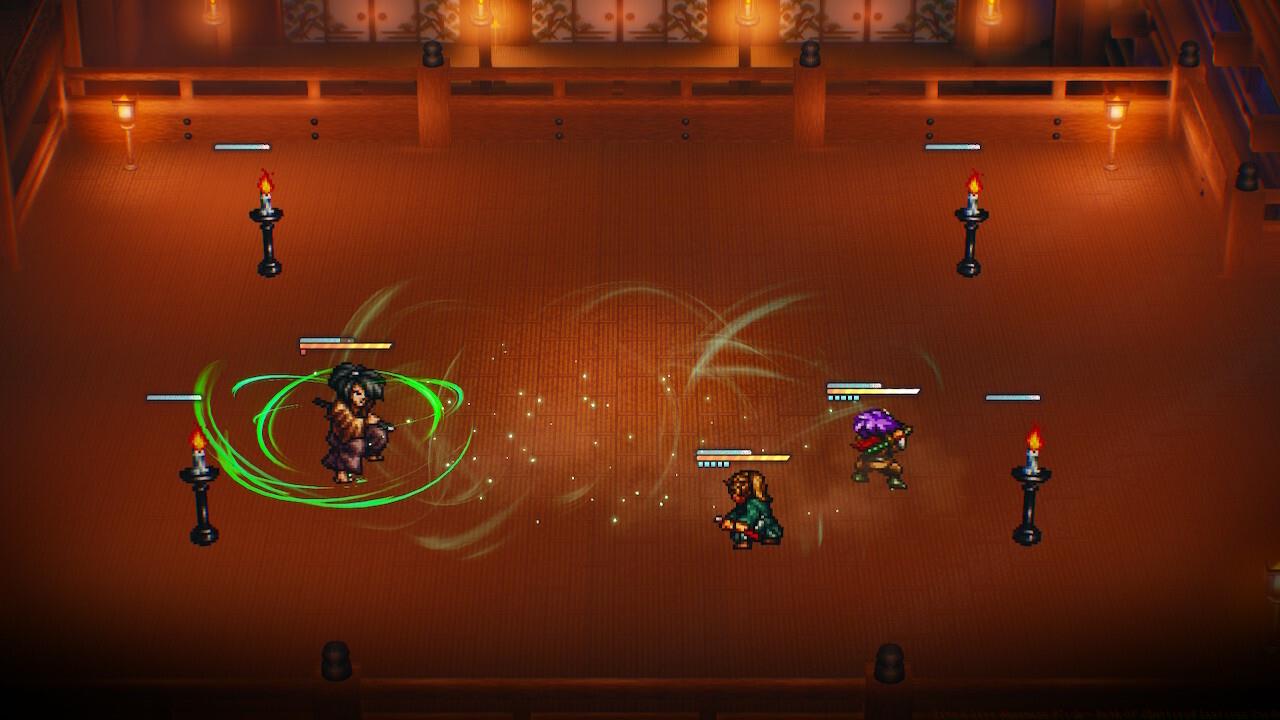
Maintain corner positioning to avoid the Bloodthirsty Samurai’s devastating lateral attacks.
For maximum effectiveness, combine status effects with hit-and-run tactics. The Samurai’s attack patterns follow predictable sequences once you recognize the visual tells. His most dangerous move features a distinctive wind-up animation—use this warning to reposition immediately. Character levels between 12-15 provide reasonable survivability, though level 18+ significantly improves success rates.
Remember that this difficult encounter rewards you with the Muramasa sword, the chapter’s most potent weapon. Utilize every available advantage and consider over-leveling if necessary. Determined players can recruit the optional Mimic party member, but exercise caution when navigating back to the Path of Shuttered Lanterns. Avoid leading them through the moat pathway, as this route can result in permanent character loss.
The Muramasa blade provides approximately 40% more damage output than the second-best weapon available. Its special ability, Demon’s Wrath, deals additional dark-element damage that bypasses most enemy resistances. However, equipping it imposes a slight speed penalty that affects action timing.
When managing your party composition, consider balancing the Muramasa’s power with supportive abilities from other characters. The Prisoner’s crowd control skills complement the sword’s offensive capabilities perfectly. Always maintain backup saves before attempting high-risk maneuvers with permanent consequences.
For comprehensive strategies on optimizing your gameplay experience, consult our Complete Guide covering advanced techniques and character development.
Action Checklist
- Scale Ode Castle’s residential rooftop and locate the climbable tree to access the Path of Shuttered Lanterns
- Activate the floor switches with precise timing: cross first plate, stop at second click, immediately return
- Create a manual save before interacting with the Muramasa sword
- Level characters to 12-15 (recommended 18+) and recruit The Prisoner companion
- Employ corner positioning strategies and status effects during the Bloodthirsty Samurai fight
- Avoid moat pathways with Mimic party member to prevent permanent loss
No reproduction without permission:SeeYouSoon Game Club » Live A Live Muramasa Blade – Path Of Shuttered Lanterns Guide Master the Muramasa blade and defeat the Bloodthirsty Samurai with advanced strategies in Live A Live's Edo Japan chapter