Complete guide to photographing Competitive Belt’s victory pose in Infinity Nikki with strategic combat tips and location details
Understanding the Event and Rewards
The Competitive Belt photography challenge represents one of several objectives within Infinity Nikki’s Journey through Serenity seasonal event, introduced in version 1.5. Successfully capturing this specific enemy pose contributes toward your accumulated Serenity Points total, which functions as the primary event currency. These points can subsequently be redeemed through the event exchange interface for valuable resources including Diamonds, Shiny Bubbles, Glitter Bubbles, and Bling cosmetic items that enhance your character progression and customization options.
Strategic prioritization of photography tasks like this one enables efficient event completion, as certain rewards may have limited availability or particularly high value relative to point costs. Understanding the mechanics behind each photography challenge ensures you maximize your time investment during the event duration.
Location Navigation and Enemy Encounter
Initiating this photography mission requires precise navigation to Serenity Island’s Misty Peak Warp Spire, which serves as the optimal fast travel point for accessing the target area. From this teleportation node, proceed along the northwestern pathway until you encounter the entrance to the Blocked Cavern dungeon environment. This route minimizes travel time while avoiding unnecessary enemy engagements that could delay your objective completion.
Upon entering the cavern interior, descend carefully through the multi-level structure while maintaining awareness of environmental hazards. Continue following the primary path downward until reaching the deepest chamber where Competitive Belt spawns consistently. The enemy typically patrols a specific area within this chamber, making it reliably locatable for repeated attempts if needed.
Navigation Tip: Activate any nearby Resonance Stones or save points before entering the cavern to ensure quick recovery if the encounter proves challenging. The cavern’s vertical design means falling damage represents a common secondary threat during navigation.
Combat Mechanics and Photography Timing
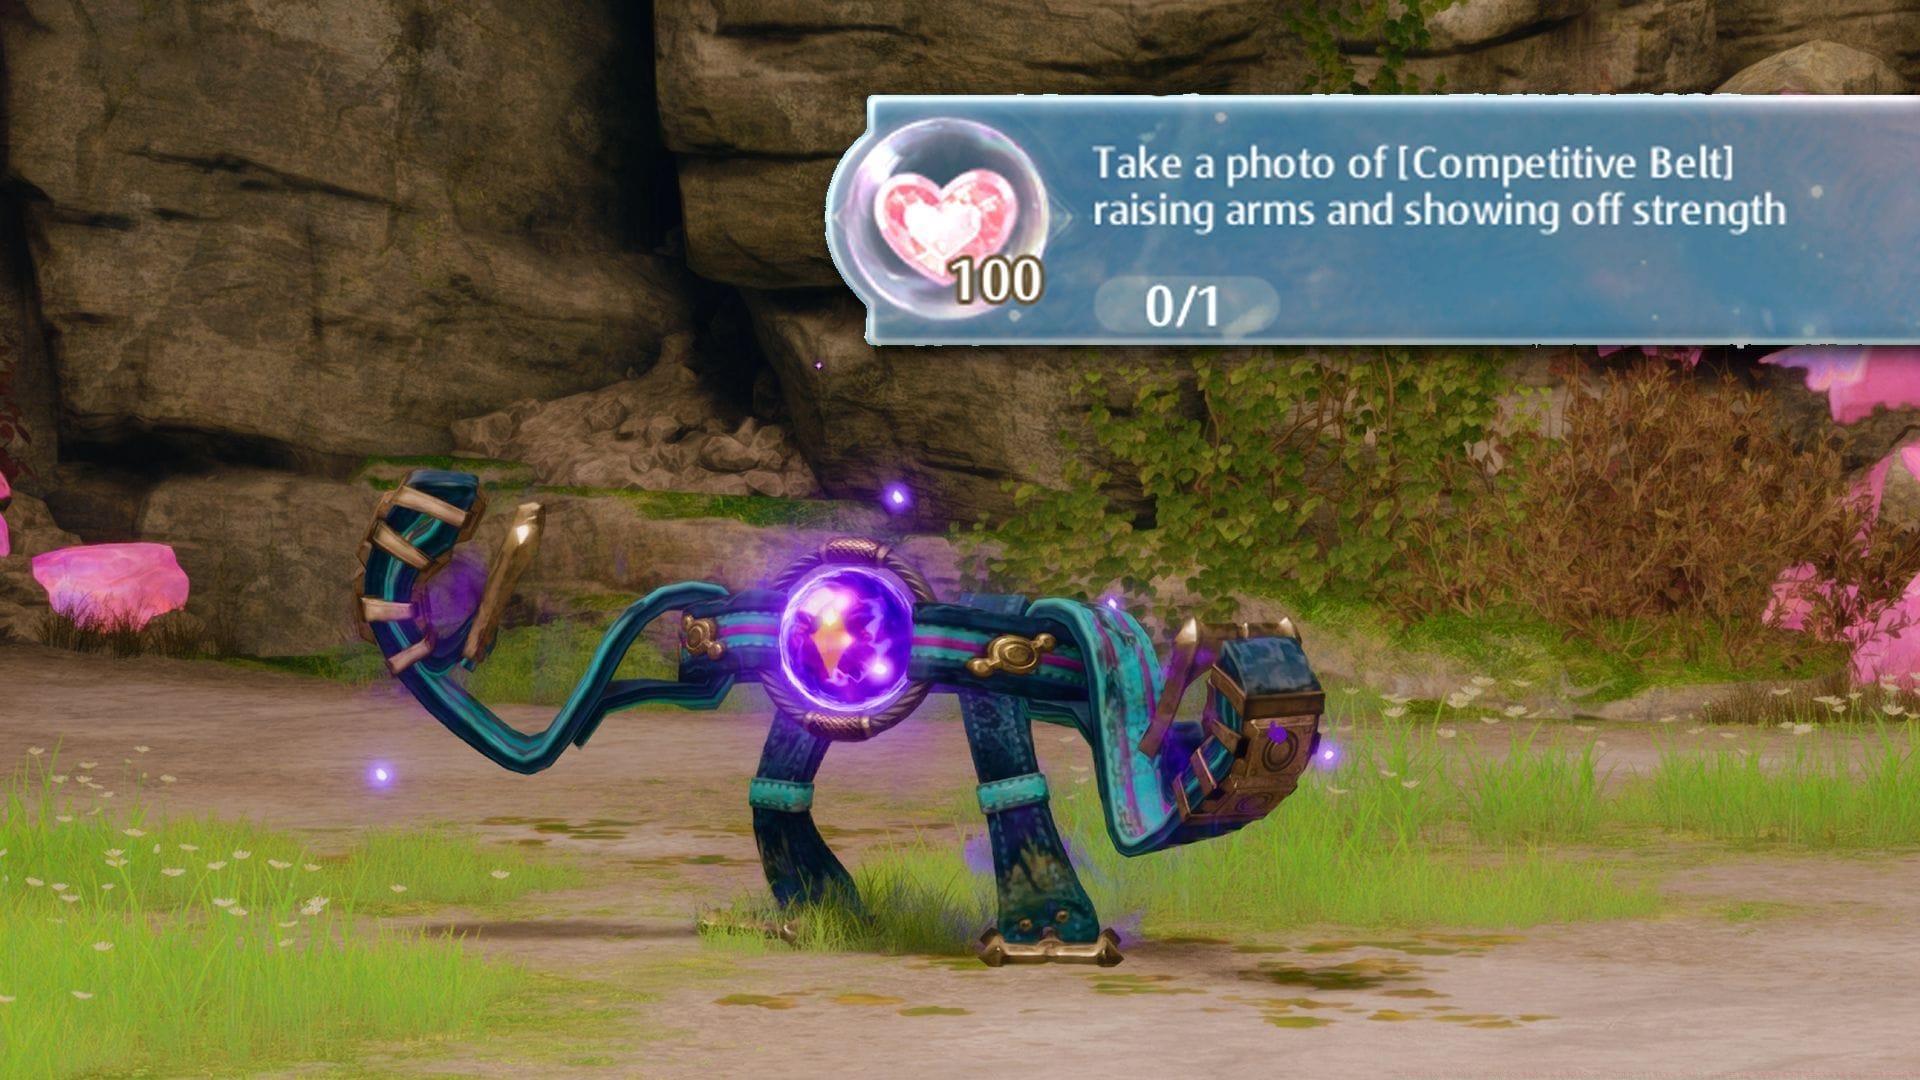
Engaging Competitive Belt directly in combat represents a mandatory prerequisite for triggering the required photographic pose. Initiate battle using your preferred combat abilities, then carefully observe the enemy’s attack rotation patterns. The critical animation sequence occurs when Competitive Belt prepares and executes its distinctive purple energy arc projectile attack, which creates a visible telegraph on the battlefield before deployment.
As the energy arc launches toward your position, execute a well-timed jump to evade the attack while simultaneously preparing your camera interface. The victory pose you need to photograph triggers immediately following this attack animation, with Competitive Belt raising both arms overhead in a strength-display stance that lasts approximately 2-3 seconds. This brief window requires quick camera activation and composition to successfully capture.
Camera Execution: Pre-position your character at medium distance from Competitive Belt to ensure the entire pose fits within frame while maintaining image clarity. The camera’s auto-focus typically handles the composition adequately, but manual adjustment may be necessary if environmental elements obstruct the view.
Advanced Strategies and Common Pitfalls
Seasoned players should consider several optimization approaches to streamline this photography challenge. Maintaining optimal combat distance of approximately 5-7 character lengths from Competitive Belt ensures you can both evade attacks effectively and capture the pose without camera obstruction. The enemy’s attack pattern typically cycles every 15-20 seconds, so patient observation prevents wasted attempts.
Common mistakes include activating the camera too early before the pose fully develops, standing at excessive distance that prevents pose triggering, or becoming overly aggressive in combat which may skip the attack animation entirely. Additionally, some players fail to account for the brief cooldown between opening the camera interface and being able to capture the shot, missing the pose window.
Pro Strategy: If struggling with timing, practice the evasion and camera activation sequence against less challenging enemies first. The game’s photography mechanics remain consistent across various encounters, making this transferable skill valuable for future event challenges. Completing this specific task contributes significantly toward the Serenity Points threshold for premium rewards, making mastery particularly valuable for resource acquisition.
After successfully capturing the photograph, the Journey through Serenity event interface will immediately register task completion and award the corresponding Serenity Points to your account.
No reproduction without permission:SeeYouSoon Game Club » Infinity Nikki: How to take a photo of Competitive Belt raising arms and showing off strength Complete guide to photographing Competitive Belt's victory pose in Infinity Nikki with strategic combat tips and location details