TL;DR
- Complete two specific quests in Fellshrine Ruins during Acts 2 and 7 to unlock both systems
- Templar Relics provide permanent account-bound buffs but can only be equipped between Sanctum runs
- Accursed Pacts offer risk-reward choices that appear after Act 7 completion
- Relic Altar management requires finishing current runs before applying new relics
- Strategic relic and pact combinations significantly improve Sanctum success rates
Games and Esports Articles
The Forbidden Sanctum represents Path of Exile’s innovative 3.20 league mechanic, introducing rogue-like elements to the ARPG experience. This challenging system requires players to navigate through multi-room dungeons while managing a resolve meter that functions similarly to a health bar for the mechanic. Successfully completing Sanctum runs rewards powerful artifacts and currency, but accessing the full feature set demands careful attention to campaign progression.
Many players overlook the critical activation steps, resulting in missed optimization opportunities throughout their league journey. The mechanic’s progression is tied to two specific quests that must be completed during the main campaign, both located in the Fellshrine Ruins area but accessed during different acts. Proper activation ensures you can leverage all available tools for conquering this demanding content.
Your journey to mastering the Forbidden Sanctum begins early in Act 2 with the initial Templar Relics unlock. This crucial step requires visiting the Fellshrine Ruins location after first interacting with Divinia, the Sanctum NPC found in town hubs. The activation sequence follows a specific order: town dialogue followed by zone exploration.
When you locate the Sanctum entrance within Fellshrine Ruins during Act 2, the game automatically grants you several key benefits. You’ll receive your first Templar Relic artifact, gain access to the Relic Altar interface, and unlock the permanent account-wide buff system that enhances all future Sanctum attempts. This initial relic typically provides modest but valuable bonuses to help early progression.
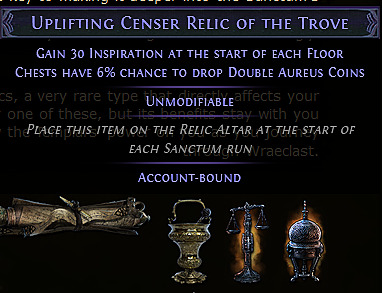
Templar Relics function as account-bound items that provide persistent buffs exclusively within Forbidden Sanctum encounters. These artifacts cannot be traded between players and accumulate throughout the league, creating personalized power progression. The relic system operates independently from your character’s gear, offering specialized enhancements tailored to Sanctum challenges.
Relics come in various rarities and types, each providing different combinations of beneficial effects. Common categories include resolve preservation bonuses, inspiration generation improvements, merchant cost reductions, and room reward enhancements. Strategic relic selection becomes increasingly important as you acquire more options and face harder Sanctum content.
Understanding relic synergies is crucial for advanced play. Some relics work exceptionally well together, creating powerful combinations that can dramatically improve your success rates in later floors. Planning your relic setup around your preferred playstyle and build strengths maximizes their effectiveness.
Many players encounter confusion when attempting to place their newly acquired Templar Relics into the Relic Altar. The common misconception involves believing this represents a game bug when the system simply follows specific mechanical rules. Your Relic Altar interface only permits modifications between completed Sanctum runs, not during active attempts.
If you unlock relics midway through an ongoing Sanctum attempt, you must first complete or abandon that run before accessing the altar. This design prevents players from adjusting their permanent buffs mid-challenge, maintaining the rogue-like integrity of the mechanic.
Troubleshooting relic placement issues involves checking your current Sanctum status. If you’re actively in a run, finish it first. If you’ve completed a run but still can’t access the altar, ensure you’ve properly exited the Sanctum and returned to a town or hideout area where the interface becomes available.
The second critical activation occurs during Act 7 when you return to Fellshrine Ruins for the campaign’s later stages. This visit unlocks the Accursed Pacts system, which introduces strategic risk-reward decisions to your Sanctum runs. Similar to the Act 2 process, locating the Sanctum entrance here triggers the feature unlock.
If the Accursed Pacts don’t activate immediately upon zone entry, prioritize speaking with Divinia in town first. This dialogue often serves as the necessary trigger before the zone interaction becomes effective.
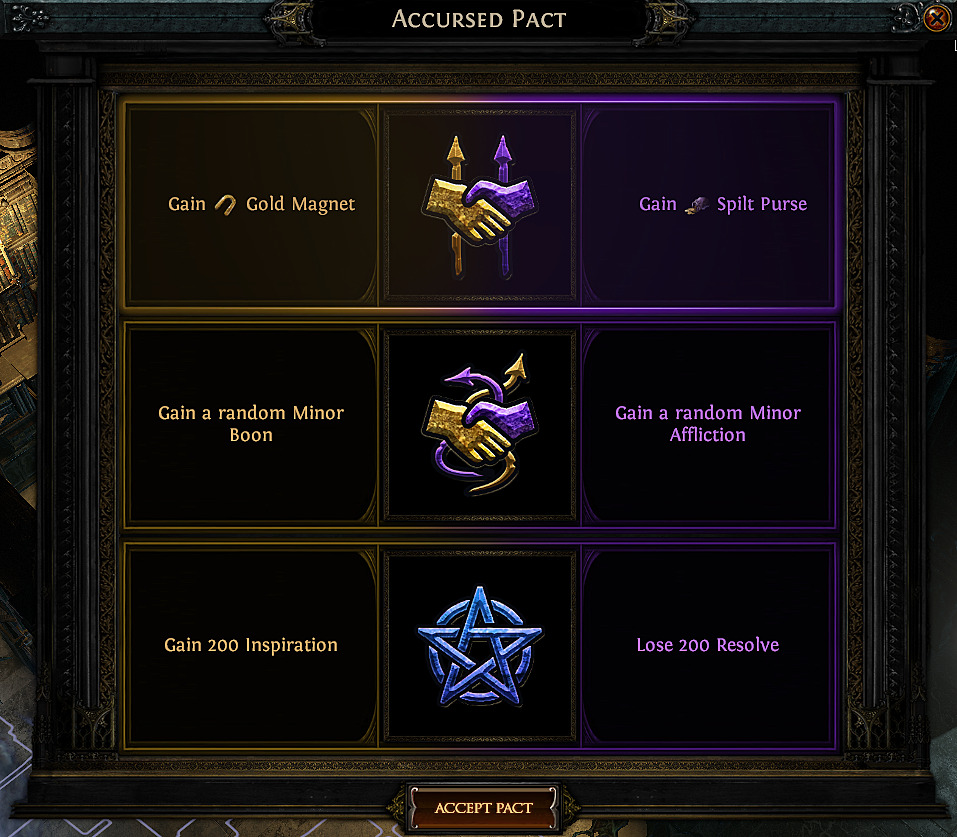
Accursed Pacts present as special room encounters within Sanctum runs, offering powerful benefits paired with significant drawbacks. These decisions require careful evaluation based on your current run status, build capabilities, and remaining resolve resources.
Mastering the Forbidden Sanctum involves more than just unlocking its systems; it requires strategic planning around relic combinations and pact selections. High-level players often create specialized relic sets for different Sanctum floor types or boss encounters. This targeted approach maximizes your chances of successful completion and optimal reward acquisition.
When approaching Accursed Pacts, consider your immediate needs versus long-term run sustainability. Some pacts provide temporary power spikes that can help overcome difficult rooms, while others offer gradual advantages that compound throughout the entire attempt.
Common optimization mistakes include overlooking relic synergy potential, taking pacts without evaluating their full implications, and failing to adjust strategies based on accumulated relics. Advanced players typically complete both activation quests within 4-6 hours of campaign playtime, ensuring they have access to both systems for the majority of their league experience.
For comprehensive guidance on character builds that excel in Sanctum content, check out our Class Guide which details optimal specialization choices. Additionally, our Weapons Unlock guide provides weapon progression strategies that complement Sanctum running efficiency.
Action Checklist
- Interact with Divinia in Act 2 town before visiting Fellshrine Ruins
- Locate and enter Sanctum in Fellshrine Ruins (Act 2) to unlock Templar Relics
- Complete current Sanctum run before attempting to place relics in altar
- Return to Fellshrine Ruins in Act 7 to unlock Accursed Pacts
- If pacts don’t unlock, speak with Divinia in Act 7 town first
- Develop relic synergy strategies based on your build and playstyle
No reproduction without permission:SeeYouSoon Game Club » How to unlock Templar Relics and Accursed Pacts in Forbidden Sanctum PoE 3.20 Complete guide to unlocking Templar Relics and Accursed Pacts in Path of Exile's Forbidden Sanctum league