TL;DR
- Activate Miku Sol checkpoints immediately for safe backtracking
- Prioritize learning enemy patterns over combat in early sections
- Create shortcuts by breaking barriers to optimize navigation efficiency
- Use D-Line transformations for linear path segments to save time
- Night Gale boss requires pattern recognition rather than brute force
Navigating the Sky-High Tree represents your first major traversal challenge in Shadow Labyrinth, testing both your platforming skills and navigational awareness. This sprawling vertical environment features multiple branching paths that can easily disorient unprepared players.
The Great Tree area becomes accessible after you defeat Orange G-HOST: Garbage Talos and acquire the GAIA form through G-Phase Shift activation. The initial sections follow a relatively straightforward design, but mastering enemy attack patterns becomes crucial as you progress eastward through unfamiliar territory.
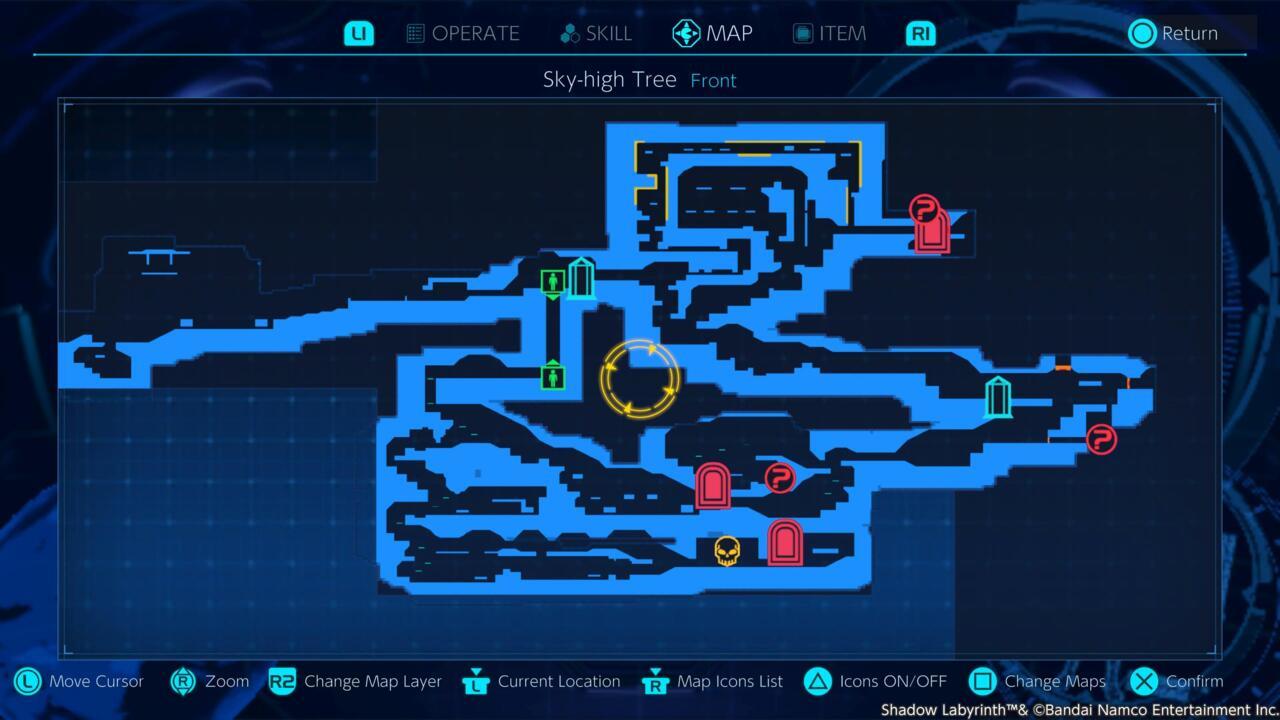
An overview of the first sprawling area of the Sky-high Tree (Front) region.
Many players struggle with the game’s intentionally cryptic map system, which often obscures critical pathways and platforming opportunities. Focus on environmental cues rather than relying solely on the minimap for navigation decisions.
Begin your ascent by following the eastern pathway until you reach an elevator descending underground. Immediately activate the Miku Sol checkpoint mechanism upon arrival—this creates a crucial safety net for potential backtracking needs and serves as your primary reference point throughout the climb.
Upon reaching the lower level, you’ll encounter a mysterious non-player character who provides an essential combat enhancement. This ability significantly improves your effectiveness against the area’s unique enemy types.
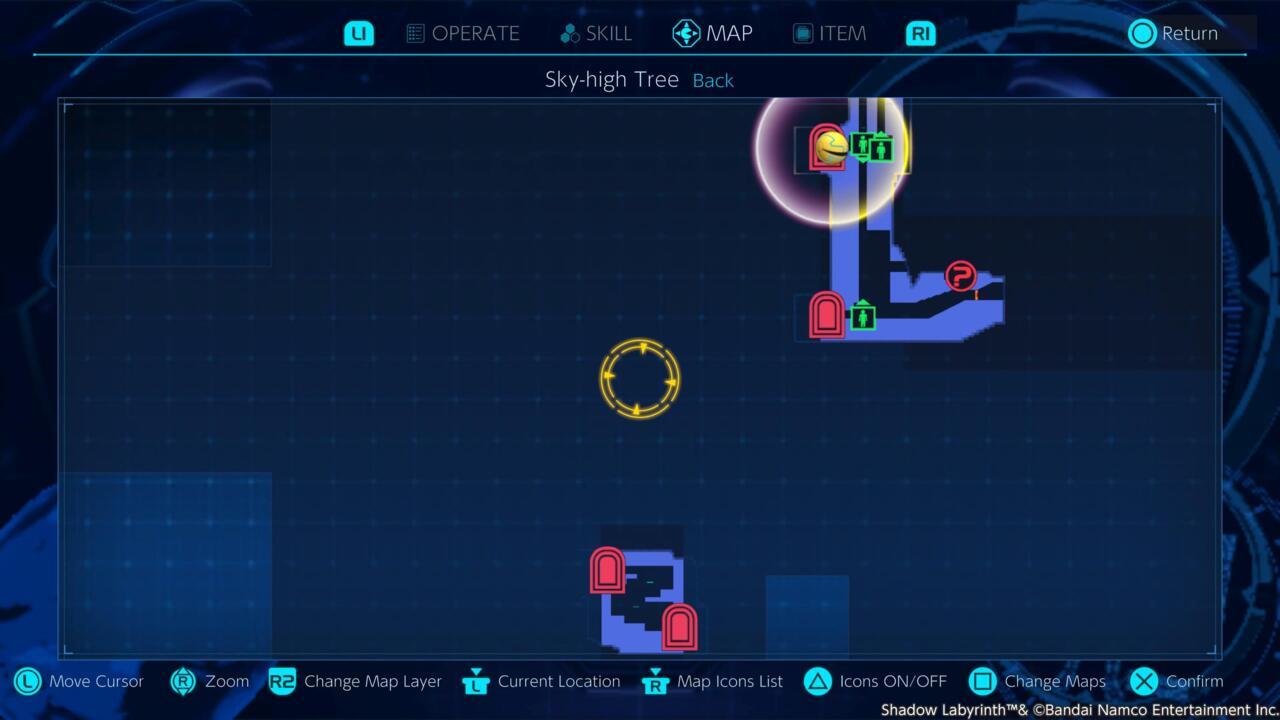
The starting path toward the top of the Sky-high Tree.
Common navigation errors include rushing through unfamiliar sections and overlooking subtle environmental indicators. Experienced players recommend methodical progression with frequent pauses to assess upcoming challenges.
From the vertical descent point, you face your first major directional decision: westward or eastward progression. For main objective completion, the eastern route provides the most direct path forward while minimizing unnecessary detours.
The eastern corridor introduces new bouncing platform mechanics alongside familiar enemy types from earlier zones. While combat may seem tempting, strategic evasion often proves more efficient for maintaining momentum.
Make sure to use the door to get to the back of the Sky-high Tree, which takes you to the lifts.
Advanced players should note that the western path contains valuable resource caches but extends travel time considerably. Balance exploration with progression based on your current resource needs and confidence level.
Once positioned on the western map extremity, initiate your vertical ascent using the Miku Sol checkpoint as orientation. Navigate the bouncing platforms while strategically engaging or avoiding aerial insects and floral adversaries.
Upon reaching the summit, you encounter another branching path scenario. The western route leads directly to your starting area near the elevator—destroy the obstruction to establish a valuable shortcut enabling checkpoint reuse.
Use the vines as visual references to continue moving upwards.
After creating this time-saving passage, return to your previous position and select the alternative eastern route. This pathway guides you through constricted tunnels populated with spiked opponents requiring careful, deliberate engagement.
Progress cautiously through the narrow passages, eliminating spiked enemies systematically while maintaining upward trajectory. You’ll eventually access another D-Line transformation sequence, converting your character into the classic Pac-Man sphere formation for linear segment navigation.
When in doubt, stick to the D-Line.
As you near the pathway conclusion, identify the critical rightward branching path—avoid the leftward optional area diversion to maintain objective focus.
Night Gale is, actually, quite a straightforward fight. You got this.
The Night Gale confrontation rewards pattern recognition over aggressive tactics. Study attack telegraphs and identify safe positioning opportunities between offensive sequences.
After the Night Gale fight, head to the right and follow the new path downwards.
Success against Night Gale grants essential mobility capabilities for subsequent labyrinth exploration. This victory represents a significant progression milestone in your Shadow Labyrinth journey.
Action Checklist
- Activate Miku Sol checkpoint immediately upon discovery
- Acquire combat enhancement from underground NPC
- Establish shortcut by breaking barrier near starting elevator
- Navigate narrow tunnels with deliberate enemy engagement
- Utilize D-Line transformation for linear path efficiency
- Defeat Night Gale using pattern recognition strategy
No reproduction without permission:SeeYouSoon Game Club » How To Get Through The Great Tree In Shadow Labyrinth Master the Sky-High Tree traversal with expert navigation tips and boss strategies