Expert strategies to defeat the Wailing Effigy boss and maximize loot in Tainted Grail: The Fall of Avalon
Understanding the Wailing Effigy Encounter
Tainted Grail: The Fall of Avalon introduces numerous distinctive adversaries from the very beginning within the Island Asylum prologue zone. Among these challenging encounters, the Wailing Effigy stands out as a completely optional boss that many players might overlook if they rush directly toward the exit. Successfully overcoming this formidable opponent not only provides an excellent preview of the combat challenges awaiting in later stages, but also grants exclusive equipment that significantly enhances your capabilities during the initial exploration of Avalon.
Navigating to this hidden foe requires careful exploration rather than following the main path. When you descend the staircase in the asylum area, immediately identify the unmarked doorway positioned to your left. This concealed entrance leads directly to the chamber housing the Wailing Effigy, making thorough environmental scanning crucial for discovery.
Engaging this boss early delivers substantial gameplay benefits beyond mere combat experience. The unique loot obtained creates meaningful power spikes that smooth progression through subsequent challenging areas, while the encounter itself teaches essential mechanics like stamina management, positioning, and attack pattern recognition that remain relevant throughout the entire game.
Combat Mechanics and Attack Patterns
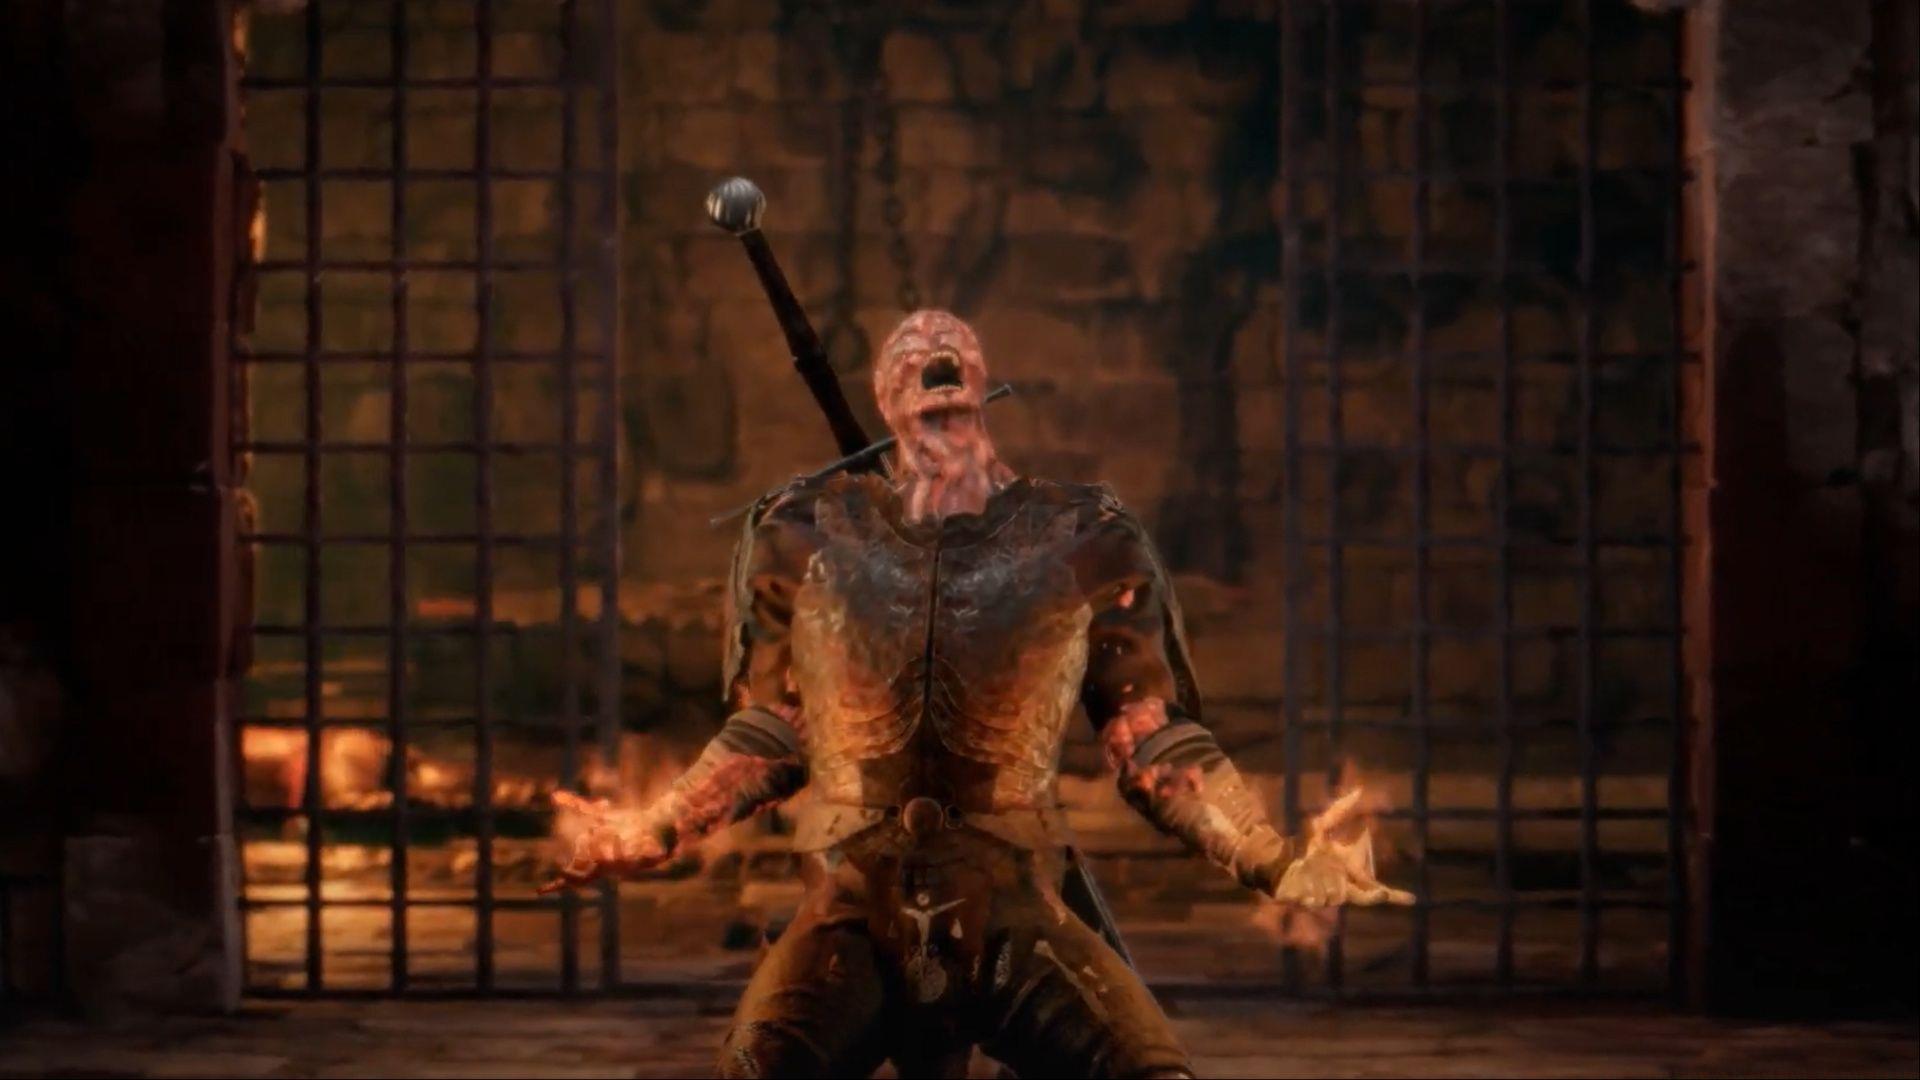
The Wailing Effigy employs a deliberately limited but deadly moveset that demands precise reaction timing and spatial awareness. Understanding these attack patterns forms the foundation of any successful engagement strategy.
This aggressive opponent primarily utilizes two distinct combat approaches:
- Close-range sword assaults featuring rapid closing speed and multi-hit combos that can quickly deplete health bars
- Mid-to-long distance fireball projectiles that track player movement and explode on impact, dealing area damage
Movement behavior represents a critical factor in this encounter. The creature demonstrates surprising agility despite its monstrous appearance, capable of quickly closing gaps when players retreat. This mobility necessitates constant vigilance and strategic stamina allocation, as excessive dodging can leave you vulnerable when energy reserves deplete.
Environmental considerations dramatically impact combat effectiveness. The confined chamber offers limited maneuvering space, with only a few structural pillars providing temporary cover from projectile attacks. However, these same environmental elements can be used against the boss when mastered, creating brief windows for healing or counter-attacks.
Advanced Combat Strategies
Mastering the Wailing Effigy encounter requires adapting your approach based on character build, available resources, and personal playstyle preferences. These advanced tactics significantly increase success probability while reducing resource consumption.
Optimal Positioning Techniques: Rather than remaining static, employ constant lateral movement to avoid fireball tracking. Use the chamber’s pillars as temporary shields while regenerating stamina, but never remain stationary behind them for extended periods as the boss will flank your position. When the Effigy initiates its sword combo, dodge diagonally toward its flank rather than directly backward to maintain offensive opportunities.
Resource Management Principles: Always enter this encounter with at least 5-7 healing consumables, regardless of your build type. Magic-focused characters should prioritize mana conservation for shield spells or interruption abilities, while melee specialists need durability enhancements and stamina regeneration items. Time your healing during the boss’s attack recovery animations rather than during active assault phases.
Build-Specific Approaches: Magic users should maintain maximum distance while exploiting the boss’s fireball cooldown periods for spellcasting. Melee fighters need to master the dodge-roll counterattack rhythm, striking immediately after avoiding sword swings. Hybrid builds can alternate between ranged harassment and opportunistic close-range strikes when the Effigy commits to spellcasting animations.
Alternative Tactics and Cheese Methods
When standard combat approaches prove insufficient, particularly on elevated difficulty settings, several alternative strategies can secure victory through environmental manipulation and AI exploitation.
Environmental Exploitation: The narrow passageway branching right from the staircase leading to the Wailing Effigy’s chamber provides a significant tactical advantage. This constricted space limits the boss’s mobility and attack angles, allowing players to land safe attacks while minimizing exposure. Position yourself at the passage entrance, striking when the Effigy approaches, then retreating beyond its effective range.
NPC Assistance Tactics: Luring the creature upward toward Cordac represents another viable strategy. This NPC possesses substantial combat capabilities and will aggressively engage the Wailing Effigy on detection. While this approach reduces personal combat experience gains, it virtually guarantees victory with minimal resource expenditure. Position yourself between the boss and staircase, then gradually retreat upward while maintaining aggro.
Difficulty-Specific Considerations: Higher difficulty settings dramatically increase the Wailing Effigy’s damage output and aggression levels. On these challenging modes, hit-and-run tactics become essential rather than optional. Engage briefly with quick attacks, then immediately create distance before the boss initiates its counterattack sequences. Patience outweighs aggression in these scenarios.
Reward Analysis and Progression Impact
Victory against the Wailing Effigy yields substantial rewards that significantly impact early-game progression, making the challenging encounter worthwhile for most playstyles.
Upon defeating this formidable foe, thoroughly search its remains to acquire multiple valuable items. The most notable equipment includes:
- Dull Broadsword: A substantial two-handed melee weapon offering superior damage output compared to early-game alternatives, particularly effective against armored opponents
- Grief Torn Armor: Chest protection featuring a respectable 2.0 Armor Rating that provides meaningful damage reduction during subsequent encounters
Beyond tangible equipment, the corpse also contains a narrative note detailing the tragic backstory of this once-human entity. This lore fragment enhances world-building while providing context for the creature’s torment-driven aggression.
From a progression standpoint, these equipment upgrades create noticeable power spikes that smooth difficulty curves in immediately subsequent areas. The armor’s protection values remain competitive through multiple following zones, while the broadsword’s damage output surpasses most readily available weapons for several hours of gameplay.
Tainted Grail: The Fall of Avalon continues to challenge adventurers across PC, PlayStation 5, and Xbox Series X|S platforms, with the Wailing Effigy serving as an excellent introduction to the game’s sophisticated combat mechanics.
No reproduction without permission:SeeYouSoon Game Club » How to defeat the Wailing Effigy in Tainted Grail: The Fall of Avalon Expert strategies to defeat the Wailing Effigy boss and maximize loot in Tainted Grail: The Fall of Avalon