Master Outriders’ toughest bosses with expert strategies and combat insights
Introduction to Outriders Boss Battles
Outriders presents some of the most challenging boss encounters in modern looter-shooters, each requiring unique strategies beyond simple gunplay. This guide breaks down the four most formidable adversaries – Gauss, Molten Acari, Moloch, and Yagak – with combat-tested tactics refined through extensive playtesting.
Pro Tip: Boss fights follow distinct phase transitions at 75%, 50%, and 25% health thresholds – prepare for ability changes at each breakpoint.
Unlike standard enemies, Outriders’ bosses feature complex attack patterns that punish reckless play. Our analysis covers optimal positioning, ability rotations, and gear choices for each class. Whether you’re a solo player or running co-op, these insights will transform your approach to endgame content.
Gauss: The Rift Town Showdown
 Square Enix
Gauss serves as your first real test of combat mastery in Outriders. Location: The Solar Tower platform in Rift Town becomes your proving ground against this electrokinetic warlord.
Gauss employs three distinct combat phases, each introducing new mechanics. Phase 1 focuses on area denial with electric fields – stay mobile and use cover effectively. When his health drops below 75%, he’ll activate Steel Wall defense while summoning adds. Critical Mistake: Wasting ammo during Steel Wall – use this time to revive teammates instead.
For Technomancers, equip freeze mods to disrupt his mobility. Pyromancers should focus on burn stacking during vulnerable windows. Always maintain at least one long-range specialist in your team to handle adds and chip away at Gauss during his mobile phases.
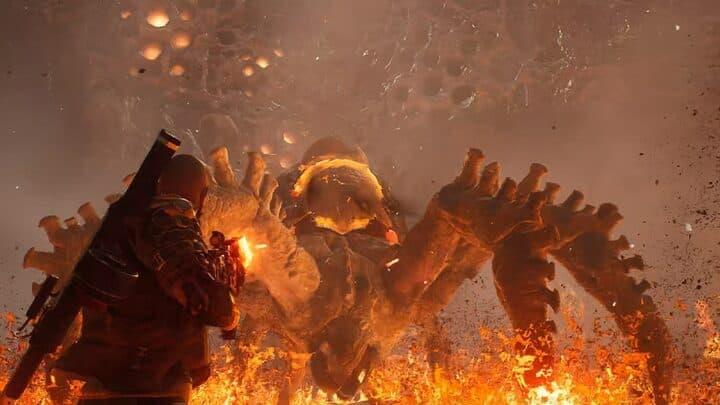
Molten Acari: The Volcanic Terror
 Square Enix
The Molten Acari’s lava-based attacks require constant environmental awareness. Location: Deep within the volcanic region, this arachnid horror uses terrain to its advantage.
Phase transitions trigger when you reduce its health to 66% and 33%. The second phase spawns spiderlings – prioritize eliminating them for health regeneration. Pro Tactics: Equip armor with fire resistance and use the roll button (B/Circle) to evade ground slams. The glowing abdomen weak point takes 40% more damage – time your shots when it exposes this area.
For Devastators, Earthquake works wonders against spiderlings. Tricksters should use Temporal Blade to hit the weak point during attack animations. Always watch for blue floor markers indicating impending lava bursts – these deal massive damage if not avoided.
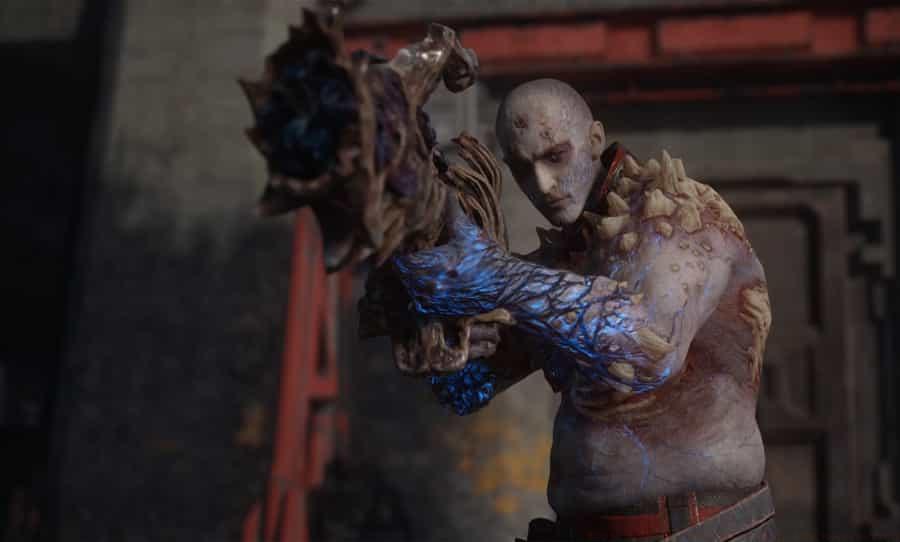
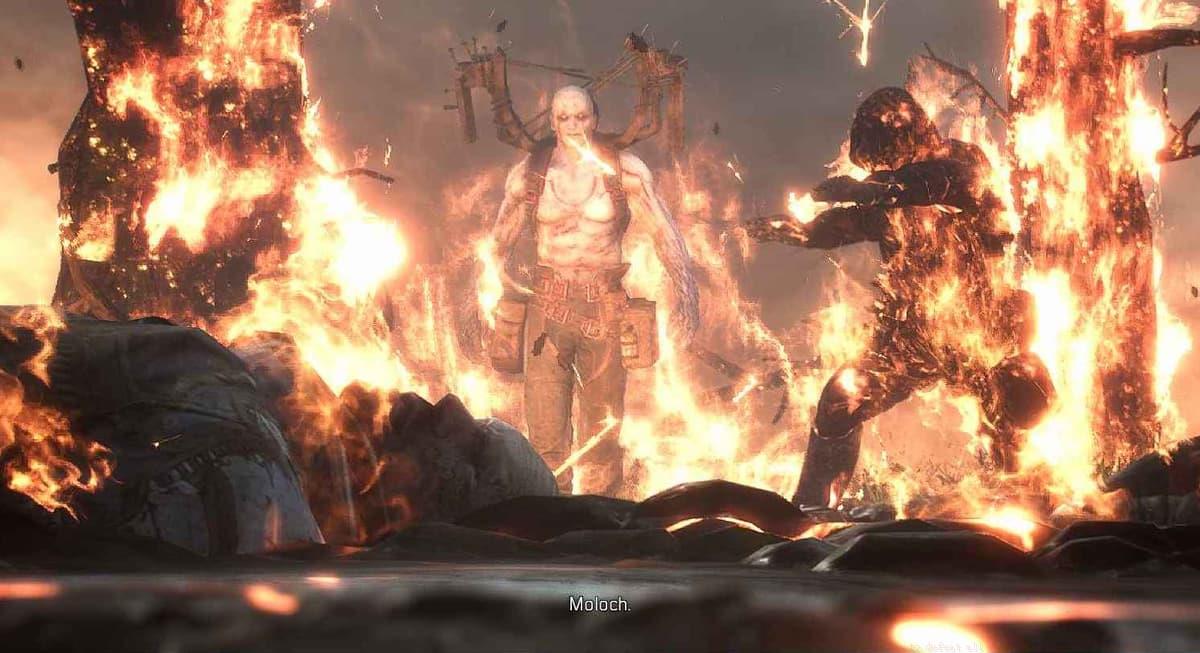
Moloch: Trench Town’s Fire Demon
 Square Enix
Moloch’s unpredictable teleportation makes him particularly dangerous in close quarters. Location: Trench Town’s confined spaces amplify his fire-based assaults.
The corpse on Moloch’s back serves as his weak point – sniper shots here deal critical damage. Team Strategy: Assign one player to call out teleports while others maintain distance. Fire Tornadoes can be avoided by sprinting perpendicular to their path. When Insurgents spawn, eliminate them quickly for health boosts – they’re especially vulnerable to AOE attacks.
Pyromancers excel here with Ash Blast to interrupt Moloch’s channeled abilities. All classes should equip at least 30% fire resistance – the Thermal Armor mod works exceptionally well. Never cluster together, as his area attacks can wipe an unprepared team instantly.
Yagak: The Final Confrontation
 Square Enix
Yagak’s dual-stage battle tests everything you’ve learned. Location: The fight begins on Utargak before moving to The Caravel for the climax.
Anomaly Rifts are your top priority – they deal stacking damage if left unchecked. Advanced Technique: Assign one player with high mobility to rift duty while others focus Yagak. Sand Wyrm attacks are telegraphed by blue floor markers – rolling at the last second provides invincibility frames. Headshots deal 2.5x damage during his vulnerable phases.
Tricksters should save Time Rift for when Yagak begins channeling. Devastators can use Gravity Leap to avoid ground effects. Since no adds spawn, equip gear with Skill Leech to sustain your health throughout this endurance battle.
Advanced Boss Combat Mastery
Mastering these bosses requires understanding their attack patterns and adapting your build accordingly. Key Takeaways: Always watch for phase transitions, communicate constantly in co-op, and don’t neglect defensive stats for glass cannon builds.
For those seeking greater challenges, experiment with different class combinations in co-op. A Technomancer’s healing combined with a Pyromancer’s damage-over-time effects can create powerful synergies against these formidable foes.
No reproduction without permission:SeeYouSoon Game Club » How to defeat all Outriders bosses, from Gauss to Yagak Master Outriders' toughest bosses with expert strategies and combat insights