TL;DR
- Navigate to Nintendo Switch Online icon on home screen and select user profile
- Access account settings through avatar icon and locate auto-renewal management
- Disable automatic renewal to prevent future charges while keeping current access
- Your subscription remains active until expiration date after cancellation
- Consider timing cancellation strategically to maximize remaining subscription value
When it comes time to manage your gaming subscriptions, knowing how to properly cancel Nintendo Switch Online on your Switch 2 console is essential for avoiding unwanted charges. While the service provides excellent value for online multiplayer and classic game libraries, various circumstances might necessitate cancellation—from budget adjustments to shifting gaming priorities.
Nintendo Switch Online delivers tremendous benefits for gamers seeking online multiplayer capabilities with friends or access to the expanding retro gaming catalog that now includes GameCube titles. However, there are multiple scenarios where you might need to terminate your membership or disable the automatic renewal function to prevent recurring billing. The process can be completed directly through your Nintendo Switch 2 interface, offering straightforward account management.
Access account management through your user profile settings.
Pro Tip: Before canceling, evaluate whether you might benefit from our Class Guide to maximize your remaining subscription time with optimized gameplay strategies.
Initiating the cancellation procedure requires precise navigation through your Switch 2’s interface. Begin by locating the Nintendo Switch Online application icon positioned on your console’s home screen. This distinctive icon typically occupies the first position in your software row, making identification straightforward.
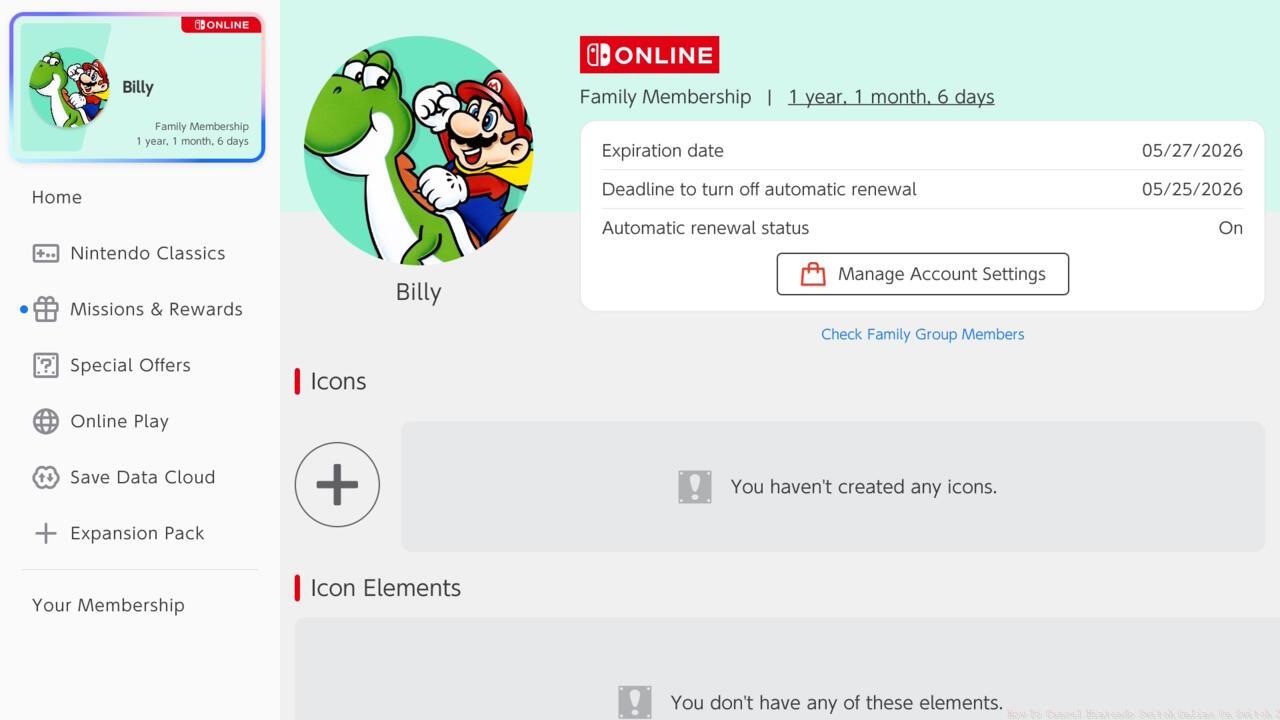
Once you’ve selected the specific user profile associated with the active Nintendo Switch Online subscription, proceed by clicking your personalized avatar situated at the screen’s upper-left corner. Subsequently, select the Manage Account Settings option visible within the subscription information panel.
The subsequent screen displays the crucial “Cancel Your Subscription By Turning Off Automatic Renewal” selection. Activating this option generates a confirmation dialogue box verifying your intent to disable automatic renewal functionality. To finalize the cancellation process, confidently click the Turn Off Automatic Renewal button within this prompt window.
Expert Insight: For comprehensive gaming guidance beyond subscription management, explore our Complete Guide covering various aspects of modern gaming platforms.
Many users mistakenly believe cancellation immediately terminates their service access. In reality, your current Nintendo Switch Online membership remains fully operational until its predetermined expiration date. This grace period allows you to continue enjoying online features and game libraries while preventing future billing cycles.
Avoid These Errors: Failing to verify the cancellation confirmation message often leads to uncertainty about successful processing. Always ensure you receive the final confirmation before exiting the settings menu. Additionally, family plan administrators must understand that canceling individual memberships differs from terminating the entire family group subscription.
Troubleshooting Note: If you encounter difficulties locating the auto-renewal option, verify that you’re signed into the correct Nintendo Account associated with the active subscription. Cross-reference your account details through Nintendo’s official website if console navigation proves challenging.
Weapons Reference: While managing your subscription, you might want to check our Weapons Unlock guide to enhance your gameplay during your remaining subscription period.
Before completely canceling your Nintendo Switch Online subscription, consider these strategic alternatives that might better suit your gaming needs while maintaining access to essential features.
Subscription Timing: Strategically schedule your cancellation to maximize value from your current billing cycle. Plan to disable auto-renewal approximately one week before your renewal date to ensure processing time while utilizing paid services fully.
Downgrading Options: If cost is the primary concern, investigate transitioning from an Expansion Pack to the standard Nintendo Switch Online tier. This maintains basic online functionality while reducing monthly or annual expenses significantly.
Reactivation Process: Should you decide to resume Nintendo Switch Online in the future, the reactivation procedure is equally straightforward. Simply revisit the Nintendo Switch Online application and follow the prompts to re-enable your subscription features.
Final Recommendation: Document your cancellation date and subscription expiration for future reference. This documentation proves valuable if billing discrepancies arise or when planning future gaming subscription reactivation.
Action Checklist
- Navigate to Nintendo Switch Online icon on home screen and select user profile
- Click avatar icon and access Manage Account Settings
- Locate and select ‘Cancel Subscription By Turning Off Automatic Renewal’
- Confirm cancellation in pop-up dialogue by selecting Turn Off Automatic Renewal
- Note subscription expiration date and verify cancellation confirmation
No reproduction without permission:SeeYouSoon Game Club » How To Cancel Nintendo Switch Online On Switch 2 Complete guide to canceling Nintendo Switch Online on Switch 2 with pro tips and alternatives