TL;DR
- Break bars require strategic damage application, not just raw damage output
- Weak point attacks and specific skills dramatically accelerate break bar filling
- Successfully breaking enemies provides 20% damage boost and often stuns them
- Boss encounters benefit most from break mechanics for turn interruption
- Proper timing and skill selection are crucial for effective break execution
How to strategically stun bosses and dramatically boost your damage output
The break bar system in Clair Obscur: Expedition 33 represents a crucial tactical element when facing the game’s more formidable opponents. This golden bar beneath enemy health indicators serves dual purposes: significantly amplifying your damage potential while simultaneously protecting your party from devastating enemy turns. Many players struggle to fully grasp this mechanic due to its nuanced activation requirements and the fact that standard enemies rarely survive long enough to demonstrate its full potential.
In this comprehensive Expedition 33 break bar guide, we’ll provide detailed strategies for effectively breaking enemies, including advanced techniques for filling the break bar efficiently and maximizing the benefits when you successfully trigger the break status.
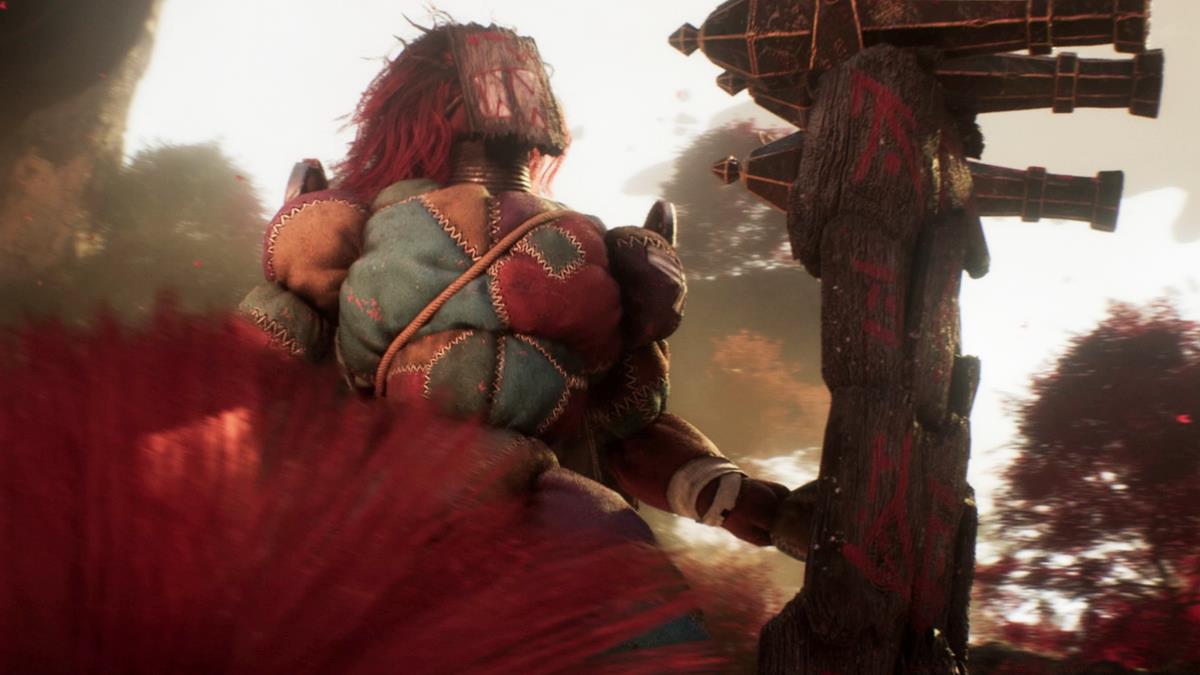
As you engage enemies throughout Expedition 33, you’ll gradually fill a distinctive gold bar positioned beneath their health indicator (clearly visible in the provided images). Understanding what truly fills this bar—beyond basic damage dealing—is essential for mastering this mechanic.
While the in-game expedition basics suggest break bar filling correlates directly with damage dealt, our extensive testing reveals a more complex reality. Many standard enemies perish long before their break bars reach maximum capacity, indicating that specific damage types and targeting strategies prove far more effective. Precision strikes against weak points using free aim attacks generate substantially higher break bar progression compared to standard attacks, making targeted aiming crucial for break-focused strategies.
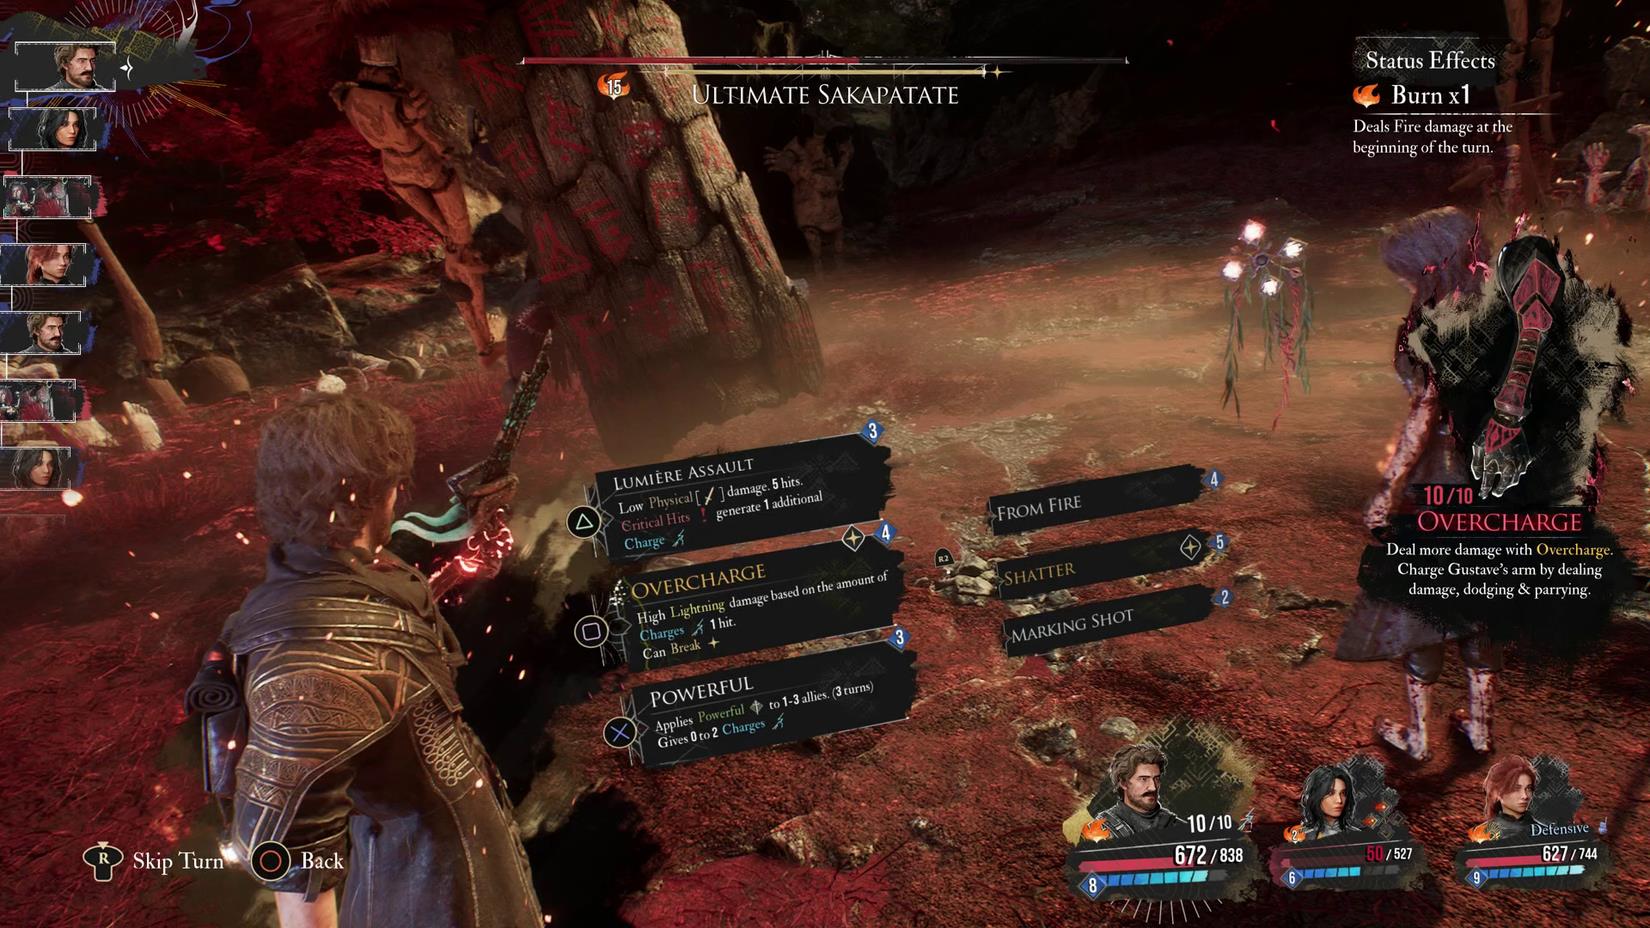
Image: Sandfall Interactive/Kepler Interactive via Polygon
Common Break Bar Filling Mistakes:
- Prioritizing raw damage over precision weak point strikes
- Wasting break-enabled skills on unfilled break bars
- Ignoring enemy attack patterns that create break opportunities
- Failing to coordinate team attacks for break bar acceleration
Once you’ve completely filled an enemy’s break bar, a small star icon materializes to the right of the bar, signaling vulnerability to the break status effect. Triggering this effect requires specific skills explicitly designated with break capabilities—standard attacks won’t activate it even against fully charged break bars.
Gustave’s Overcharge ability serves as a prime example, explicitly stating it “can break” and displaying a distinctive gold diamond icon beside its name. Using this attack against enemies with fully charged break bars instantly applies the break status. However, many break-capable skills demand additional conditions beyond simple activation. Lune’s Mayhem skill exemplifies this complexity, requiring consumption of four stains during execution to unlock its break potential.
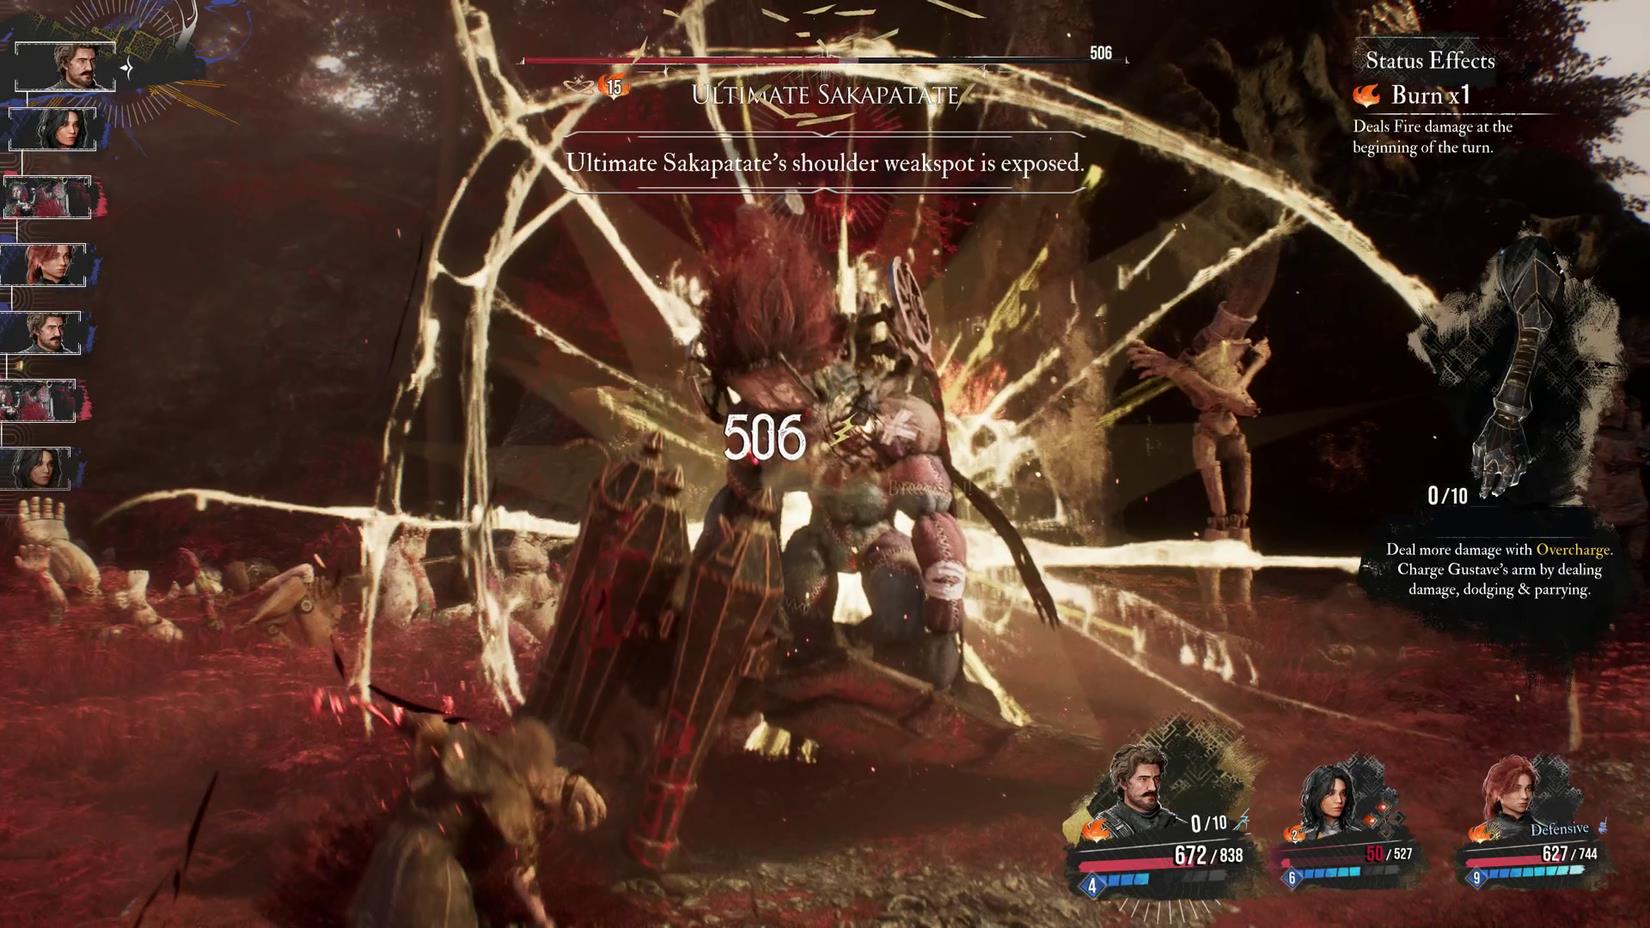
Image: Sandfall Interactive/Kepler Interactive via Polygon
Advanced Break Execution Techniques:
- Time break attempts during enemy charge-up animations for maximum impact
- Coordinate break skills with party members’ buffs and debuffs
- Conserve break-capable skills for when break bars are fully charged
- Experiment with different character combinations to discover synergistic break strategies
For players seeking comprehensive character guidance, our Class Guide provides detailed breakdowns of each expedition member’s capabilities and how they contribute to break strategies.
The considerable effort required to break enemies delivers substantial combat advantages. Broken enemies suffer 20% additional damage from all sources throughout the break duration, significantly accelerating boss encounters. Most adversaries—though not universally—also experience stunning, causing them to forfeit their subsequent turn entirely. This turn manipulation enables your entire party to potentially act twice consecutively, depending on individual speed attributes and proper turn order management.
Break status effects occur relatively infrequently during standard gameplay, as most common enemies succumb to damage well before their break bars reach maximum capacity, let alone survive the breaking attack itself. This mechanic truly shines during extended boss engagements, where interrupting enemy attack sequences provides tremendous defensive and offensive value.
Boss-Specific Break Strategies:
- Study boss attack patterns to identify optimal break timing windows
- Prioritize breaking during powerful multi-turn attack preparations
- Coordinate break attempts with party-wide damage amplification abilities
- Use break stuns to safely revive fallen party members or apply healing
For additional Expedition 33 strategic guidance, explore our Complete Guide covering fundamental gameplay systems and our Weapons Unlock guide for optimizing your damage-dealing capabilities.
Breaking represents one of Expedition 33’s most sophisticated combat mechanics, transforming challenging encounters through proper understanding and execution. Mastering these techniques will significantly enhance your performance against the game’s most demanding adversaries.
Action Checklist
- Identify enemy weak points and prioritize precision strikes for faster break bar filling
- Learn which character skills have break capabilities and their activation requirements
- Practice timing break attempts during enemy charge animations for maximum impact
- Coordinate break sequences with party members’ buffs and debuffs for damage amplification
- Master turn order manipulation following successful breaks for consecutive actions
No reproduction without permission:SeeYouSoon Game Club » How to break enemies in Clair Obscur: Expedition 33 Master the break bar mechanics in Expedition 33 to stun bosses and maximize damage output effectively