TL;DR
- Devastators are heavily armored Automatons vulnerable only to face/waist shots
- Find them in Automaton red zones, especially Malevelon Creek on Easy+ difficulty
- Use armor-piercing weapons like Breaker shotgun or Anti-Material Rifle
- Deploy strategic Stratagems for solo play and efficient farming
- Avoid confusing chainsaw-handed bots that don’t count for kill missions
Mastering the elimination of Devastators in Helldivers 2 requires understanding their tactical role within the Automaton hierarchy.
When you receive the mission objective to eliminate 15 Devastators, you’re facing one of the first major escalation threats in the Automaton forces. For veterans who’ve been holding the line at notorious fronts like Malevelon Creek, these armored units represent the transition from basic infantry to serious combat challenges. While standard Automatons present manageable threats, Devastators introduce the need for tactical weapon selection and precision targeting.
Devastators function as the armored vanguard of Automaton forces, featuring comprehensive plating that protects all areas except their distinctive glowing facial components. They typically wield automatic rifle systems, but their primary danger stems from their resilience against conventional small arms fire that would easily dispatch their skeletal counterparts.

Visual reference: A neutralized Devastator unit displaying its armored construction and vulnerable facial target.
Crucial identification note: The larger automatons equipped with chainsaw appendages do not qualify as Devastators for mission completion purposes. Focus your engagement on the standard armored variants with rifle weaponry when working toward Personal Order objectives.
When operating against Automaton forces, you’ll encounter Devastators across multiple engagement scenarios. They represent the secondary tier of enemy units and frequently deploy as reinforcements during Bot Drop incidents or while conducting planetary patrol operations.
Strategic deployment to Automaton-controlled red sectors provides optimal Devastator encounter rates.
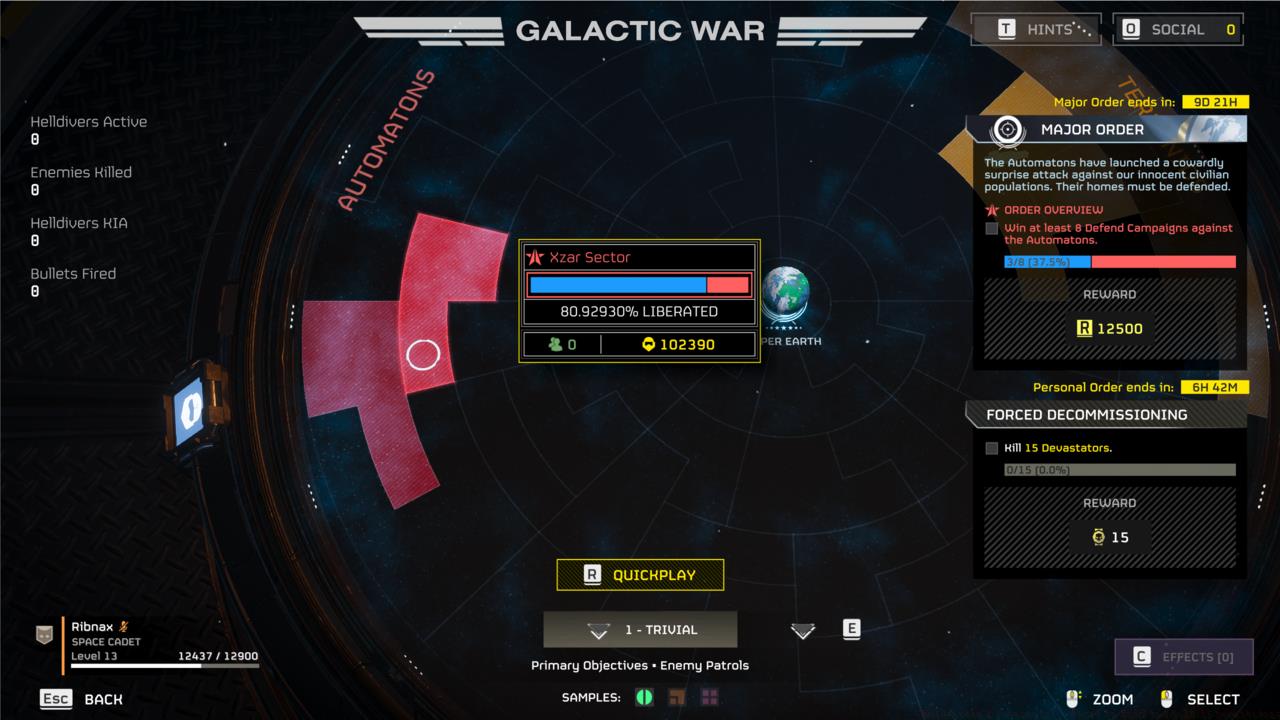
Navigation guidance: The Automaton warfront (displayed in red) indicates primary hunting territories for Devastator elimination missions.
Any planetary body within red zones offers Devastator engagement opportunities, with Malevelon Creek standing as the most recognized combat theater. While occasional sightings occur on Trivial difficulty settings, substantial concentrations appear during Defend mission types starting at Easy difficulty and escalating with challenge level.
Advanced Farming Strategy: For efficient 15-kill mission completion, prioritize Defend missions on Medium difficulty where Devastator spawn rates increase significantly without introducing overwhelming heavy support units. Mission duration typically ranges from 12-18 minutes for optimal farming efficiency.
Devastators present two primary vulnerability points that experienced Helldivers leverage. Their facial region lacks armor protection (a tactical oversight shared by numerous adversaries of democratic values) while their waist junction offers a secondary structural weakness that causes rapid disassembly when targeted. I consistently employ the Breaker automatic shotgun available through the standard Warbond system for rapid neutralization, though various armaments including grenade launchers and other explosive or armor-penetrating systems (such as the outstanding Anti-Material Rifle) prove equally effective.
For solo operations, I strongly advise incorporating elite Helldivers 2 Stratagems including the Guard Dog ‘Rover’ companion unit alongside automated defense systems like Gatling Sentry, Machine Gun Sentry, and Mortar Sentry deployments. Position these assets at elevated vantage points to establish overlapping fields of fire, significantly simplifying civilian extraction protocols while minimizing exposure risks—provided you avoid catastrophic detonations or accidental friendly fire incidents.
Common Tactical Errors to Avoid:
- Wasting primary ammunition on armored body sections
- Underestimating their reinforcement frequency during defense missions
- Failing to prioritize Devastators over less threatening units
- Neglecting to bring armor-piercing capabilities to engagements
Advanced Loadout Configuration: Combine the Breaker shotgun with Eagle 500kg Bomb Stratagem for crowd control, and always pack at least one armor-penetrating secondary weapon. Team coordination should designate one member with explosive specialization while others handle precision targeting of Devastator weak points.
Action Checklist
- Select Automaton red zone planet (Malevelon Creek recommended)
- Configure loadout with Breaker shotgun and armor-piercing secondary
- Deploy defensive Stratagems at high ground positions
- Focus fire on facial weak points or waist structural junctions
- Prioritize Defend missions on Medium difficulty for optimal spawn rates
No reproduction without permission:SeeYouSoon Game Club » Helldivers 2 Devastator – Where To Find And Kill 15 Devastators Master Devastator elimination in Helldivers 2 with expert tactics, optimal loadouts, and mission strategies