TL;DR
- The Terrorbyte requires careful drone elimination before accessing its hacking equipment
- Strategic positioning and cover usage are essential against armed drone waves
- The laptop target is consistently located near the Ferris wheel at the pier
- Stealth approaches prevent unnecessary combat during laptop acquisition
- Proper mission sequencing saves significant time and resources
Successfully completing the Breaking and Entering mission in GTA Online’s Cluckin’ Bell Farm Raid demands acquiring two critical assets: the heavily armored Terrorbyte vehicle and a cartel intelligence laptop. These items serve distinct but equally vital roles in advancing through the heist narrative.
At mission initiation, you’ll face a strategic choice between pursuing the Terrorbyte’s specialized hacking equipment or the intelligence-rich laptop first. The Terrorbyte houses advanced electronic warfare tools necessary for subsequent operations, while the laptop contains encrypted cartel data that Vincent urgently requires. Your selection order can impact mission efficiency and difficulty.
Understanding the core mechanics of this mission will significantly enhance your performance. The Terrorbyte acquisition involves combat sequences, while the laptop retrieval emphasizes stealth and precision timing. Planning your approach based on your combat preferences and available equipment is crucial for optimal results.
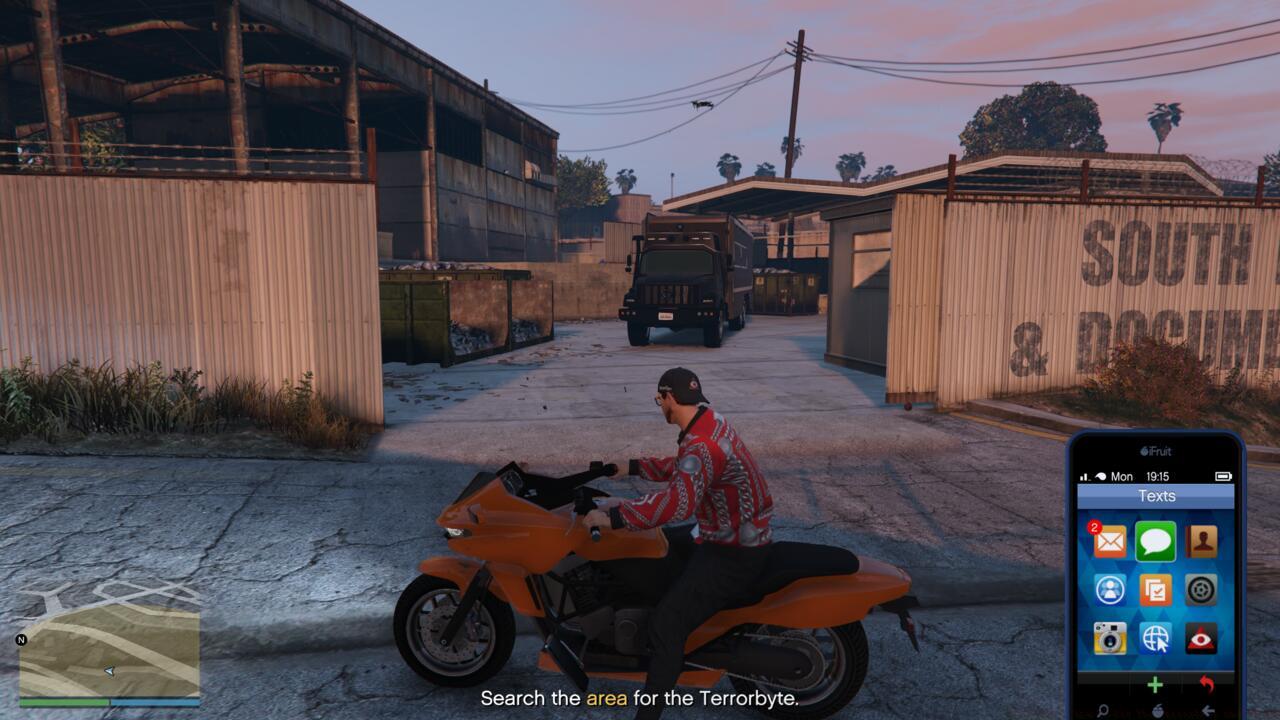
Navigating to the Terrorbyte begins with tracking the distinctive blue bus icon on your mini-map, which directs you to the warehouse district’s central area. The search zone is clearly marked in yellow, requiring systematic exploration within these boundaries to locate the vehicle concealed in plain sight.
Within the designated search area, follow the primary roadway southward while scanning side streets on your right. The Terrorbyte consistently spawns between industrial structures adjacent to a warehouse, positioned strategically near a dumpster for camouflage. This predictable placement allows experienced players to proceed directly to the location.
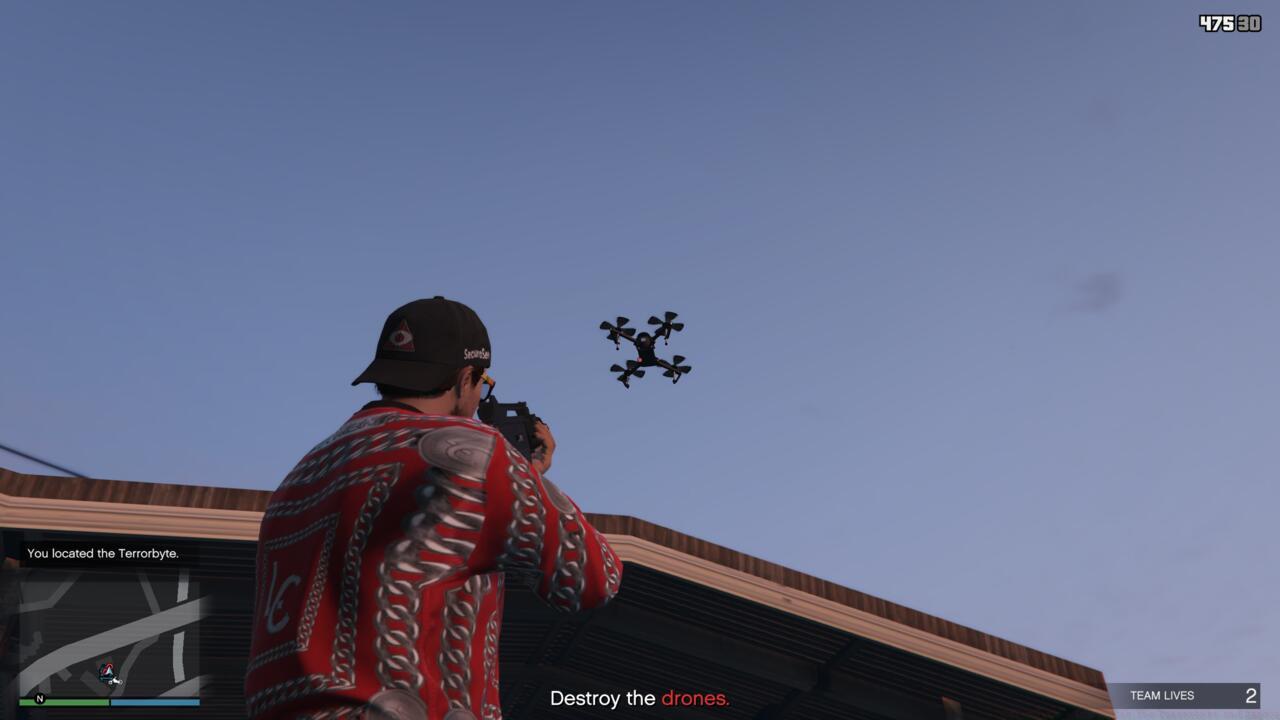
Upon approaching the vehicle, you’ll encounter aerial drones providing security coverage. The initial drones remain stationary and vulnerable, but subsequent waves feature aggressively armed units with mounted machine guns. Employing cover effectively becomes essential for survival during these escalating engagements.
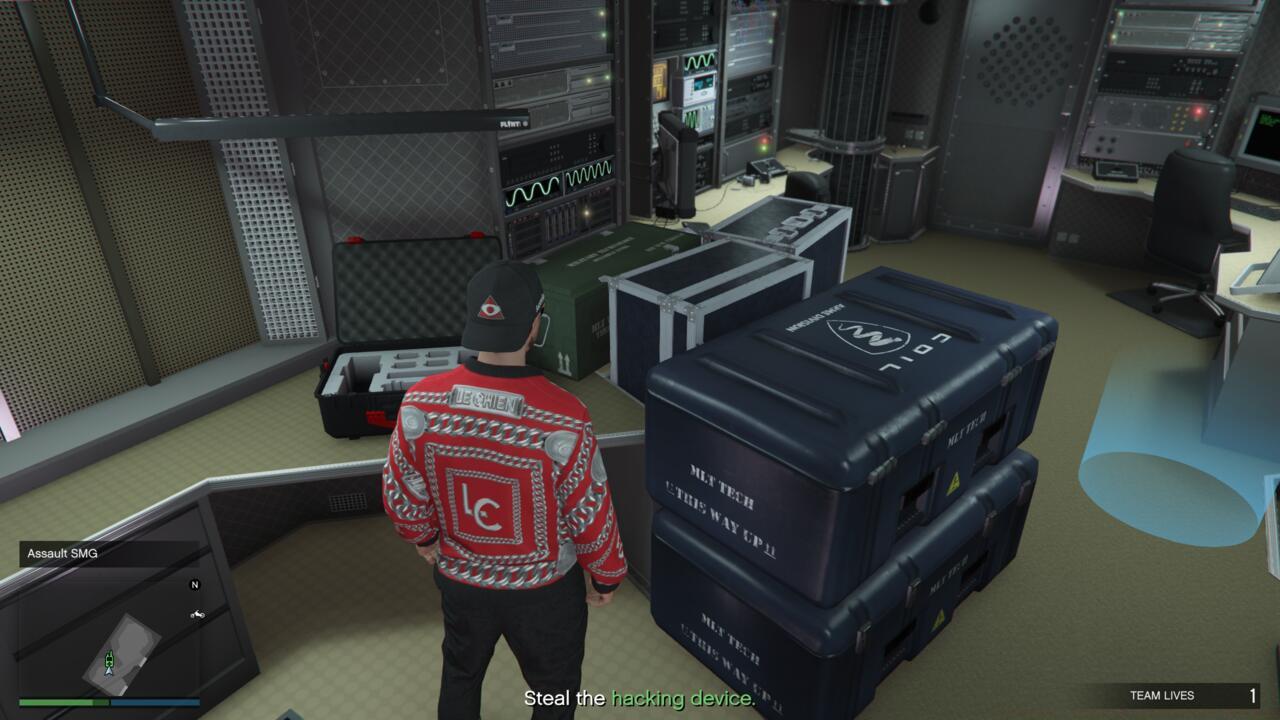
Combat strategy should prioritize environmental protection while systematically eliminating drone threats. After neutralizing several waves, Vincent will authorize Terrorbyte access via radio communication. Inside, retrieve the hacking device from its designated table position before exiting to continue your mission objectives.
Transitioning to the laptop acquisition phase requires traveling to Los Santos Pier, where Vincent provides target identification through a detailed text message. The image clearly depicts a brown-haired male wearing a distinctive black and white shirt, providing positive identification parameters.
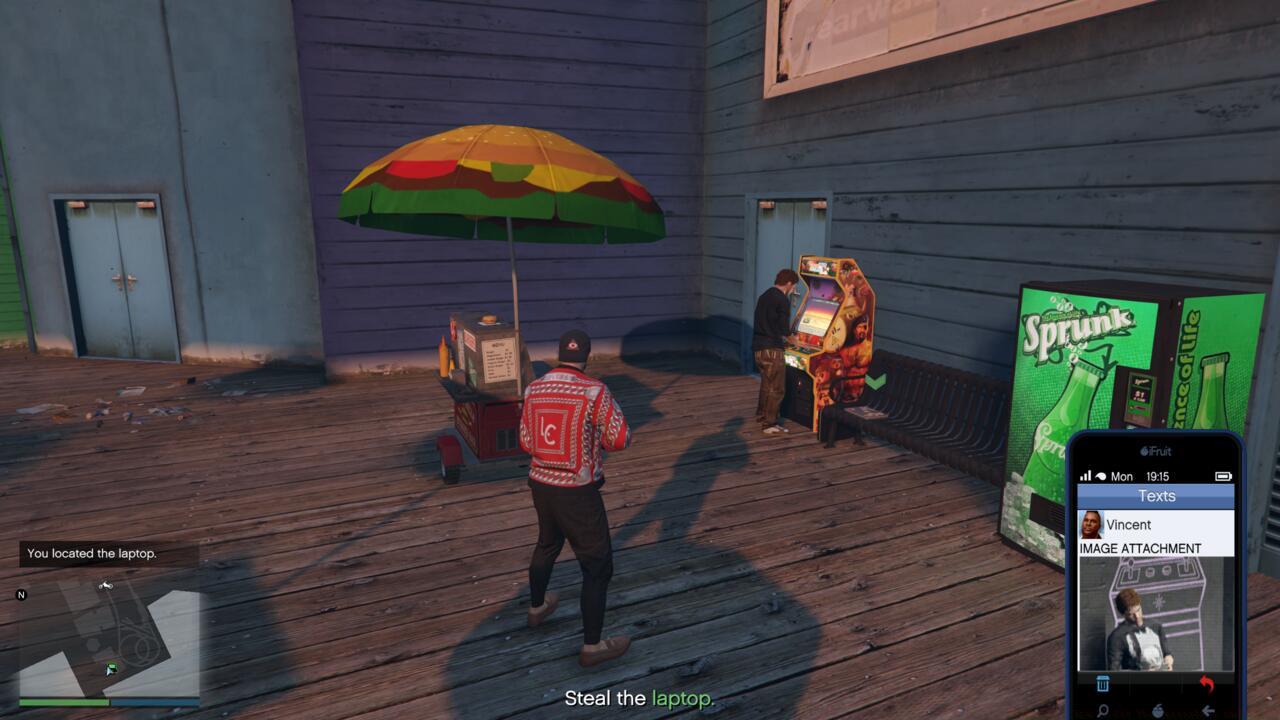
The search area at the pier is similarly marked with yellow boundaries, but the target maintains a consistent spawn position that eliminates extensive searching. Proceed directly to the pier’s far right section adjacent to the Ferris wheel structure for efficient target location.
Your objective occupies space behind a building near food service facilities, actively engaged with arcade games while facing away from approach vectors. This positioning creates ideal conditions for stealth acquisition when executed properly.
Approach methodology significantly impacts mission outcomes. Move cautiously from behind the target, maintaining minimal visibility until within interaction range of the laptop positioned on the nearby bench. Successful theft triggers environmental panic responses but avoids police pursuit escalation, allowing clean extraction from the area.
Mission efficiency can be dramatically improved through strategic sequencing. Beginners should prioritize the Terrorbyte acquisition first, as the combat sequence provides valuable resources for subsequent stages. However, experienced players may prefer securing the laptop initially to minimize overall mission duration.
Combat preparation proves essential for the drone engagement phase. Equipping explosive weapons or high-capacity firearms before approaching the Terrorbyte significantly reduces combat difficulty. Additionally, positioning vehicles as temporary cover can create tactical advantages during firefights.
Common execution errors include triggering unnecessary combat at the pier through aggressive approaches or failing to utilize cover properly during drone waves. These mistakes commonly add 5-10 minutes to mission completion time and consume additional resources.
Advanced optimization involves memorizing spawn locations to eliminate search time entirely. The Terrorbyte maintains consistent positioning between warehouse structures, while the laptop target always occupies the same Ferris wheel-adjacent location. Mastering these positions can reduce total mission time by approximately 40% compared to initial attempts.
Action Checklist
- Choose mission approach order based on combat preference and equipment
- Navigate to warehouse district using blue bus icon, then proceed south to Terrorbyte location
- Eliminate drone waves using cover and appropriate weapons
- Retrieve hacking device from Terrorbyte interior
- Travel to Los Santos Pier and locate target near Ferris wheel
- Execute stealth approach for laptop acquisition without alerting target
No reproduction without permission:SeeYouSoon Game Club » GTA Online – How To Get The Terrorbyte And Laptop Master the Breaking and Entering mission with strategic approaches to secure the Terrorbyte and cartel laptop efficiently