TL;DR
- Yoimiya excels as single-target Pyro DPS with normal attack-focused gameplay
- Prioritize ATK%, Pyro DMG, and Crit stats while managing Energy Recharge needs
- Shimenawa’s Reminiscence is her best artifact set for maximizing damage output
- Team compositions should include Hydro or Electro supports for reaction damage
- Master animation cancels and attack timing to optimize damage sequences
Yoimiya brings spectacular fireworks displays to the battlefield as a premier Pyro archer specializing in relentless single-target damage. Her unique combat rhythm revolves around weaving precise normal attacks during her elemental skill activation.
- Activating this ability temporarily disables her charged attack enhancements, emphasizing that her core damage rotation depends entirely on normal attack sequences.
- The Aurous Blaze mark triggers explosive chain reactions whenever other party members attack the marked enemy, dealing additional AoE Pyro damage every two seconds. This creates excellent synergy with off-field support characters who can trigger these explosions consistently.
Advanced Technique: Master the art of animation canceling by dashing immediately after her fifth normal attack to reset the combo while maintaining damage output. This requires precise timing but significantly increases her damage per second potential.
Building Yoimiya effectively requires focusing on stats that amplify her primary damage source—rapid-fire Pyro-infused normal attacks. The foundation of her damage scaling comes from maximizing attack power while balancing critical hit potential.
Since Yoimiya’s damage profile heavily favors sustained normal attack sequences during her skill duration, prioritize ATK%, Pyro Damage Bonus, and Critical Damage across your artifact selections. Critical Rate receives natural scaling through character ascension, reducing the artifact burden for this stat compared to other main DPS characters.
| Artifacts | Suggested Main Stats | Suggested Substats |
|---|---|---|
| Flower | HP | ATK%, Crit Dmg, Crit Rate, Energy Recharge |
| Feather | ATK | ATK%, Crit Dmg, Crit Rate, Energy Recharge |
| Sands | ATK% | Crit Dmg, Crit Rate, Energy Recharge, Elemental Mastery |
| Goblet | Pyro Dmg | ATK%, Crit Dmg, Crit Rate, Energy Recharge |
| Circlet | Crit Dmg or Crit Rate | ATK%, Crit Dmg/Crit Rate, Energy Recharge, Elemental Mastery |
Substat Priority Guide: Always prioritize ATK% substats to reach optimal damage thresholds. Critical stats should be balanced according to your current gear—most players will benefit more from Critical Damage due to her ascension bonuses. Energy Recharge becomes crucial because Yoimiya lacks innate energy generation mechanics, requiring external sources to maintain burst uptime. Elemental Mastery occupies the lowest priority since inconsistent Pyro application timing makes reaction damage less reliable.
Common Mistake to Avoid: Don’t overinvest in Critical Rate substats beyond 70-80% total, as this creates diminishing returns compared to stacking Critical Damage or Attack percentage.
Selecting the right artifact set dramatically impacts Yoimiya’s performance, with different options catering to various team compositions and playstyle preferences.
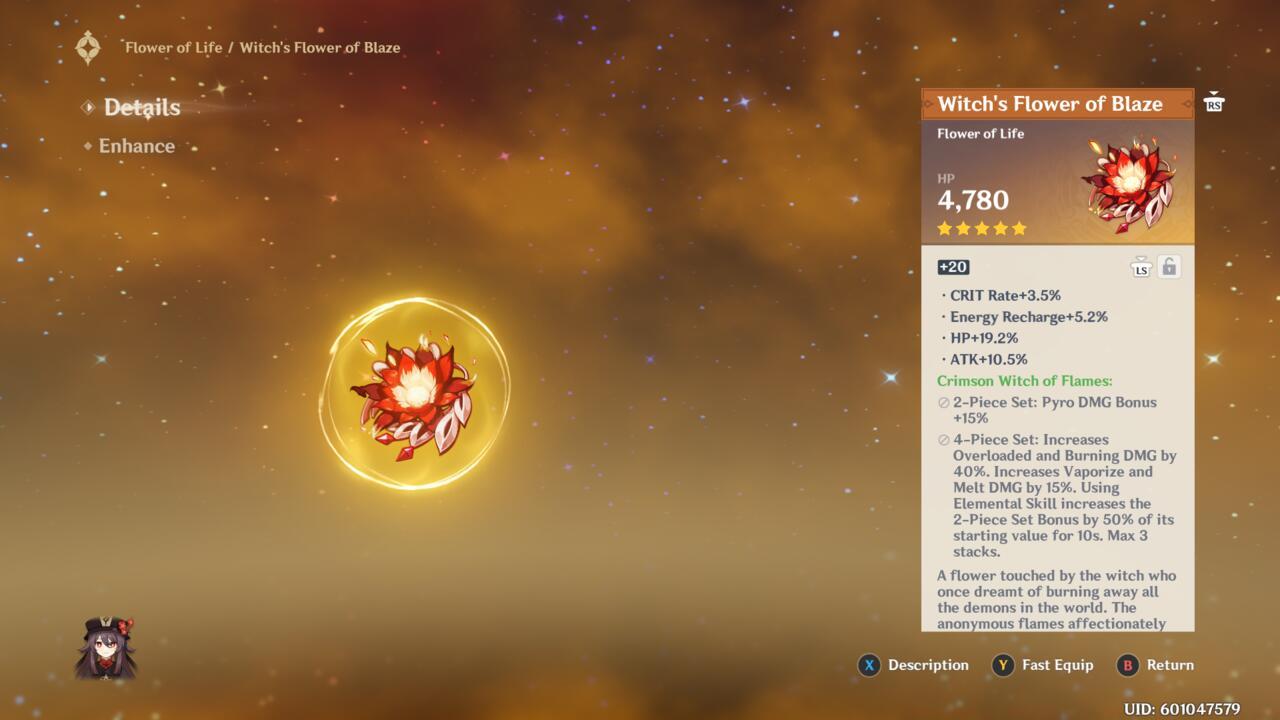
Crimson Witch of Flames flower artifact
Shimenawa’s Reminiscence (4-piece): This set stands as Yoimiya’s premier choice for maximum normal attack damage. The 50% normal attack damage bonus significantly outweighs other options, though it comes with the tradeoff of consuming 15 energy when using her skill. With proper energy management through substats and team support, this set delivers unparalleled single-target destruction.
Crimson Witch of Flames (4-piece): An excellent alternative that enhances reaction damage while providing consistent Pyro damage bonuses. This set performs exceptionally well in Vaporize team compositions where Yoimiya can consistently trigger damage-amplifying reactions.
Mixed Set Options: For players still farming optimal sets, combining 2-piece Shimenawa with 2-piece Crimson Witch provides solid interim performance while working toward complete sets.
Yoimiya’s weapon selection heavily influences her damage output, with several options ranging from premium 5-star choices to accessible 4-star alternatives.
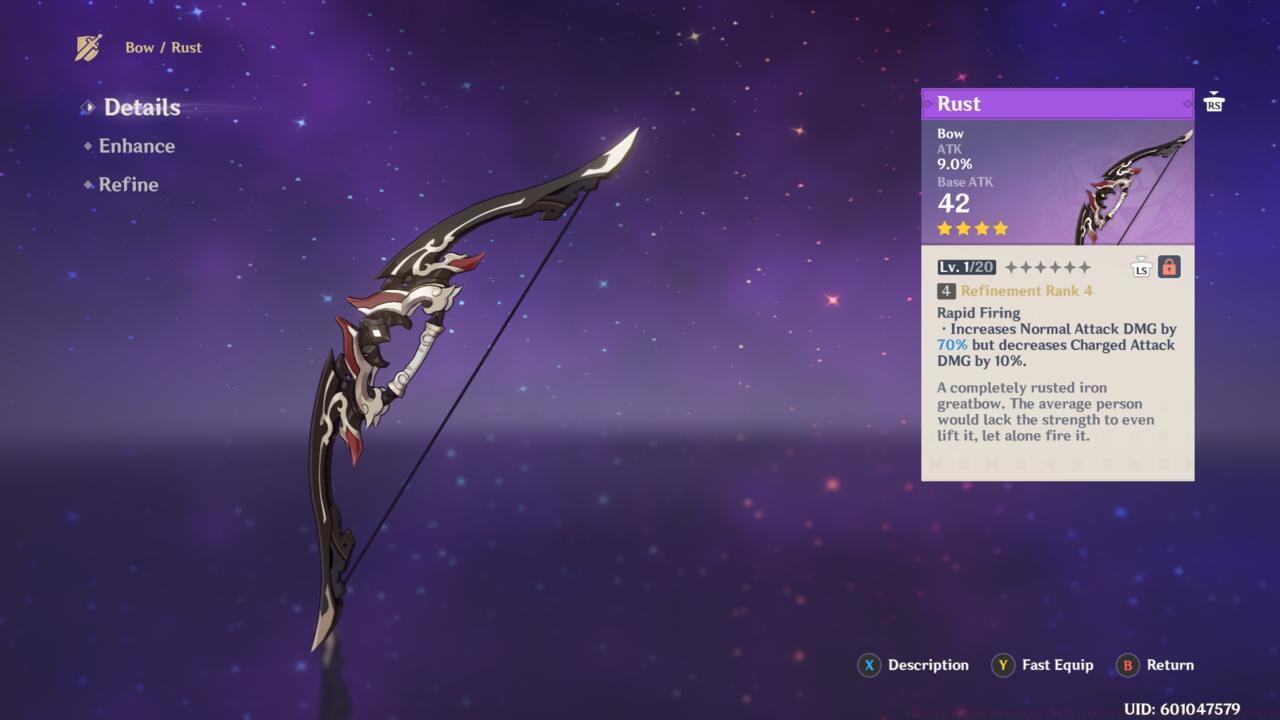
The four-star Rust bow
5-Star Weapon Tier: Thundering Pulse stands as her signature weapon, providing massive normal attack damage bonuses alongside critical damage substats. Other premium options include Skyward Harp for critical rate consistency and Polar Star for players who can maintain skill rotation timing.
4-Star Weapon Rankings: Rust emerges as the standout 4-star option, with refinements dramatically increasing normal attack damage. The Viridescent Hunt provides crowd control utility while maintaining solid damage output.
F2P Alternatives: Slingshot surprisingly performs well despite its 3-star status, while Prototype Crescent offers solid performance for players who can consistently hit weak points.
Refinement Priority: If using Rust, prioritize refinements as each level significantly boosts normal attack damage. For other weapons, focus on obtaining optimal artifact stats before pursuing refinements.
Building effective teams around Yoimiya requires understanding her synergy with various support characters who can enable reaction damage while covering her defensive weaknesses.
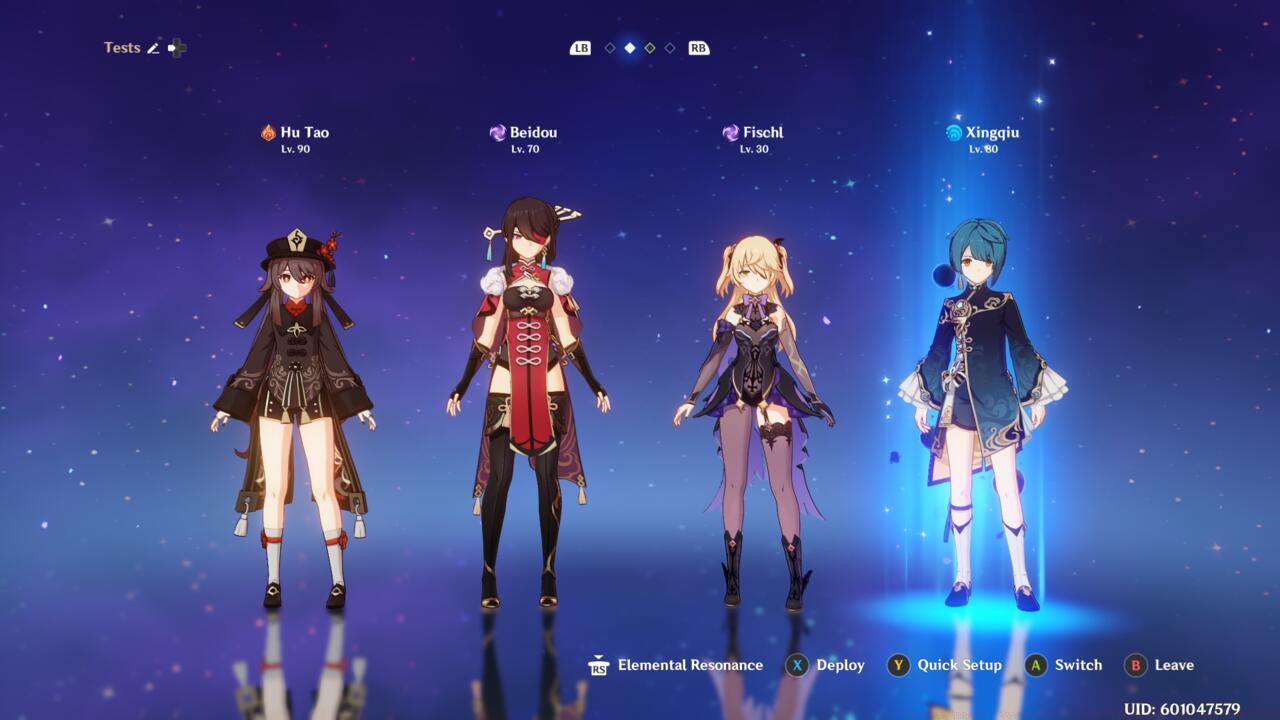
Overload team comp for a Pyro main DPS
Vaporize Compositions: Pair Yoimiya with Hydro applicators like Xingqiu or Yelan for massive damage amplification. These teams require precise timing to ensure Hydro application precedes Yoimiya’s Pyro attacks for consistent reaction triggers.
Overload Teams: Combining Yoimiya with Electro characters like Fischl, Beidou, or Raiden Shogun creates explosive area damage while maintaining single-target pressure.
Defensive Support: Always include a shielder like Zhongli or Thoma to protect Yoimiya during her attack sequences, as interruption can completely disrupt her damage output.
Advanced Rotation Strategy: Start with support character skills and bursts, switch to Yoimiya to activate her skill and execute normal attack combos, then use her burst before switching out to maximize team damage contribution.
For players looking to expand their tactical knowledge, our Class Guide provides deeper insights into character roles and synergies that can enhance your team-building approach.
Action Checklist
- Farm Shimenawa’s Reminiscence domain focusing on ATK% Sands, Pyro Goblet, and Crit Circlet
- Balance Critical Rate/Damage ratio to approximately 1:2
- Practice animation canceling after fifth normal attack in combo
- Build team with Hydro/Electro supports and defensive shielder
- Optimize energy recharge to ensure burst availability every rotation
No reproduction without permission:SeeYouSoon Game Club » Genshin Impact – Yoimiya Abilities, Artifacts, and Team Comp Guide Master Yoimiya's explosive gameplay with optimal builds, team strategies, and advanced combat techniques