Complete walkthrough for Genshin Impact’s The Last Survivor of Tenochtzitoc quest with expert strategies and reward optimization
Quest Overview and Preparation
The Last Survivor of Tenochtzitoc represents one of Genshin Impact’s most substantial World Quests within the Easybreeze Holiday Resort region. This narrative-rich adventure features compelling characters including Endou and Citlali, while offering players temporary access to the mysterious Mare Jivari dimension. Successful completion rewards travelers with substantial benefits including 50 Primogems and four treasure chests, with the highlight being a premium Luxurious Chest containing valuable artifacts and resources.
Pro Tip: Before initiating this quest, ensure your party includes characters capable of generating Electro-Charged reactions and possesses adequate healing capabilities. The dimensional travel segments feature environmental hazards that can quickly deplete your team’s health if unprepared.
Initial Quest Steps and Combat Strategy
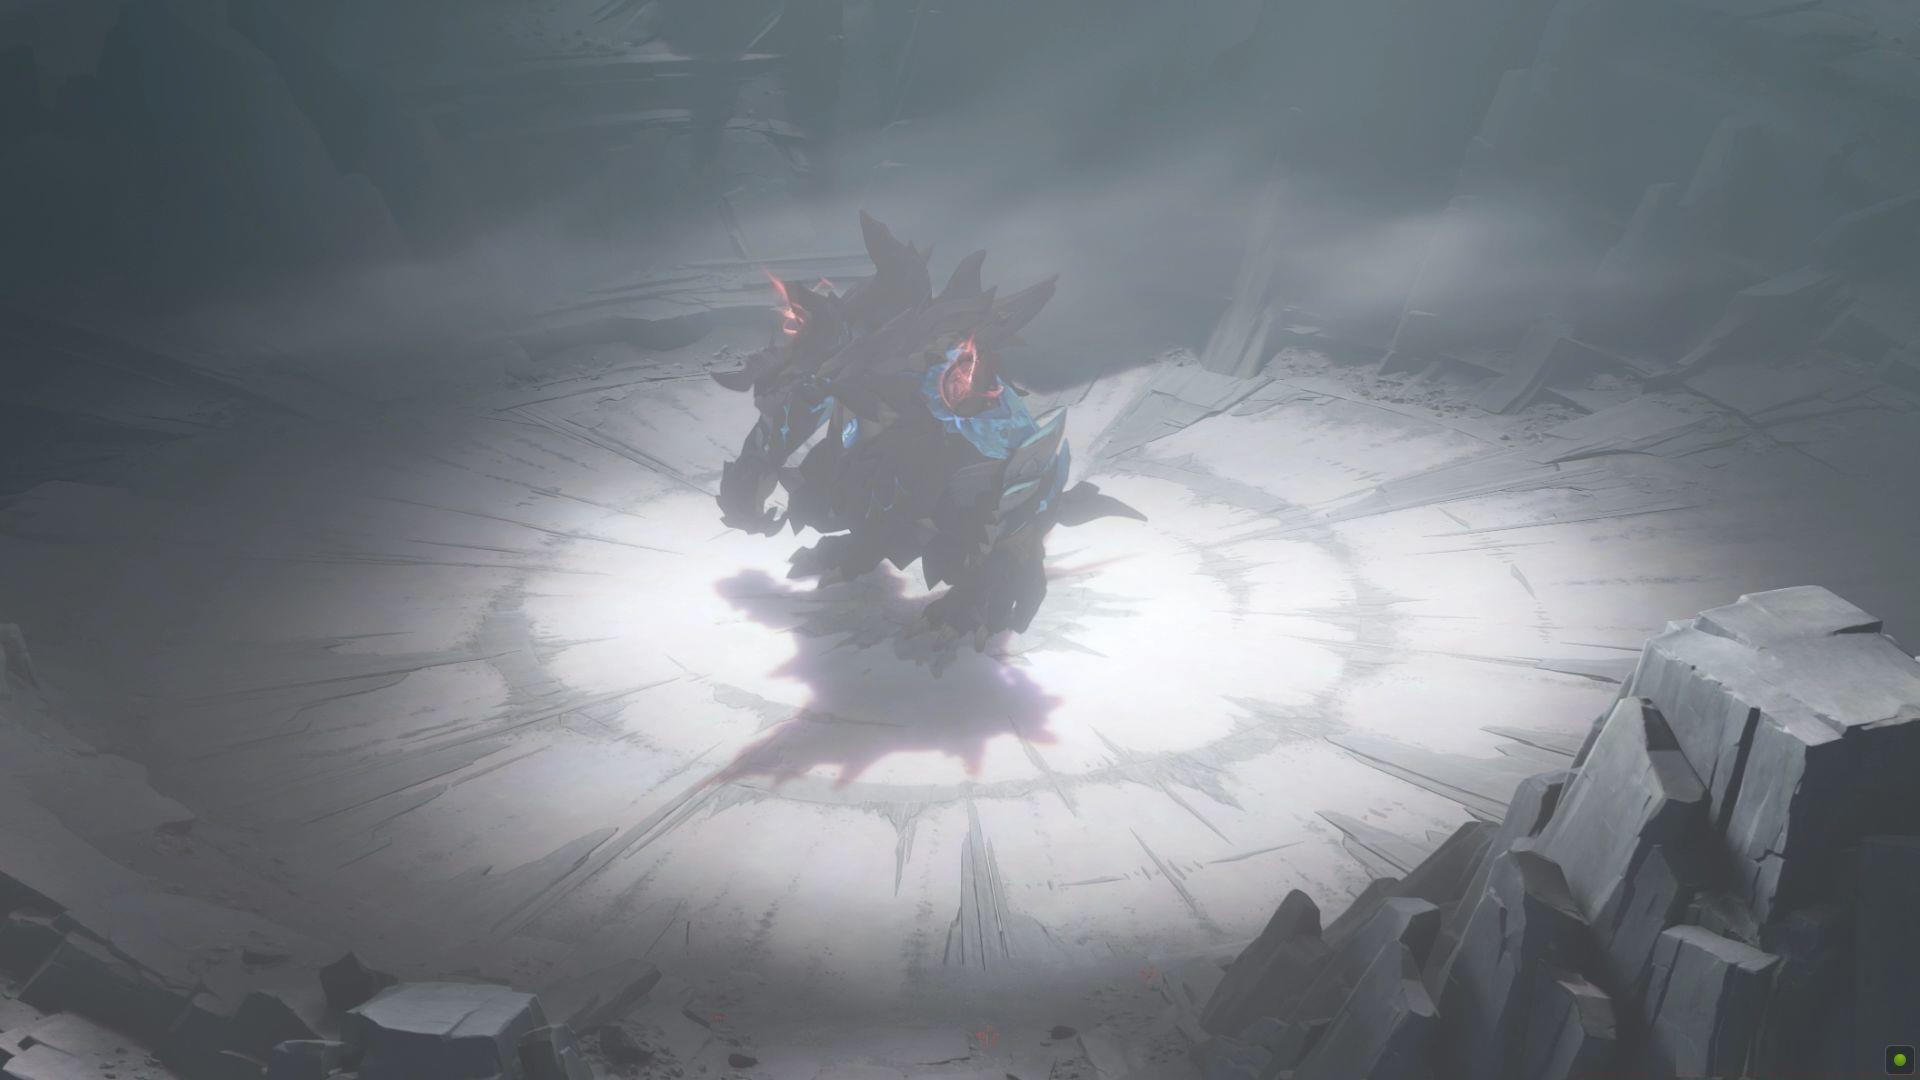
Your first major encounter involves subduing Tenoyollotzin through combat. While the game interface may recommend utilizing Electro-Charged or Lunar-Charged elemental reactions to stagger this entity, experienced players can successfully complete this encounter through standard combat approaches. The recommended strategy involves maintaining distance while utilizing rapid-attack characters to whittle down its health bar efficiently. Upon successful pacification of the creature, an intervention occurs from Pucli, a local NPC who will attempt to mediate the conflict.
Following the quest markers will direct you to a nearby hut where initial dialogue with Pucli establishes the quest’s narrative foundation. Subsequent progression requires traveling to Leyla’s location, triggering an extensive cutscene that reveals intriguing shamanic abilities and lore exposition.
Common Mistake Avoidance: Many players waste resources attempting to precisely execute the suggested elemental reactions. Focus instead on consistent damage output and dodging telegraphed attacks for more efficient completion.
Return to Pucli’s dwelling and comprehensively recount your experiences with Leyla. The quest progression then necessitates advancing the in-game clock to 8:00 AM the following day. This temporal manipulation can be performed through the Paimon Menu’s time adjustment feature. Subsequently, locate Pucli at the reception area within Easybreeze Market to continue your investigation.
Asha Investigation Phase
The investigation intensifies as you’re directed to the lakeside area adjacent to the hut. Here, you must indwell an Asha – a spiritual mechanic that enables perception of otherwise invisible entities. This ability reveals three concealed Ashas positioned throughout the environment:
Upon successful identification of all three spectral entities, utilize any available pigment to apply coloration, effectively documenting their presence. An important progression note: when locating the final Asha, pursue it diligently until hostile Hiluchurl enemies materialize. Efficiently dispatch these combatants to advance the quest narrative.
Optimization Strategy: Equip a character with rapid movement capabilities like Mona or Yelan to streamline the Asha tracking process. The color selection for painting carries no mechanical consequence, so choose based on personal preference.
Secret Cave Exploration
Accompany Citlali back to the primary hut structure, where a significant narrative cutscene unfolds. Subsequently, examine three distinct luminous markers distributed around the dwelling’s exterior to gather contextual clues. Thorough investigation of all glowing indicators precedes reporting your findings to Citlali, advancing the storyline.
Quest navigation then directs you behind a nearby waterfall where a destructible rock formation conceals a hidden entrance. Deploy claymore-wielding characters or explosive abilities to obliterate the obstructive geology, revealing access to a subterranean cavern system. Progress deeper into this underground complex to discover a mystic arts implement – an interactive object that facilitates transition to a specialized realm.
Exploration Tip: Before entering the mystical implement, ensure your party’s health and energy are fully restored. The subsequent dimensional segment contains multiple combat encounters with limited restoration opportunities.
Within the concealed chamber, proceed directly forward and engage with the vacant seating arrangement positioned to the right. Placement of the acquired relic artifact upon this chair initiates a transitional cutscene, transporting your character to an ethereal realm reminiscent of the Night Kingdom’s aesthetic.
Shattered Spatial Rifts Navigation
Continue progression through this anomalous dimension by entering successive Shattered Spatial Rifts – portal-like phenomena that facilitate forward movement through the distorted landscape. During this traversal, vigilant explorers can locate two additional treasure chests concealed within the environment. Meticulous exploration is recommended to secure these bonus rewards.
Critical Warning: Maintain considerable distance from the roaming dark spirit entities inhabiting this realm. These hostile manifestations initiate aggressive behavior upon proximity detection, potentially complicating navigation and chest acquisition. Strategic pathing that circumvents these entities will significantly reduce encounter difficulty.
Chest Location Details: The first chest is positioned behind a crystalline formation shortly after the third spatial rift, while the second requires descending into a lower platform area before the final teleportation point. Both contain valuable enhancement materials and Mora.
Upon reaching the traversal sequence’s conclusion, an automatic teleportation effect transfers your character to Mare Jivari – a region typically inaccessible through conventional exploration means.
Final Boss Battle and Quest Completion
Progress linearly through Mare Jivari until encountering Bakunawa, the quest’s culminating boss antagonist. This entity possesses unique combat mechanics that render conventional attack methodologies ineffective. Victory necessitates utilization of the Calamity of Eshu ability – a specialized mechanic introduced specifically for this encounter.
Boss Strategy: During the Bakunawa confrontation, focus on evading its area-of-effect attacks while waiting for the Calamity of Eshu ability to become available. When activated, this power creates damaging zones that progressively deplete the boss’s health bar. Position these zones strategically to maximize damage output while maintaining safe positioning.
Successfully defeating Bakunawa initiates an extensive concluding cutscene that resolves the narrative threads, followed by automatic return to the distinctive seven-chair chamber. This sequence formally concludes The Last Survivor of Tenochtzitoc quest, with reward distribution including the guaranteed Luxurious Chest and 50 Primogems.
Reward Optimization: Ensure your inventory has adequate space before completing the quest to prevent any reward collection issues. The Luxurious Chest typically contains 4-star artifacts, character experience materials, and significant Mora quantities.
No reproduction without permission:SeeYouSoon Game Club » Genshin Impact: The Last Survivor of Tenochtzitoc quest guide Complete walkthrough for Genshin Impact's The Last Survivor of Tenochtzitoc quest with expert strategies and reward optimization