Complete guide to solving the Nothing Passage puzzle and claiming three Common Chests in Genshin Impact
Understanding the Kuuhenki Puzzle Mechanics
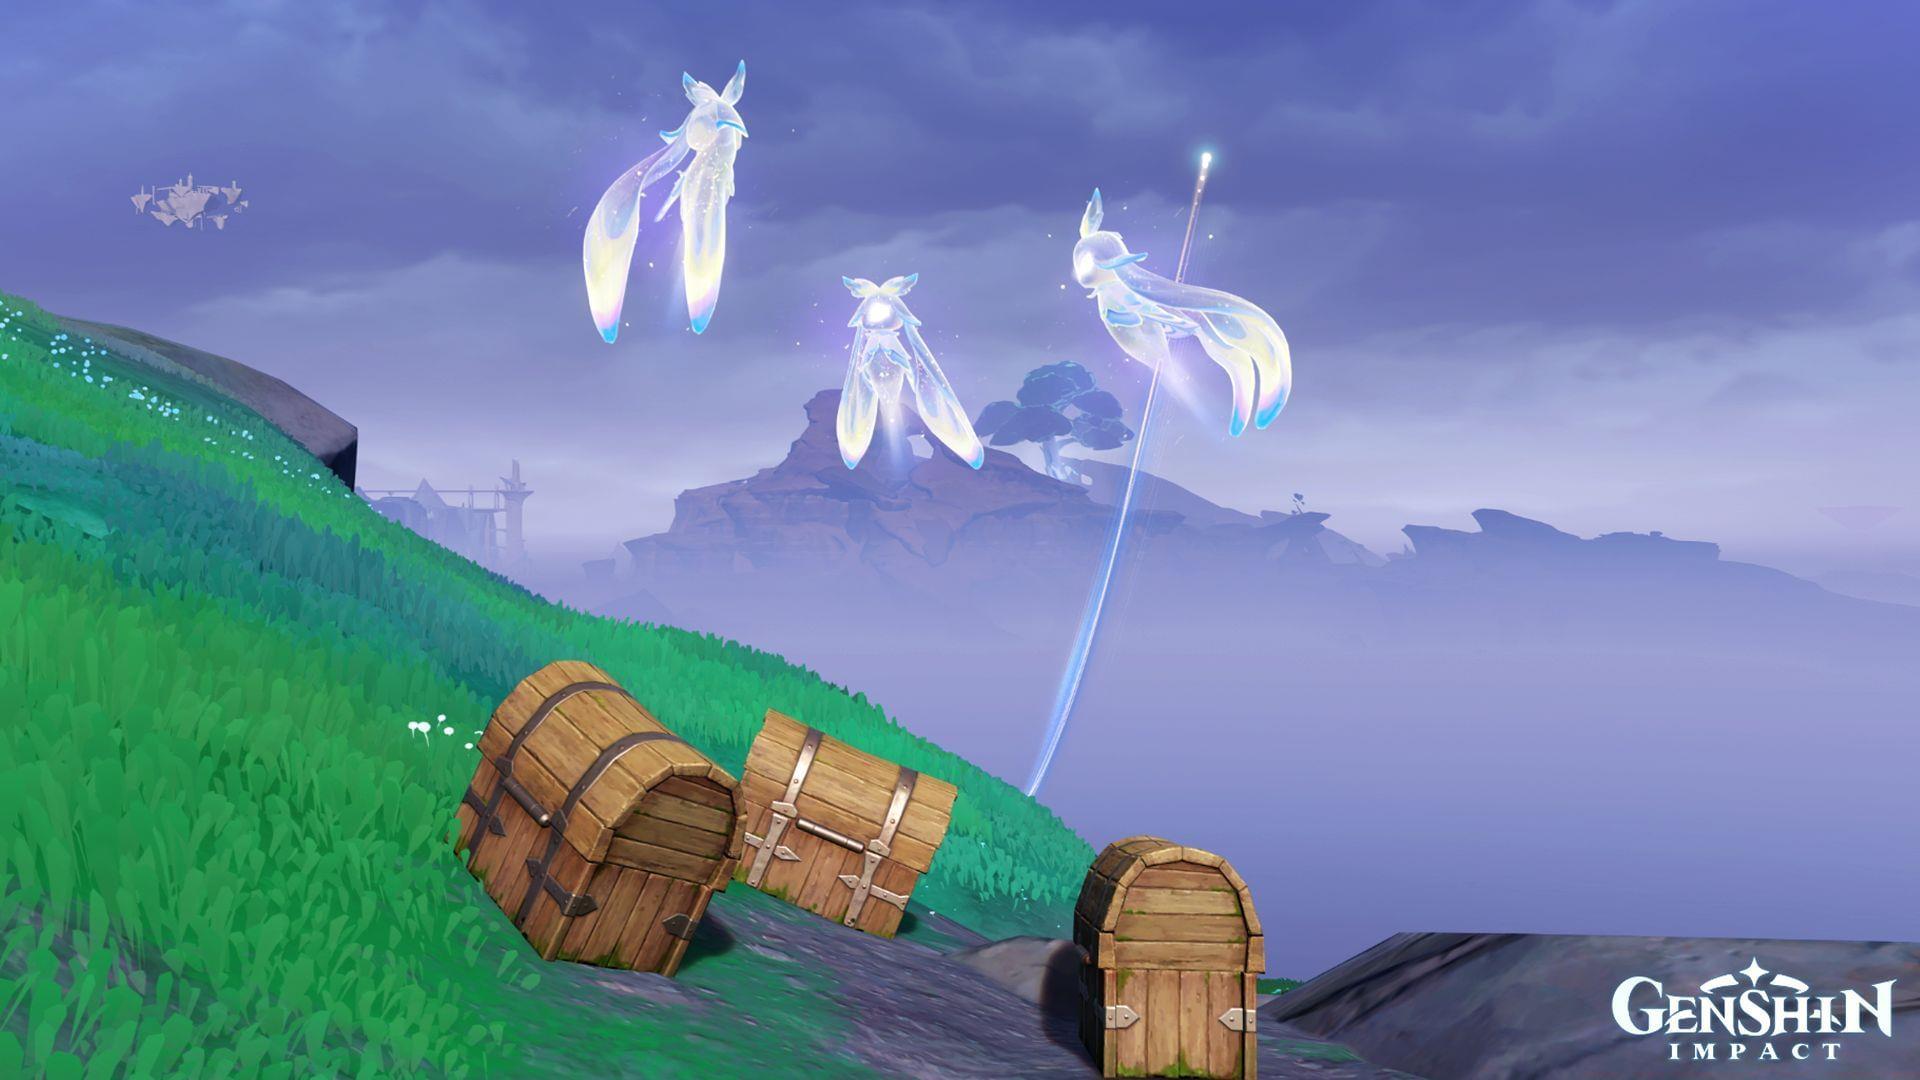
The environmental puzzle located within Lempo Isle’s Nothing Passage region presents an engaging challenge that rewards diligent explorers with three separate Common Chests. This puzzle centers around collecting ethereal Kuuhenki spirits from strategic positions across the landscape and guiding them back to the central chest area. Successfully completing this multi-stage puzzle requires spatial awareness and understanding of Genshin Impact’s environmental interaction mechanics.
Each Kuuhenki spirit is trapped within a specific environmental puzzle that must be solved before the spirit can be freed. The key mechanic involves using the Moonlane teleportation system to efficiently transport the spirits back to the main puzzle area. Unlike traditional combat challenges, this puzzle emphasizes exploration and problem-solving skills, making it accessible to players of various adventure ranks.
The reward structure provides three Common Chests that contain Primogems, Mora, Adventure EXP, and potential enhancement materials. While Common Chests offer modest rewards compared to higher-tier chests, completing all three efficiently contributes significantly to your daily exploration progress and resource accumulation.
First Kuuhenki Location: Southwest Unipolar Puzzle
Navigate southwest from the central chest location to discover the first Kuuhenki trapped behind an environmental puzzle involving Unipolar objects. This area features two distinctive Unipolar mechanisms with a small robotic assistant positioned nearby. The solution requires precise interaction sequencing to successfully free the spirit.
Begin by approaching the robotic unit and selecting the “Activate” prompt to initialize the puzzle sequence. This action enables the Unipolar objects for manipulation. Move toward the glowing Unipolar structures and execute two consecutive “Rotate” commands. Proper rotation causes a strategic box displacement that shatters the obstructing door mechanism, revealing the trapped Kuuhenki spirit.
After the door destruction, access the newly revealed area and interact with the “Investigate” prompt to liberate the first Kuuhenki. Immediately utilize the Moonlane teleportation system that appears to efficiently guide the spirit back toward the main chest area. Pro tip: Position yourself strategically before activation to ensure a smooth teleportation path without environmental obstacles.
Common Mistake Alert: Many players incorrectly rotate the Unipolar objects only once or three times, failing to break the door. The precise two-rotation requirement is essential for puzzle completion. Additionally, ensure you don’t wander too far after activation, as this may cause the puzzle to reset.
Second Kuuhenki Location: Southeast Goat Clearing
Travel southeast from the puzzle hub to locate the second Kuuhenki in a serene clearing populated by numerous goats. This location requires minimal puzzle solving compared to the first, focusing instead on careful observation and quick interaction. The area is distinguished by its pastoral setting and easily missed investigation point.
Scan the clearing thoroughly for a distinctive yellow luminous spot on the ground surface. This glowing marker indicates the investigation point containing the trapped spirit. Promptly select the “Investigate” interaction to release the second Kuuhenki from its confinement. Unlike the previous puzzle, this location doesn’t require mechanical manipulation.
Once freed, immediately engage the Moonlane teleportation mechanism to escort the spirit back to the central chest area. Advanced players can optimize their route by clearing any potential obstructions beforehand and positioning their character facing the direct path to reduce travel time.
Efficiency Tip: Use your mini-map to verify you’re heading directly southeast from the chests. The goat clearing is easily missed if you deviate from the straight path. The investigation spot sometimes blends with environmental lighting, so toggle your camera angles for better visibility.
Third Kuuhenki Location: Northern Mountain Peak
The third and final Kuuhenki resides significantly farther north, positioned atop a substantial mountain peak requiring deliberate ascent. This location presents both navigation challenges and valuable bonus discoveries for attentive explorers. The mountain peak is identifiable by two distinctive goats standing sentinel at its summit.
Upon reaching the summit, locate the luminous investigation spot positioned between the two goat sentinels. This location also contains a valuable Lunoculus collectible, providing additional exploration rewards beyond the puzzle completion. Engage with the “Investigate” prompt to free the final Kuuhenki spirit.
Utilize the Moonlane teleportation system to guide this spirit back to the main puzzle area. Given the considerable distance, ensure you maintain visual contact with the spirit during teleportation to prevent disorientation or accidental separation.
Bonus Opportunity: While collecting this Kuuhenki, don’t forget to grab the Lunoculus visible nearby. This collectible contributes to your Sacred Sakura Tree or Statue of the Seven progression, offering permanent stamina and other stat bonuses. Mark this location on your map for future reference if you’re systematically collecting all Lunoculi.
Advanced Strategies and Common Mistakes
Successfully gathering all three Kuuhenki spirits simultaneously unlocks the three Common Chests, completing the Nothing Passage environmental puzzle. However, several advanced strategies can optimize your completion time and prevent common frustrations experienced by players.
Optimization Technique: Complete the Kuuhenki collection in a specific sequence based on distance and complexity. Start with the southwestern Unipolar puzzle (most complex), then collect the southeastern spirit (quickest), and finish with the northern mountain spirit (farthest). This sequence minimizes backtracking and ensures you handle the most difficult puzzle with fresh attention.
Troubleshooting Common Issues: If chests don’t unlock after gathering all spirits, verify that all three Kuuhenki are present simultaneously. Sometimes spirits may despawn if you leave the area or take too long. If this occurs, simply recollect the missing spirit. Additionally, ensure you’ve properly solved each puzzle rather than just reaching the locations.
Advanced Moonlane Usage: Expert players can chain Moonlane teleportations by quickly moving between spirit collection points without returning to the chest area between collections. This advanced technique requires precise timing but can significantly reduce overall completion time.
Also read: Genshin Impact Nod-Krai Viewpoints locations
Follow Sportskeeda for more Genshin Impact news, updates and guides.
No reproduction without permission:SeeYouSoon Game Club » Genshin Impact Nothing Passage 3 Common Chests puzzle guide Complete guide to solving the Nothing Passage puzzle and claiming three Common Chests in Genshin Impact