TL;DR
- Located northwest of Sumeru via teleport portal west of Chatrakam Cave
- Trigger Quicken/Aggravate reactions with Electro+Dendro for 15-second vulnerability windows
- Avoid Pyro completely to prevent fungal enemy spawns
- Exploit enraged state special moves followed by recovery periods
- Use strong single-target DPS characters during immobility phases
This challenging encounter requires minimal effort when approached correctly.
The Jadeplume Terrorshroom represents one of Genshin Impact’s standard world bosses introduced with the Sumeru expansion in version 3.0. Contrary to its intimidating name, this avian fungal creature ranks among the most manageable opponents in the game when utilizing appropriate team configurations. Our comprehensive guide covers essential knowledge about this Dendro avian adversary.
You’ll discover this formidable opponent situated in the northwestern quadrant of Sumeru’s vast landscape. The map indicator appears immediately west of Chatrakam Cave’s entrance. Rather than encountering the boss directly, players will find a mystical portal awaiting their arrival. Activate the Four-Leaf Sigil mechanism within this portal to transport directly to the combat arena. Upon arrival, immediately secure the Teleport Waypoint positioned behind your starting location for convenient future access. Here’s the visual reference for identification:


The Jadeplume Terrorshroom location and teleport portal
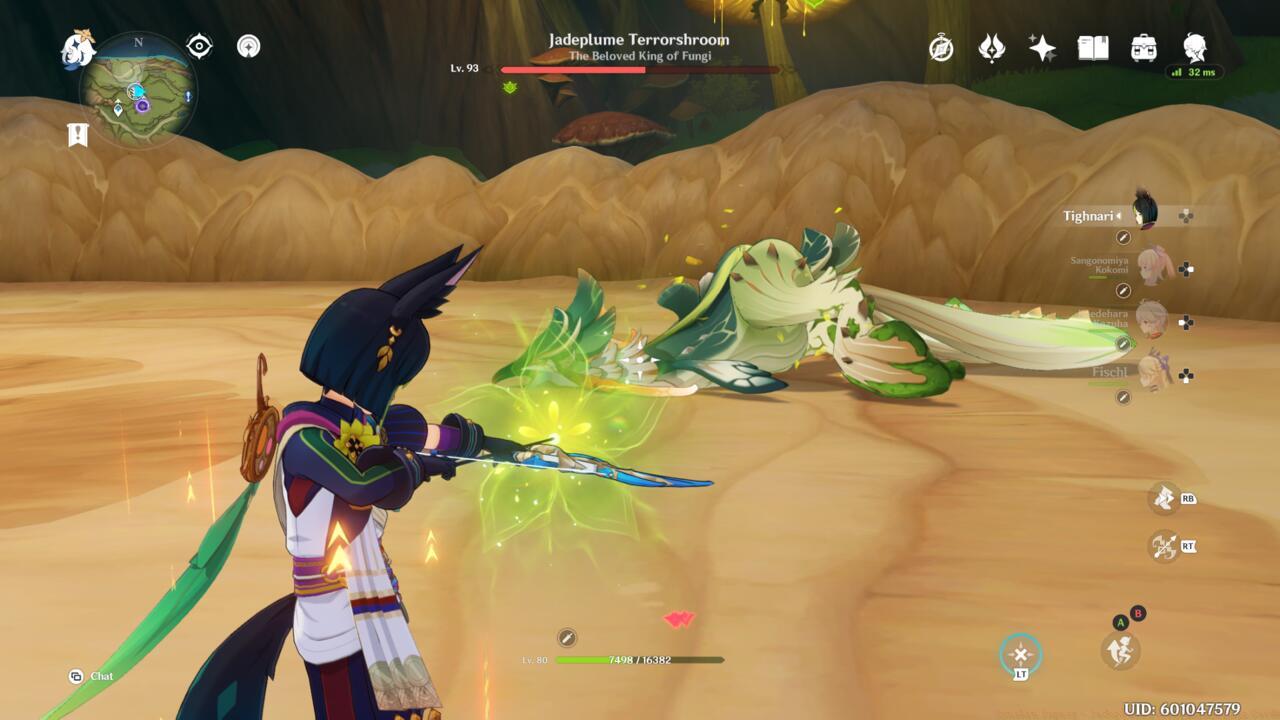
- Utilize Electro and Dendro Combinations: These complementary elements generate Quicken, Aggravate, or Catalyze elemental interactions, compelling the boss to enter a brief frenzied state while executing one of three distinctive special abilities. This strategy might initially appear counterintuitive, but following each special ability execution, the avian creature requires recuperation. The Jadeplume Terrorshroom remains completely stationary for approximately 15 seconds after every outburst, creating ideal circumstances for unleashing significant damage.
- Eliminate Pyro Element Usage: Fire-based assaults induce the Scorched status on the boss, resulting in problematic combat scenarios. When afflicted with Scorched, the Jadeplume Terrorshroom discharges spores that develop into additional fungal adversaries. These supplementary fungi will persistently disrupt your combat flow throughout the remaining engagement unless promptly eliminated.

The Jadeplume Terrorshroom in its resting state
Advanced Timing Strategy: Coordinate your elemental skill cooldowns to align with the 15-second vulnerability windows. Characters with persistent off-field abilities like Fischl’s Oz or Nahida’s Tri-Karma Purification can maintain damage during both mobile and stationary phases.
- Standard combat maneuvers: The boss employs a repertoire of basic attacks during phases unaffected by elemental reactions. These incorporate a three-strike close-range combination, tracking projectiles, and a spore precipitation that detonates within an area-of-effect radius.
- Frenzied assault techniques: When the organism experiences Electro and Dendro elemental interactions, it transitions into an enraged condition. Subsequently, it executes one of three potent abilities before requiring recovery time. These techniques encompass an extended homing spore downpour, a bull-rush style charge attack, and multiple pecking motions radiating outward in all directions.
- Scorched state offensive: As previously indicated, the Jadeplume Terrorshroom releases spores that germinate into fungal opponents whenever subjected to the Scorched reaction originating from Pyro abilities. Evade this scenario unless you prefer confronting multiple enemies simultaneously.
Pattern Recognition Tips: Each enraged attack has distinctive startup animations – the charge attack features a head-lowering motion, while the pecking assault shows wing-flapping telegraphs. Learning these visual cues allows precise dodging and optimal positioning.
Core Dendro-Electro Synergy Teams: For maximum efficiency, combine a Dendro applicator like Nahida or Collei with Electro enablers such as Yae Miko or Raiden Shogun. Supplement with Hydro supports like Xingqiu or Yelan for additional Hyperbloom damage, or include Zhongli for shielding during enraged phases.

A sample team that focuses on Dendro, Hydro, and Electro reactions
Alternative Composition Options: If lacking premium five-star characters, effective budget teams include Dendro Traveler, Fischl, Barbara, and a flex slot. This setup provides consistent elemental application while maintaining survivability through healing.
Beginner-Friendly Recommendations: Newer players should prioritize teams with strong shields and healing capabilities. Consider Diona, Noelle, or Layla alongside your core Dendro and Electro units.
For comprehensive team-building strategies across different game modes, consult our Class Guide for detailed character role explanations.
Action Checklist
- Navigate to northwestern Sumeru and locate teleport portal west of Chatrakam Cave
- Activate Four-Leaf Sigil and secure Teleport Waypoint in arena
- Deploy Electro and Dendro characters to trigger Quicken/Aggravate reactions
- Avoid Pyro characters completely to prevent fungal spawns
- Exploit 15-second vulnerability windows after enraged attacks for maximum damage
No reproduction without permission:SeeYouSoon Game Club » Genshin Impact – Jadeplume Terrorshroom Boss Guide Master the Jadeplume Terrorshroom boss fight with expert strategies, location guide, and optimal team compositions
