TL;DR
- Complete The Discarded Insignia and The Misplaced Photo quests first to unlock access
- Collect three specific conches from Minacious Isle, Twinning Isle, and Broken Isle
- Solve environmental puzzles at each location to reveal the hidden conches
- Return to central island and place conches in specific order: striped, white, then red tablecloth boxes
- Use visual references and timing strategies to optimize your collection process
The A Misplaced Conch world quest represents the concluding chapter of Genshin Impact’s three-part The Scattered Past storyline within the Summertime Odyssey event. This particular mission becomes accessible only after players have finished the primary narrative arcs tied to each character’s mirage domain. Understanding the activation requirements ensures you don’t waste time attempting to trigger it prematurely.
Before initiating this quest chain, you must successfully complete both The Discarded Insignia and The Misplaced Photo world quests. These preliminary missions establish the necessary context and unlock the central island location where the Fatui encampment resides. Journey to the heart of the Golden Apple Archipelago and engage with the assembled Fatui soldiers to discover how you can assist Yakov with his predicament. Following these conversations, activate the Imaging Conch positioned at the camp’s center to reveal your next objectives and officially begin the conch retrieval process.
Seasoned adventurers who have already gathered all Phantasmal Conches scattered throughout the archipelago may proceed directly to the final puzzle solution. However, if you’re missing any of the three essential conches, our comprehensive guide details each location with precision navigation instructions and puzzle-solving techniques.
The Minacious Isle conch requires ascending to the island’s highest elevation point. Scale the cliffs above the western shoreline’s shallow pool area, where you’ll discover the conch resting precisely above the location where you previously encountered Chevka during earlier quest stages. The positioning demands careful climbing rather than combat, making this the most straightforward retrieval of the three.


Misplaced conch on Minacious Isle
Misplaced conch on Minacious Isle
Twinning Isle houses its conch within an enigmatic well encircled by the distinctive raven statues originating from Fischl’s mirage domain. Navigate to the specified map coordinates and interact with each stone raven sculpture surrounding the well’s perimeter. Select the dialogue option to cast stones downward, which mechanically raises the water level sufficiently to access the submerged conch. This environmental manipulation puzzle tests your observation skills rather than combat prowess.


Misplaced conch on Twinning Isle
Misplaced conch on Twinning Isle
The Broken Isle presents the most complex conch retrieval challenge, featuring a multi-step environmental puzzle. Descend into the subterranean cavern system beneath the island’s surface. Illuminate every torch and Pyro pillar mechanism within the chamber to trigger a water drainage sequence, ultimately exposing the conch at the cavern floor. This puzzle demands systematic exploration and elemental interaction mastery.


Misplaced conch underneath Broken Isle
Misplaced conch underneath Broken Isle
Misplaced conch underneath Broken Isle
Misplaced conch underneath Broken Isle
After successfully acquiring all three essential conches, make your way back to the central island’s Fatui encampment. The concluding puzzle demands precise placement sequence to trigger the successful completion. Reference the visual guide below to ensure accurate positioning according to the game’s designated box nomenclature system.
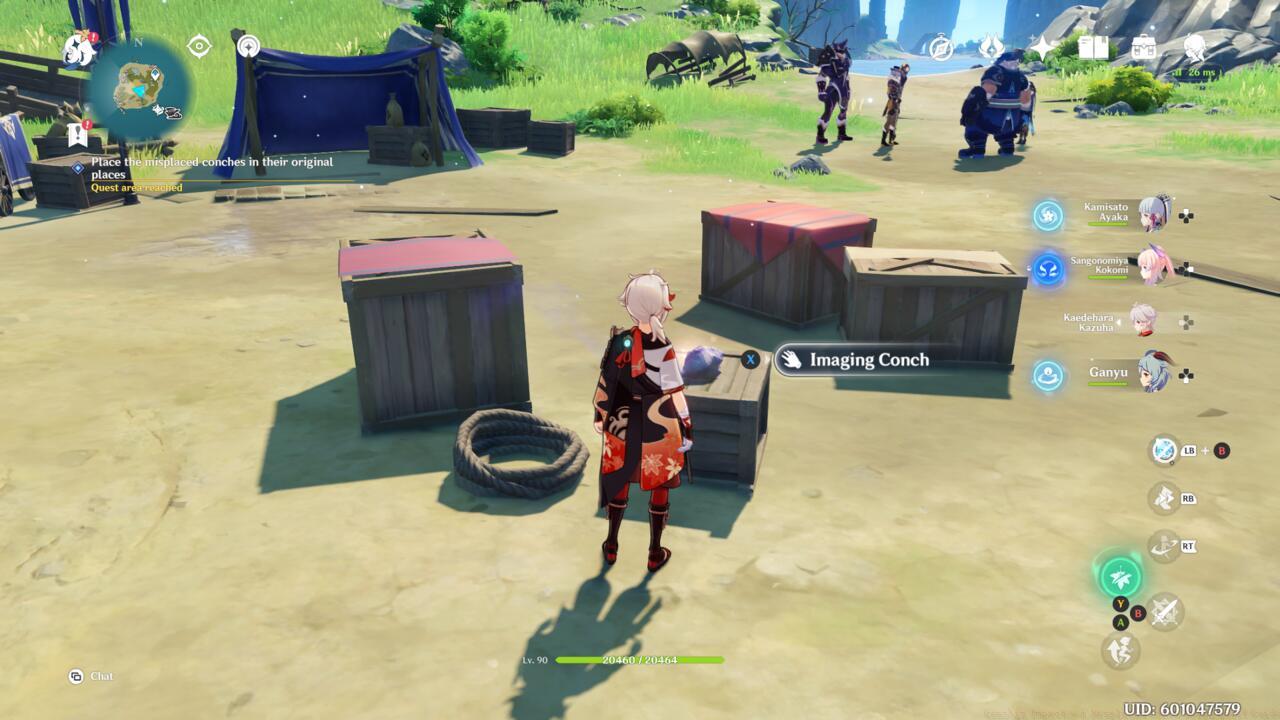
Boxes in the middle of the Fatui camp
The puzzle resolution requires strategic conch placement following a specific progression pattern. Begin by positioning the first conch on the central container, followed by the right-side receptacle, concluding with the left-positioned box. According to the in-game identification system, this translates to: the striped tablecloth box first, then the white tablecloth box, and finally the red tablecloth box. This sequential activation unlocks the quest’s conclusion and rewards.
Advanced players should note that incorrect placement sequences will not progress the quest, requiring removal and reattempt. The visual indicators provide subtle clues through color coding and patterning, making careful observation essential for first-time success. Most players complete this final phase within 5-10 minutes when following the prescribed order precisely.
Action Checklist
- Complete prerequisite quests: The Discarded Insignia and The Misplaced Photo
- Travel to central island and speak with Fatui group to initiate quest
- Collect Minacious Isle conch from cliff above western shore pool
- Solve Twinning Isle well puzzle by interacting with raven statues
- Complete Broken Isle cavern puzzle by lighting all torches and Pyro pillars
- Return to central island and place conches in order: striped, white, then red boxes
No reproduction without permission:SeeYouSoon Game Club » Genshin Impact – A Misplaced Conch World Quest Guide Complete guide to finding all three misplaced conches and solving the final puzzle in Genshin Impact's Summertime Odyssey