TL;DR
- Heat Level increases through eliminations, vault openings, and payphone activations
- Each level provides movement speed boosts and health/shield regeneration benefits
- Higher Heat Levels make you visible on enemy minimaps but offer significant combat advantages
- Strategic timing and positioning are crucial for maximizing benefits while minimizing risks
- The system creates a dynamic risk-reward gameplay loop during the Most Wanted event
The temperature’s definitely rising in the battle royale arena.
When you jump into Fortnite’s Most Wanted limited-time event, you’ll encounter numerous new mechanics to master alongside fresh cosmetic rewards and powerful weaponry. Among these additions, the Heat Level system stands out as a game-changing feature that transforms how you approach each match. Understanding this mechanic is essential for optimizing your performance during this special event period.
Throughout the Most Wanted event duration, every player maintains an individual Heat Level displayed as flame icons on your heads-up display interface. This rating escalates whenever you achieve player eliminations, successfully access secured vaults, or interact with designated burner payphones located within Cold Blooded faction territories. This progression system creates a compelling risk-reward dynamic where increased visibility to enemies must be weighed against substantial gameplay advantages.
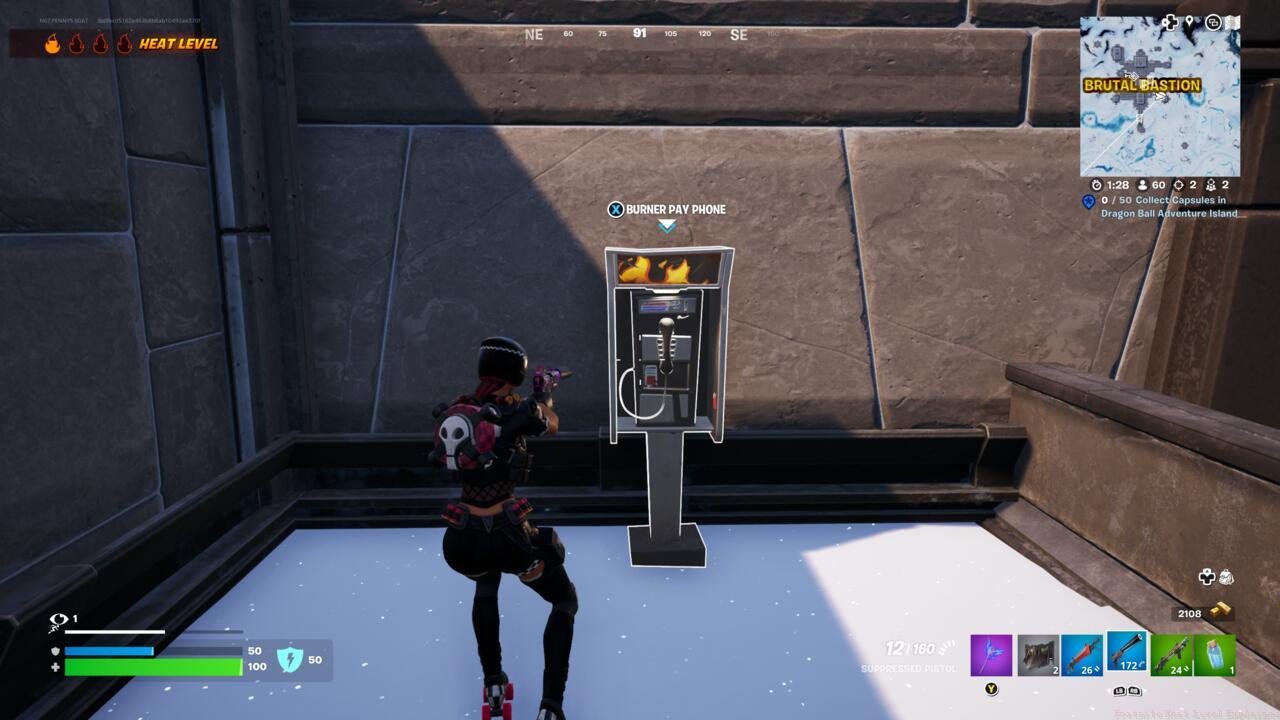
Strategic use of burner payphones requires careful timing and positioning awareness.
Activating burner payphones and spending gold bars represents one of three primary methods for elevating your Heat Level status. Each approach carries distinct strategic considerations that experienced players should factor into their decision-making process.
- Heat Level 1 – Defeated opponents provide supplementary gold bar drops, enhancing your economic position.
- Heat Level 2 – Boosts your movement velocity by 15% while enabling health regeneration up to 100 points when not engaged in combat situations.
- Heat Level 3 – Accelerates movement by 20% and facilitates recovery of both health (up to 100) and shields (up to 50) during non-combat intervals.
- Heat Level 4 – Provides 25% increased movement speed alongside comprehensive regeneration capabilities for both health (100) and shields (100) outside of active firefights.
Pro players recommend prioritizing early Heat Level accumulation during the initial match phases when enemy density is lower and the minimap visibility penalty carries reduced consequences. For comprehensive loadout strategies that complement Heat Level gameplay, consult our BF6 Weapons Unlock Guide for advanced weapon selection techniques.
The escalating benefits system creates a compelling progression curve where each Heat Level milestone delivers increasingly powerful combat enhancements. The movement speed advantages alone can dramatically impact engagement outcomes, particularly during late-game scenarios where positioning becomes paramount.
Health and shield regeneration mechanics provide sustained survivability that reduces dependency on consumable items and healing utilities. This allows players to allocate inventory space more efficiently toward offensive capabilities or utility items.
Gold bar bonuses at Heat Level 1 create an economic snowball effect, enabling earlier access to premium weapons, services, and equipment from NPC vendors scattered across the island.
Understanding these interconnected benefits helps players make informed decisions about when to aggressively pursue Heat Level increases versus adopting a more conservative approach based on current match circumstances. For broader strategic context, our Battlefield 6 Complete Guide offers foundational gameplay principles applicable across multiple titles.
The risk-reward calculus inherent in the Heat Level system demands sophisticated tactical awareness. While the movement and regeneration benefits provide tangible combat advantages, the increased visibility on enemy minimaps requires adjusted positioning and movement patterns.
Common strategic errors include pursuing Heat Level increases during vulnerable positioning situations or without adequate backup from squadmates. Advanced players coordinate Heat Level progression across team members to maintain balanced threat distribution.
Optimal timing for vault accesses and payphone activations typically occurs during mid-game phases when initial skirmishes have concluded but final circle pressures haven’t yet intensified.
The enhanced mobility at higher Heat Levels enables more aggressive rotation strategies and unexpected flanking maneuvers. However, this advantage must be balanced against the predictability that comes with constant minimap visibility. For character-specific strategies that complement Heat Level playstyles, explore our BF6 Class Selection Guide for specialized loadout recommendations.
Ultimately, the system creates dynamic gameplay where tactical decisions about visibility versus capability trade-offs continuously evolve throughout each match. Mastering this balance separates average performers from truly dominant players during the Most Wanted event timeframe.
Action Checklist
- Monitor your flame icon HUD indicator continuously throughout matches
- Prioritize early-game eliminations and payphone activations when risk is lower
- Coordinate Heat Level progression with squadmates to distribute minimap visibility
- Adjust positioning and movement patterns as Heat Level increases to counter minimap visibility
- Leverage movement speed bonuses for aggressive rotations during late-game phases
No reproduction without permission:SeeYouSoon Game Club » Fortnite Heat Level Explained Master Fortnite's Heat Level system to balance risk and reward during the Most Wanted event