TL;DR
- Fobia combines Silent Hill’s atmosphere with Resident Evil’s inventory puzzles and Fatal Frame’s camera mechanics
- Hotel escape requires solving dynamic code puzzles and assembling a supernatural camera device
- The dimensional camera reveals hidden messages and objects essential for progression
- Key management involves strategic backtracking between rooms 606-611
- Proper camera usage and inventory expansion are critical for late-game success
Fobia: St. Dinfna Hotel represents a modern homage to survival horror’s golden era, blending psychological tension with cerebral challenges that will test even veteran players. The game deliberately channels the oppressive atmosphere of Silent Hill while incorporating the inventory management systems that made Resident Evil legendary.
What sets Fobia apart is its intricate puzzle design that demands careful observation and logical thinking. Unlike many contemporary horror titles that prioritize action, this experience focuses on environmental storytelling through cleverly concealed clues and multi-layered challenges. The dimensional camera mechanic, inspired by Fatal Frame, introduces a unique supernatural element that transforms how players interact with the game world.
The initial hotel section establishes core gameplay loops you’ll utilize throughout your journey. Mastering these early mechanics—particularly the camera’s reality-shifting capabilities and dynamic puzzle solutions—provides essential foundation for navigating later, more complex scenarios.
Your escape journey begins in room 610 after protagonist Roberto Leite Lopes regains consciousness. The initial locked door creates immediate tension, but systematic exploration reveals your path forward. Begin by securing the backpack on the desk to unlock expanded inventory capacity—a system directly borrowed from classic survival horror conventions.
Critical to your progress is the numbered metal object beside the door. This device features a procedurally generated three-digit combination that randomizes with each playthrough, ensuring no two players experience identical solutions. Carefully rotate the object to read the digits sequentially from left to right, then apply this unique code to the suitcase lock to obtain your first key.
This initial key grants access to the bathroom, where two vital items await: a camera lens on the shelf and a static five-digit code (37251) inside an open suitcase. Return to the bedroom armoire and input this fixed combination to retrieve the camera body. Combine both components in your inventory to assemble the supernatural imaging device.
The camera’s activation triggers paranormal phenomena—specifically flickering emanations from the overflowing bathtub. When viewed through the lens, this ordinary fixture reveals terrifying visions that psychologically unlock the main door rather than providing a physical key solution.
Upon exiting your room, immediately investigate room 611 where the camera reveals spectral writing on the bathroom wall. This message provides narrative context while teaching advanced dimensional viewing techniques. The key hanging from room 608’s doorknob represents a clever misdirection—it actually unlocks a hallway drawer containing the genuine room 608 key.
Room 608 contains a breach in the wall leading to room 606, where strategic camera deployment manifests a previously invisible safe. This puzzle demonstrates the device’s object-manifestation capabilities, a mechanic that becomes increasingly crucial in later game sections.
The safe yields another essential key for continued progression. Before advancing further, ensure you collect the additional inventory expansion bag located in the darkened hallway terminus—this extra carrying capacity proves invaluable for managing the numerous items required in subsequent challenges.
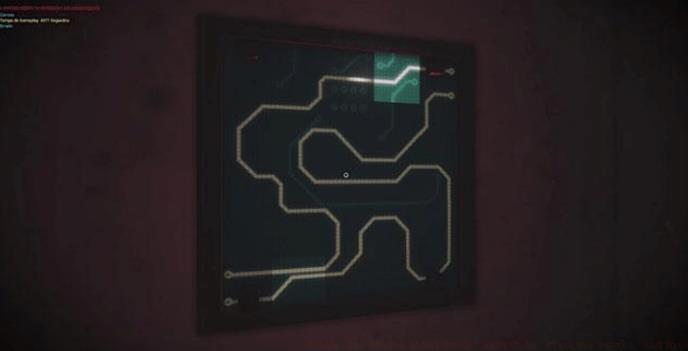
Elevator puzzle solution
Descend to the fifth floor to continue your investigation, but first master the camera’s dimensional shifting to uncover hidden pathways and avoid backtracking unnecessarily.
Seasoned players recommend documenting all discovered codes immediately, as the game provides no in-game note system. The dynamic three-digit combinations particularly demand recording since they cannot be retrieved once progressed beyond certain checkpoints.
Avoid the common mistake of assuming keys correspond to their discovery locations—the room 608 doorknob key being for the hallway drawer perfectly illustrates the game’s deliberate misdirection design philosophy.
Camera battery management becomes critical in later sections. Use the device sparingly during exploration and only when environmental cues (like flickering lights or auditory distortions) indicate dimensional anomalies.
For optimal progression, experienced players complete the initial hotel section in approximately 45-60 minutes. Rushing through puzzles typically results in 20-30 minutes of unnecessary backtracking to retrieve missed items or clues.
The inventory expansion items dramatically improve gameplay flow. Prioritize locating both the initial backpack and hallway bag before attempting complex multi-item puzzles on lower floors.
Action Checklist
- Collect backpack and decipher dynamic 3-digit code from metal object
- Retrieve camera lens and static code (37251) from bathroom
- Assemble camera and use on bathtub to trigger door opening
- Navigate hallway sequence: room 611 camera scan → room 608 key retrieval → drawer unlock → room 606 safe manifestation
- Secure additional inventory bag and descend to fifth floor
No reproduction without permission:SeeYouSoon Game Club » Fobia: St. Dinfna Hotel Guide: Safe Code, Elevator Puzzle, And More Master Fobia's hotel puzzles with expert strategies, camera mechanics, and time-saving solutions