TL;DR
- The Construction Hammer dramatically speeds up building compared to manual placement methods
- Flame Altar defines your buildable area and can be upgraded to expand construction limits
- Comfort items like campfires and mattresses provide crucial stamina regeneration bonuses
- Small Chests offer essential 24-slot storage but require manual inventory management
- Strategic base placement near resources and NPCs enhances long-term survival efficiency
Establishing your first secure base in Enshrouded represents a critical survival milestone that transforms your gameplay experience from nomadic wandering to strategic settlement development.
Enshrouded thrusts your adventurer into a perilous world filled with environmental threats and hostile creatures. Having a reliable home base provides not just safety from dangers but also essential crafting stations and storage solutions. This comprehensive guide delivers actionable strategies to construct your initial shelter while avoiding common beginner pitfalls.
Flame Altar Fundamentals
The Flame Altar serves as the absolute centerpiece of your base operations, defining the perimeter where construction becomes possible. This mystical structure establishes a protective boundary against the deadly shroud while enabling structural development within its radius. Crucially, the Flame Altar features upgradeable capabilities that progressively expand your building territory and enhance defensive properties. Understanding this mechanic early prevents frustrating placement limitations later.
- Construction Hammer – Requires just 1x Stone; enables rapid placement of large structural components and prefabricated elements.
- Workbench – Demands 3x String and 8x Wood Logs; facilitates block crafting, furniture creation, and instant item repairs.
- Rough Stone Block, Rough Wood Block, and Plant Fiber Roof Block – Each complete stack (100 blocks) consumes 2x Stone, 2x Wood, or 5x Plant Fiber respectively; these materials form the backbone of foundation and structural construction.
- Axe – Needs 4x Twigs, 1x Stone, and 1x String; significantly accelerates tree harvesting while boosting resource yields.
- Pickaxe – Requires 4x Twigs, 1x Stone, and 1x String; features a compact mining radius effective for breaking stone and excavating soil.
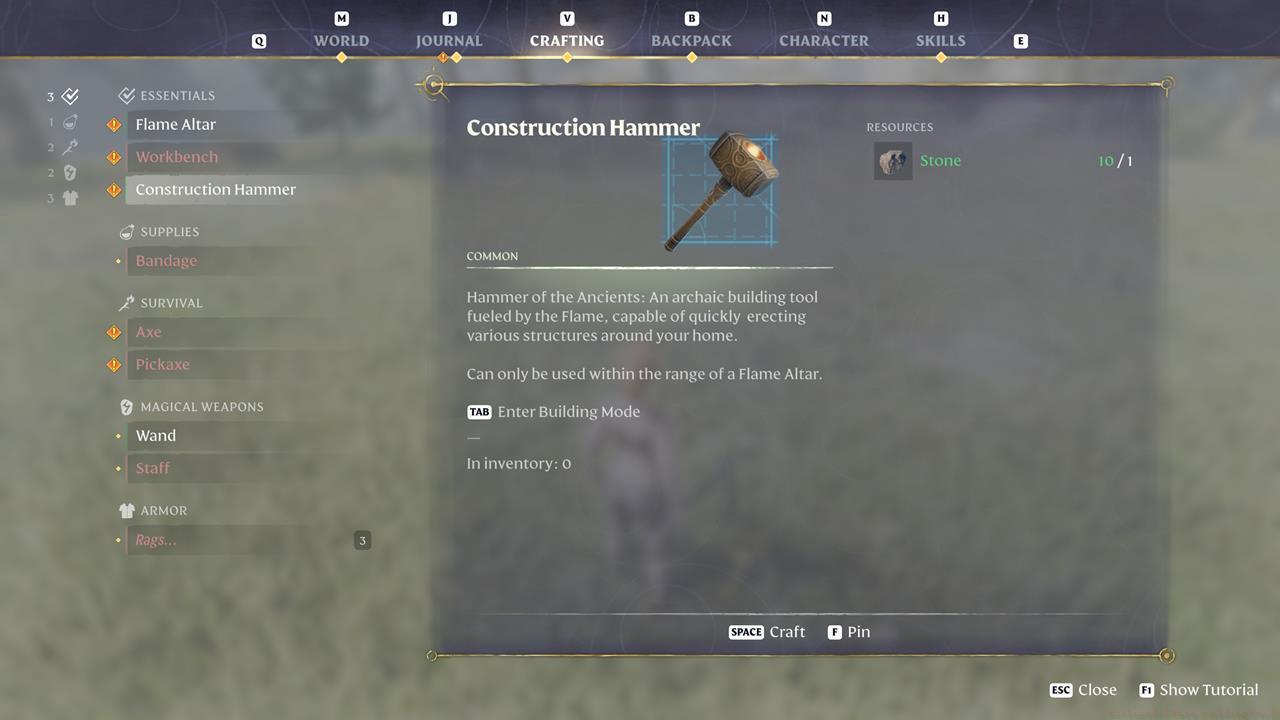
The Construction Hammer revolutionizes building efficiency, transforming tedious manual labor into streamlined construction workflows.
NPC Integration Benefits
Rescuing the Blacksmith NPC unlocks advanced crafting functionalities and exclusive blueprint access that dramatically expands your architectural possibilities. Early rescue missions pay substantial dividends through expanded construction options.
Manual Building Techniques
Manual construction represents the most labor-intensive approach to base development, requiring players to manually transfer block stacks from inventory to action bar slots. This method demands individual placement of every single block, creating an exceptionally tedious building process that tests player patience. However, this method offers unparalleled design flexibility for creating intricate architectural details and custom shapes that prefabricated options cannot match.
Construction Hammer Mastery
The Construction Hammer completely transforms the building experience through its intuitive Building Mode interface. Simply assign the hammer to an action slot, then activate construction mode using the tab key (keyboard) or left trigger/LT (Xbox controller). This interface provides categorized access to structural components and decorative elements that can be placed instantly with single clicks.
Pro Tip: Always enable the “Use Snapping” feature by pressing “X” (keyboard) or right thumbstick/R3 (gamepad). This crucial setting ensures floors, walls, roofs, and other structural elements automatically align and connect properly, eliminating frustrating misalignments and structural instability issues.


Manual block placement (left) consumes significantly more time compared to Construction Hammer efficiency (right).
Snapping System Optimization
Mastering the snapping system represents one of the most impactful skill developments for efficient base construction. Proper snapping not only accelerates building speed by approximately 300% but also ensures structural integrity by preventing misaligned connections that could compromise building stability during environmental events or attacks.
Let’s implement practical construction techniques by building a functional small house that provides essential shelter and crafting space for your character’s survival needs.
- Utilize your Workbench to produce abundant Rough Stone Blocks supplemented by several Plant Fiber Roof Blocks. Additionally craft a few Wooden Window Frames and one Crude Wooden Door for complete enclosure.
- Activate Building Mode through the Construction Hammer interface.
- Navigate to the 2M or 4M foundation categories and select appropriate base foundation options. Position these foundational elements securely on leveled ground.
- Erect walls surrounding the established foundations, ensuring proper snapping alignment throughout. Designate one wall section for door frame installation and optionally select specific walls for window frame integration based on visibility and defensive priorities.
- Access the corresponding 2M Roofs or 4M Roofs category matching your foundation dimensions. Install roof components above the completed wall structures.
- Finalize the structure by mounting the Crude Wooden Door and Wooden Window Frames into their pre-designated wall segments.
Common Mistake: Beginners often underestimate material requirements, leading to frustrating mid-construction resource shortages. Always gather 150% of estimated needs before beginning construction.
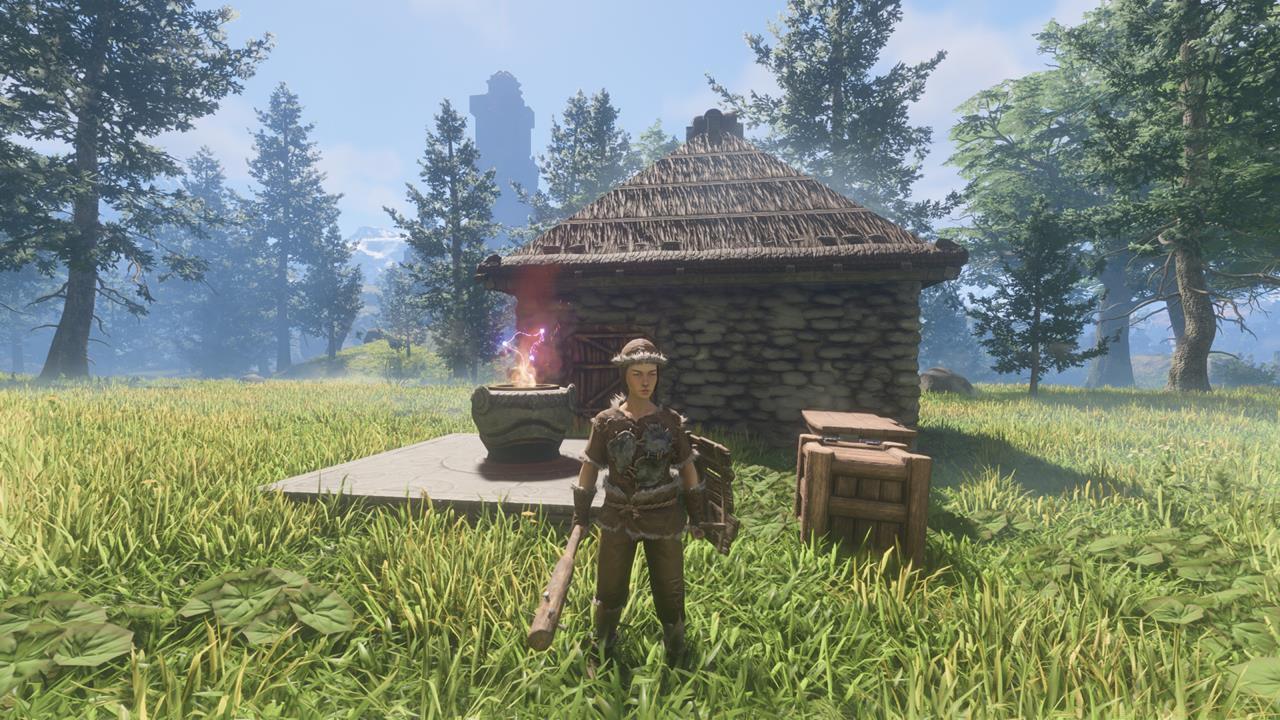
A properly constructed small hut provides not just shelter but psychological security, serving as a reliable home base between dangerous exploration missions.
Congratulations! Your character now possesses a secure small house in Enshrouded. While the basic structure stands complete, interior furnishing and functional fixtures represent the next development phase.
Enhancing your character’s comfort level within your Enshrouded base delivers tangible gameplay advantages, particularly regarding stamina management and survival efficiency.
To optimize comfort metrics when establishing your base, ensure your character maintains well-rested status while maintaining proximity to reliable warmth sources:
- Campfire (Manual Crafting menu) – Requires 2x Wood Logs; generates essential warmth while enabling food preparation capabilities.
- Crude Mattress (Workbench menu) – Demands 4x Plant Fiber, 3x String, and 4x Torn Cloth; permits character sleeping functionality. Important clarification: sleeping accelerates the day-night cycle progression but doesn’t instantly transition between daylight and darkness periods.
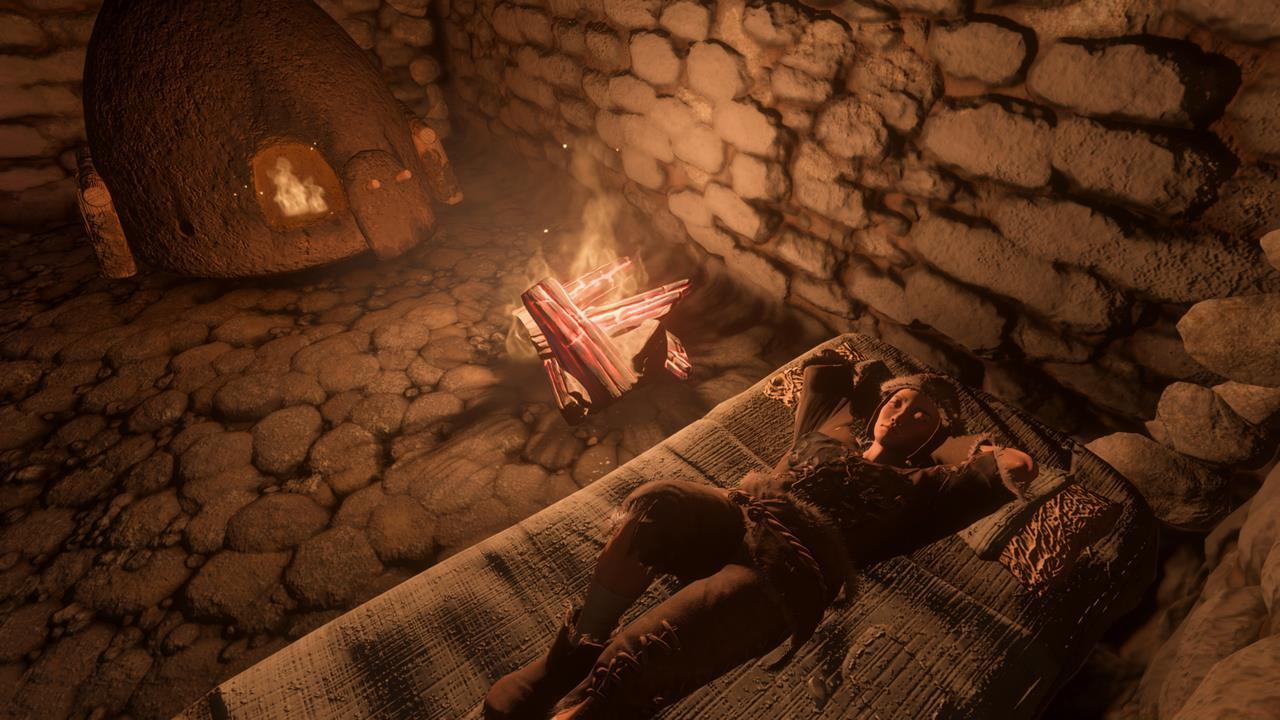
Maintaining well-rested status provides substantial stamina regeneration bonuses that dramatically impact exploration endurance and combat effectiveness.
Advanced Strategy: Position your bed near campfires but maintain safe distance to prevent accidental ignition while maximizing comfort radius benefits. The optimal configuration creates overlapping comfort zones that compound regeneration bonuses.
Given Enshrouded’s restrictive inventory capacity, developing efficient storage systems becomes non-negotiable for sustained survival and progression.
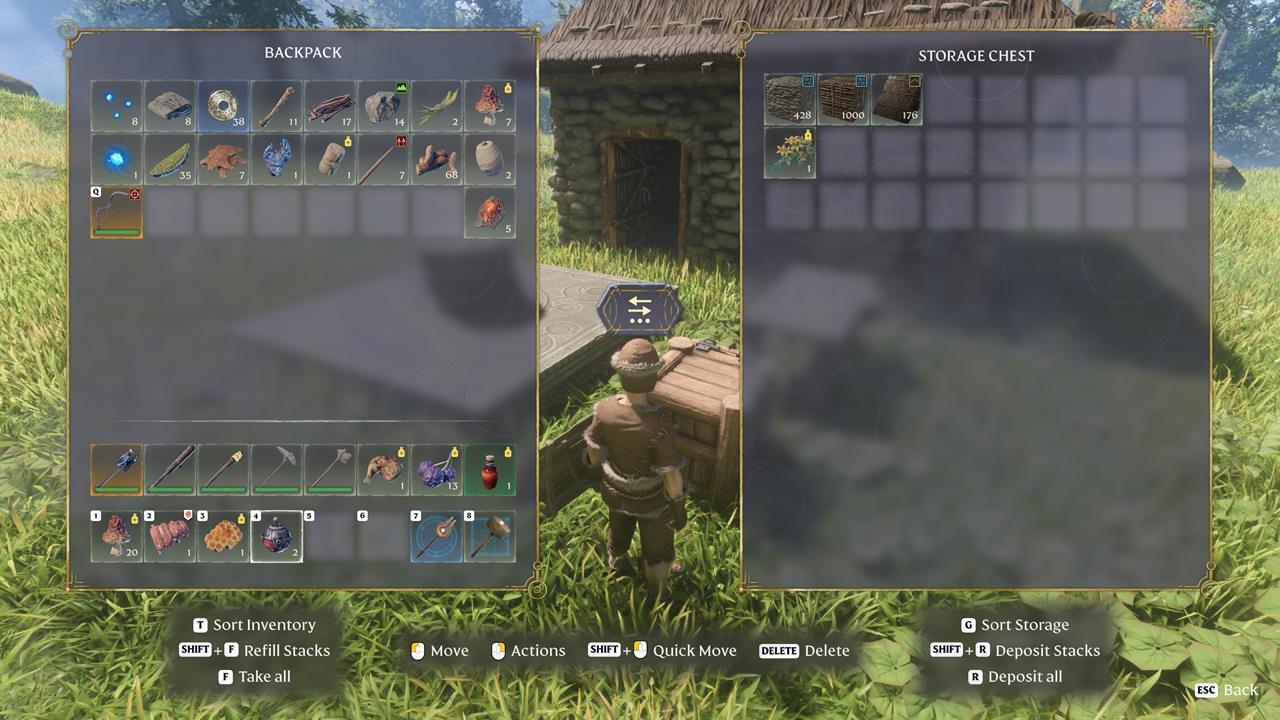
Address storage limitations by crafting Small Chests (skip the inefficient Tiny Chest entirely). Fabricate Small Chests at the Workbench using 6x Nails and 6x Wood Logs. These containers provide 24 valuable storage slots for systematic material organization.
The container’s 24-slot capacity makes it essential for securing base-related items before embarking on exploration missions. Critical design note: resources stored inside chests don’t contribute to crafting or construction tallies, requiring manual retrieval when needed. This represents an unconventional design choice that demands adaptive player behavior.
Maintain adequate inventory capacity by strategically storing non-essential materials before venturing into dangerous territories.
Storage Pro Tip: Create categorized chest systems—one for construction materials, another for consumables, and a third for valuable resources. This organizational approach saves significant time during crafting sessions and resource management.
This comprehensive Enshrouded base building guide establishes fundamental construction principles and survival strategies. These foundational techniques prepare you for advanced base development as you recruit additional NPCs and unlock sophisticated structural components and specialized materials.
Enshrouded presents an expansive open-world survival experience where you navigate cursed landscapes blanketed in lethal mists. For additional strategic guidance, explore our comprehensive guides hub for specialized tutorials and advanced gameplay optimization.
Action Checklist
- Craft Construction Hammer (1x Stone) and Workbench (3x String, 8x Wood Logs)
- Establish Flame Altar as base centerpoint and gather 150% of estimated building materials
- Rescue Blacksmith NPC to unlock advanced crafting blueprints
- Build foundation, walls, and roof using Construction Hammer with snapping enabled
- Place comfort items (campfire and mattress) with optimal spacing for bonus stacking
- Craft and organize Small Chests with categorical storage systems
No reproduction without permission:SeeYouSoon Game Club » Enshrouded Base Building Guide Master Enshrouded base building with essential tools, construction techniques, and survival optimization strategies