TL;DR
- Zamor Ruins introduce fast-attacking enemies requiring stealth or speed tactics
- The stone bridge crossing demands maximum Torrent speed to avoid golem archer attacks
- Borealis the Freezing Fog offers 100K runes but poses significant early-game challenge
- Heretical Rise’s invisible bridge requires precise navigation for powerful spell reward
- Castle Sol contains essential items for accessing hidden game areas
Venturing into Elden Ring’s Mountaintops of the Giants presents one of the game’s most challenging late-game regions, demanding strategic preparation and expert navigation skills. This frozen wasteland serves as the culmination of your journey through the Lands Between, testing everything you’ve learned so far.
Located beyond the Forbidden Lands in the northernmost reaches, the Mountaintops of the Giants ironically hosts few living giants, instead being populated primarily by corpses, monstrous creatures, and remnants of ancient civilizations. The area contains numerous critical locations tied to your main quest progression alongside valuable optional content that rewards thorough exploration with powerful items and spells.

Strategic approach to Zamor Ruins sets the tone for your entire Mountaintops exploration experience.
As the initial landmark encountered after ascending via the Grand Lift of Rold, the Zamor Ruins function as both a loot-rich area and combat tutorial for the region’s unique threats. The tall, agile Zamor Warriors attack with surprising speed and coordination, making direct confrontation risky for unprepared travelers.
Critical rewards include the Smithing-Stone Miner’s Bell 3, enabling unlimited purchase of high-level upgrade materials from the Twin Maiden Husks. Additional valuable items scattered throughout require careful navigation past multiple enemy patrols that can quickly overwhelm solo players.
Advanced strategy: Employ hit-and-run tactics using Torrent’s mobility, or utilize the ruins’ structural layout for stealth approaches. The enemies possess limited vertical tracking, making elevated positions effective for ranged attacks. Their frost-based attacks can quickly build up status effects, making frost resistance gear particularly valuable here.
Progressing beyond the ruins reveals a perilous stone walkway serving as the primary access point to the region’s deeper areas. This narrow bridge-like structure presents one of the Mountaintops’ most frustrating traversal challenges due to its limited cover and distant enemy threat.
A single Giant Golem Archer positioned on the far side possesses incredible range and accuracy with its massive arrows. These projectiles not inflict substantial damage but can knock riders from Torrent, potentially sending you plummeting to your death from the elevated pathway.
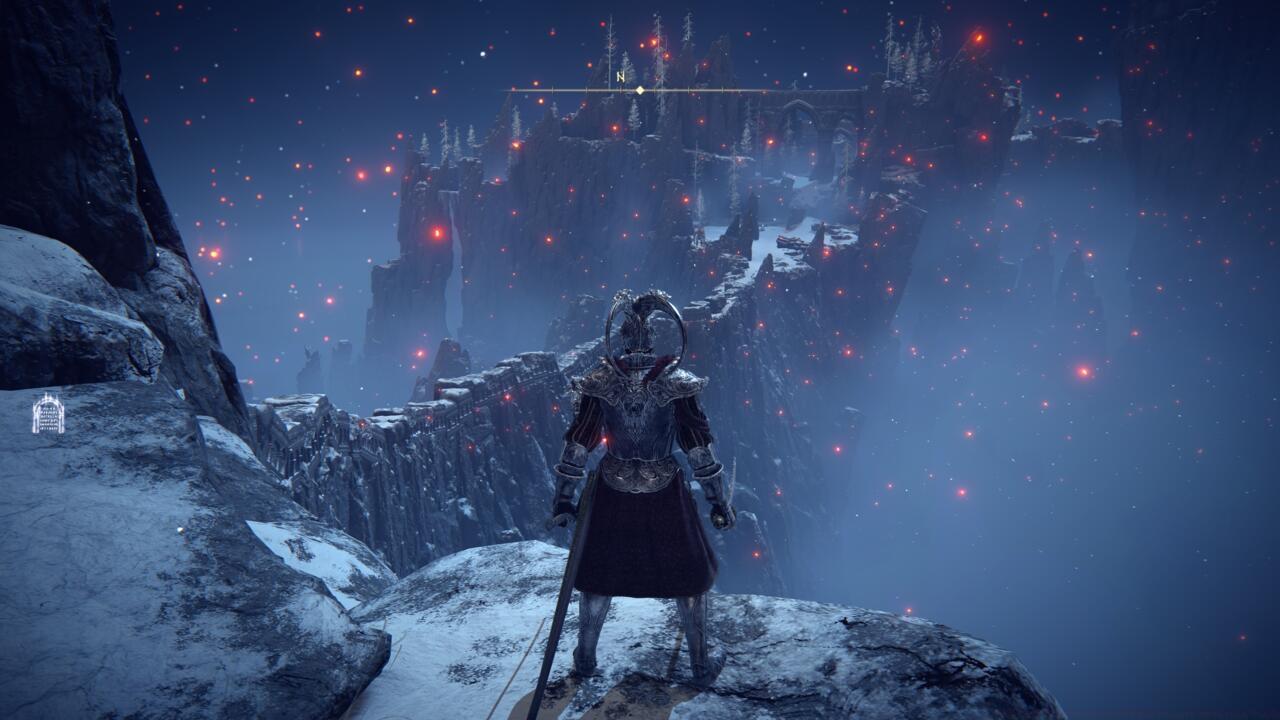
The stone bridge crossing demands precise timing and speed to avoid the golem archer’s devastating attacks.
Optimal approach: Mount Torrent and trigger a full-speed dash across the gap, utilizing the occasional stone pillars for momentary cover. While valuable smithing stones dot the bridge’s middle section, collecting them requires dismounting and exposing yourself to arrow fire—weigh risk versus reward carefully based on your current upgrade needs.
Pro tip: The golem’s attack pattern follows a predictable rhythm—observe several volleys from a safe distance to time your sprint during its reload animation. Magic users can employ long-range spells to eliminate the threat before crossing, though this requires significant FP investment and precise aiming.
Successfully navigating the bridge deposits you in a sprawling canyon bisected by a frozen river, with the massive frozen lake to the northeast presenting both opportunity and danger. The lake’s central area features dramatically reduced visibility during snowstorms, creating perfect ambush conditions for the area’s primary threat.
Borealis the Freezing Fog patrols the lake’s center, emerging from the dense snowfall with little warning. This optional dragon boss delivers punishing area-of-effect frost attacks and commands 100,000 Runes plus a Dragon Heart upon defeat—substantial rewards balanced by significant combat difficulty.
Strategic considerations: Borealis shares many attack patterns with other dragons but incorporates unique frost breath techniques that can freeze players solid. The battle becomes considerably more manageable with fire-based weapons or spells, which counteract its elemental affinity. Mounted combat proves highly effective for evading its ground-based frost attacks.
Essential diversion: The First Church of Marika on the lake’s southern edge contains a Sacred Tear for enhancing your Flask potency—an essential upgrade for the coming challenges.
Advanced tactic: Borealis becomes temporarily staggered after sustained head attacks, creating critical damage windows. Magic users should prioritize spells with fast casting times to maintain mobility during its aggressive assault phases.
The Heretical Rise tower presents one of Elden Ring’s most inventive environmental puzzles, requiring navigation of an invisible pathway across the canyon chasm. This magical structure demands both careful observation and precise movement to access its valuable contents.
Access point: Begin from the northern cliffside where bridge remnants indicate the starting position. The invisible path extends straight toward the tower for approximately 90% of the distance before veiling left in a rising circular pattern leading to a balcony entrance.

Navigating Heretical Rise’s invisible bridge requires careful observation and testing each step.
Navigation technique: Use throwing knives, arrows, or glowing stones to visually map the pathway before committing to each section. The final spiral section proves particularly treacherous with its changing elevation and direction.
Interior threats: Immediately upon entry, several magical adversaries await in the initial chamber. These enemies employ sorceries that can quickly deplete health from close range, making defensive positioning crucial.
Ultimate reward: The tower’s peak houses the Founding Rain of Stars spell—an exceptionally powerful sorcery that creates a devastating stellar downpour over a wide area, making the challenging access worthwhile for magic-focused builds.
Safety measure: Always maintain a light equip load for longer rolls, and consider the Ash of War: Bloodhound’s Step for additional mobility during the invisible sections.
Though technically optional, Castle Sol represents one of the Mountaintops’ most significant locations due to housing essential items for accessing hidden game content. The fortress stands as a formidable stronghold protected by both environmental hazards and elite warriors.

Castle Sol’s challenging architecture and powerful defenders guard critical progression items.
Strategic approach: Eliminate Niall’s summoned knights first, as they create overwhelming pressure when combined with his aggressive assault patterns. The knights possess relatively low health pools compared to the commander, making them priority targets.
Reward significance: Successfully navigating Castle Sol and defeating its commander yields the Haligtree Secret Medallion (Right)—essential for accessing Consecrated Snowfield and ultimately Miquella’s Haligtree.
Combat tips: Commander Niall exhibits vulnerability to strike damage and fire attacks. His lightning techniques leave brief recovery windows that skilled players can exploit for counterattacks.
Advanced preparation: Stock up on Preserving Boluses to counter his frostbite buildup, and consider bringing a shield with high lightning resistance for his most devastating attacks.
The Giant’s Graveyard presents a somber landscape filled with massive skeletal remains, serving as both a visual spectacle and practical combat environment. The area contains scattered enemies that, while not particularly threatening individually, can create dangerous situations through numerical advantage if approached carelessly.
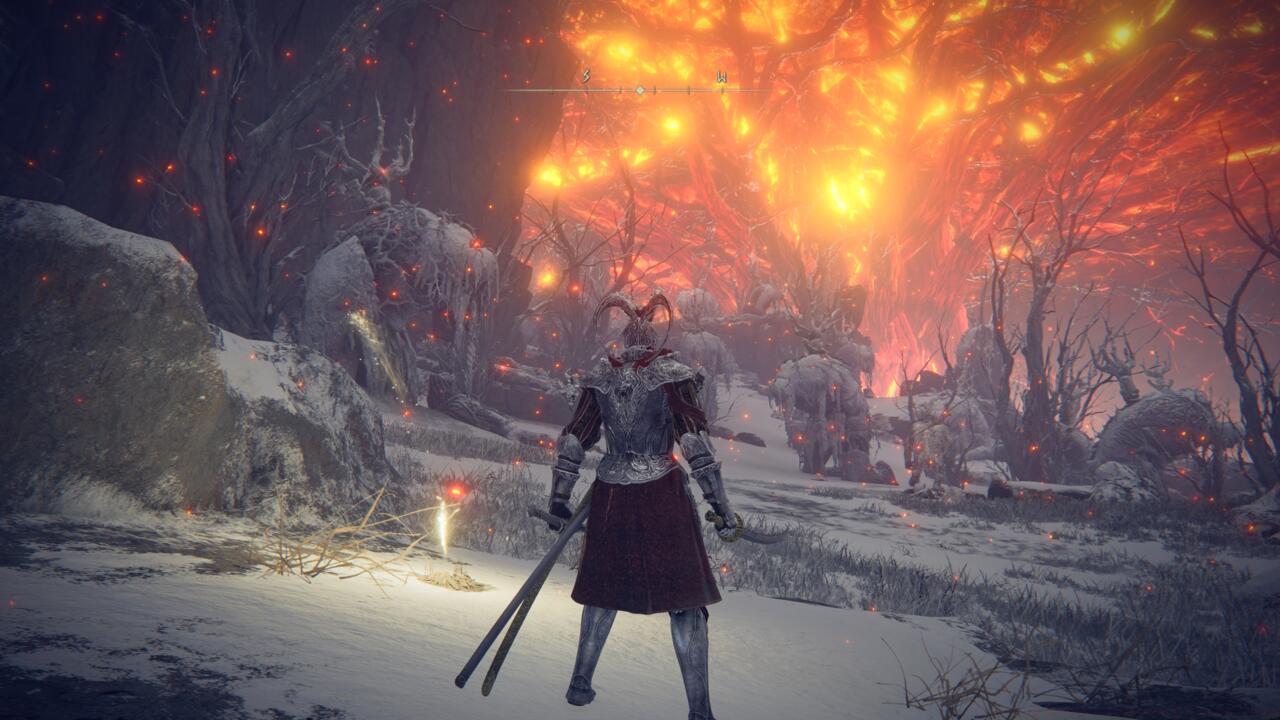
The Giant’s Graveyard’s atmospheric design creates both visual spectacle and tactical challenges.
Climactic encounter: The Fire Giant stands as one of Elden Ring’s most imposing boss battles, demanding mastery of mounted combat and precise timing. This mandatory fight represents a key story moment with significant narrative consequences.
Fire Giant tactics: Target the giant’s injured leg during the first phase for increased damage, then transition to hand attacks during the second phase when it becomes more mobile.
Final objective: Beyond the Fire Giant lies the Forge of the Giants, where you must make a critical decision affecting your ending progression. This location serves as the culmination of your Mountaintops journey.
Action Checklist
- Secure Smithing-Stone Miner’s Bell 3 from Zamor Ruins for weapon upgrades
- Execute high-speed Torrent dash across stone bridge to avoid golem archer
- Collect Sacred Tear from First Church of Marika
- Defeat Borealis the Freezing Fog for 100K runes (optional)
- Navigate invisible bridge to Heretical Rise for Founding Rain of Stars spell
- Conquer Castle Sol and defeat Commander Niall for Haligtree Medallion
- Defeat Fire Giant and proceed to Forge of the Giants
No reproduction without permission:SeeYouSoon Game Club » Elden Ring Mountaintops of the Giants Location Guide Master the treacherous Mountaintops of the Giants with expert navigation tips and strategic combat guidance