TL;DR
- Recruit Isha, Garoo, and CJ from Eiyuden Chronicle: Rising to unlock the southeastern Runebarrows
- Flee the initial Rune Golem battle – it’s designed to be unwinnable until you solve all puzzles
- Complete six symmetrical puzzles (three on each side) to weaken the Golem significantly
- The area contains valuable treasure chests with powerful equipment and rare items
- Use strategic positioning and elemental attacks for the final weakened Golem encounter
GameSpot may receive revenue from affiliate and advertising partnerships for sharing this content and from purchases through links.
Eiyuden Chronicle: Hundred Heroes introduces numerous compelling characters throughout your adventure. Veterans of the prequel will recognize several returning faces that expand the narrative universe. This comprehensive guide details the methodology for resolving all Runebarrows puzzles within the game. Please be aware that this content includes minor narrative spoilers.
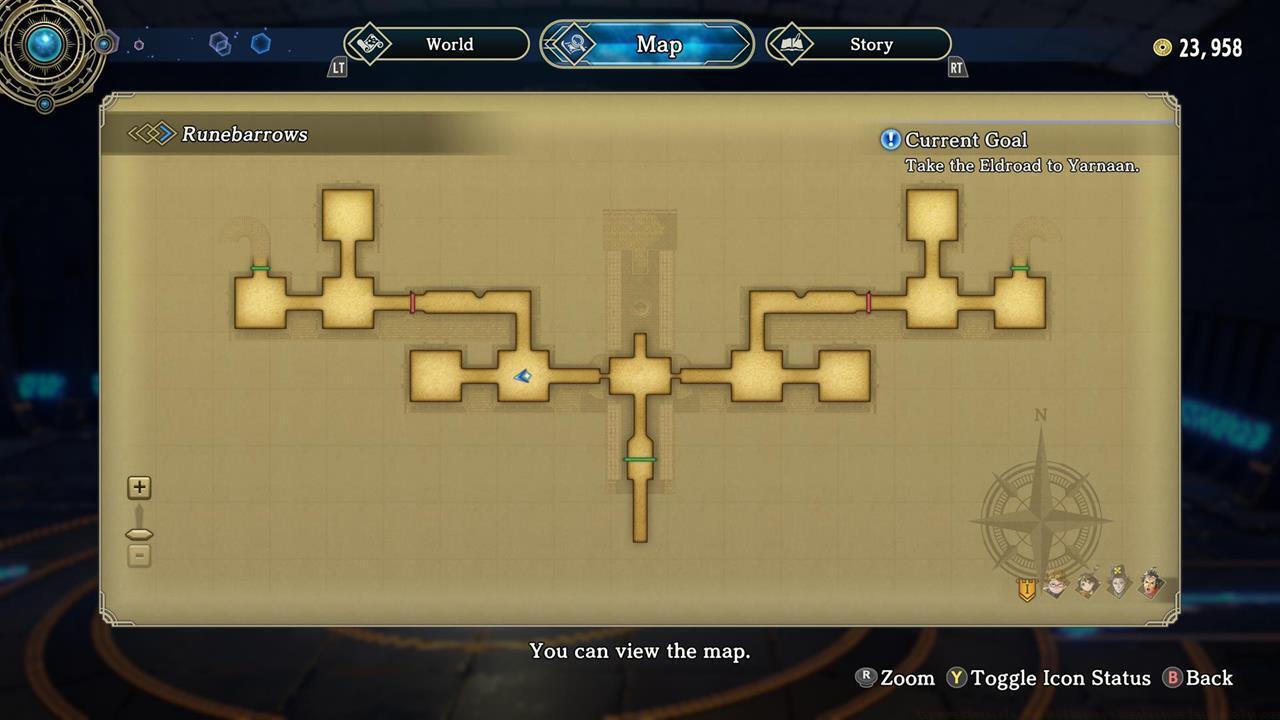
Our Eiyuden Chronicle: Hundred Heroes Runebarrows puzzle solutions concentrate specifically on the southeastern location relative to Arenside settlement. While multiple Runebarrows exist throughout the game world, including the northern instance serving as your initial campaign objective, the southeastern variant remains inaccessible during early gameplay phases. Access becomes available following substantial main story progression and completion of specific character recruitment objectives.
Gaining entry to the sealed Runebarrows chamber requires assembling the three central protagonists from Eiyuden Chronicle: Rising. These essential characters include Isha, Garoo, and CJ. Below are the critical recruitment details:
- Isha becomes available in Eltisweiss after concluding primary missions within Hishahn’s metropolitan area. She presents multiple side quests requiring completion before joining your forces permanently. Detailed recruitment procedures are available in our dedicated Isha recruitment guide.
- Garoo accompanies Marisa when they jointly join your cause. This character integration occurs following the Hishahn narrative arc and successful resolution of Seign’s compact storyline.
- After securing both Garoo and Isha within your resistance organization, depart from castle headquarters and proceed along the pathway toward the primary entrance. CJ will materialize unexpectedly, instructing you to journey toward the Runebarrows with both Garoo and Isha actively participating in your current party formation.
- Upon reaching the destination, CJ will disengage the Runebarrows security mechanism. You maintain the flexibility to exit and revisit your headquarters whenever necessary, though CJ will persistently remain stationed at the Runebarrows entrance until you accomplish the central objective.
CJ activates a pressure plate upon arrival, summoning a formidable Rune Golem adversary. This boss encounter will decisively overwhelm your party composition through devastating offensive capabilities inflicting massive damage output. Your companion characters will explicitly observe during combat that the entity appears invincible. Consequently, strategic withdrawal from engagement represents the optimal tactical decision. Subsequent dialogue indicates potential methods exist to degrade its combat effectiveness.
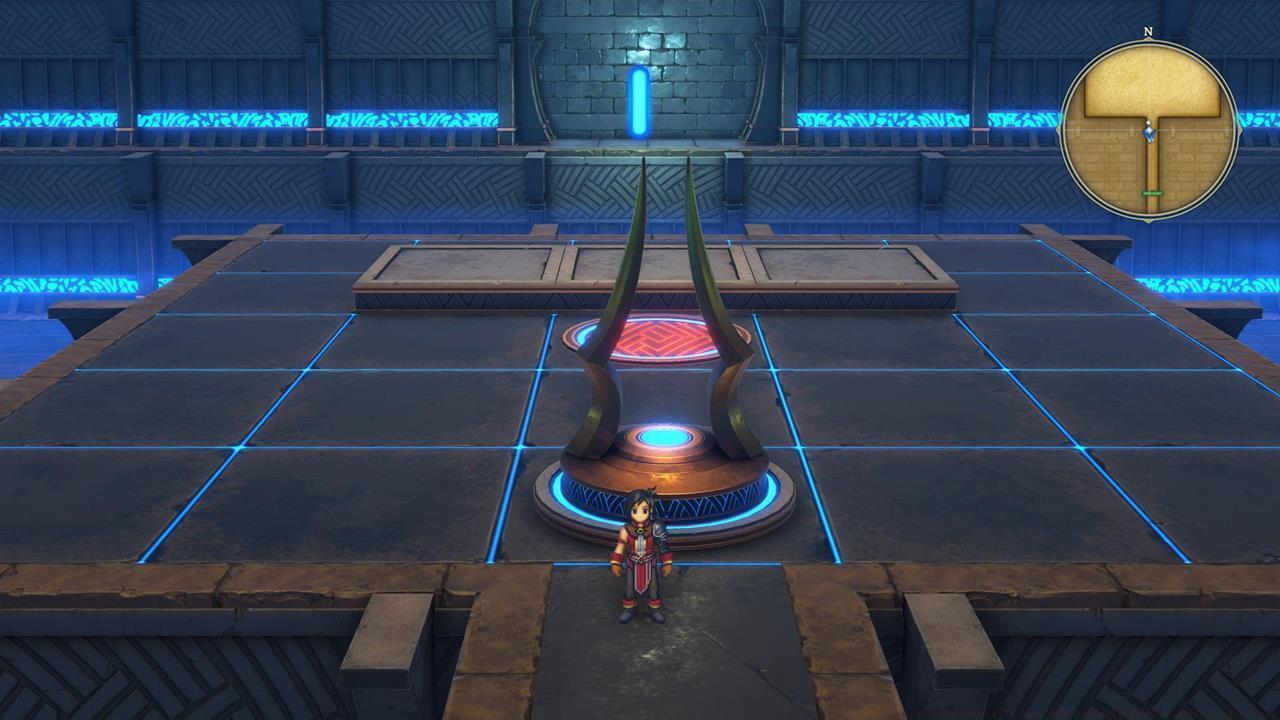
Your revised mission objective involves activating ancient mechanisms by successfully solving the Eiyuden Chronicle: Hundred Heroes Runebarrows environmental puzzles. Both left and right wing sections demonstrate symmetrical architectural layouts, featuring descending passages accessing subterranean levels containing additional puzzle interfaces. The complex also houses multiple treasure containers yielding substantial valuable loot.
Pro Tip: The initial Golem encounter serves as an intentional narrative device teaching players strategic retreat mechanics. Attempting to prolong this unwinnable battle wastes valuable resources and healing items. Immediately utilize escape commands when party members begin commenting on the impossibility of victory.
Common Mistake: Many players exhaust their consumable inventory attempting to defeat the Golem prematurely. This creates resource scarcity issues for subsequent puzzle-solving segments and the final confrontation.
The left wing presents three progressively complex environmental puzzles requiring methodical problem-solving approaches. Each successfully resolved mechanism contributes to systematically weakening the Rune Golem’s defensive capabilities.
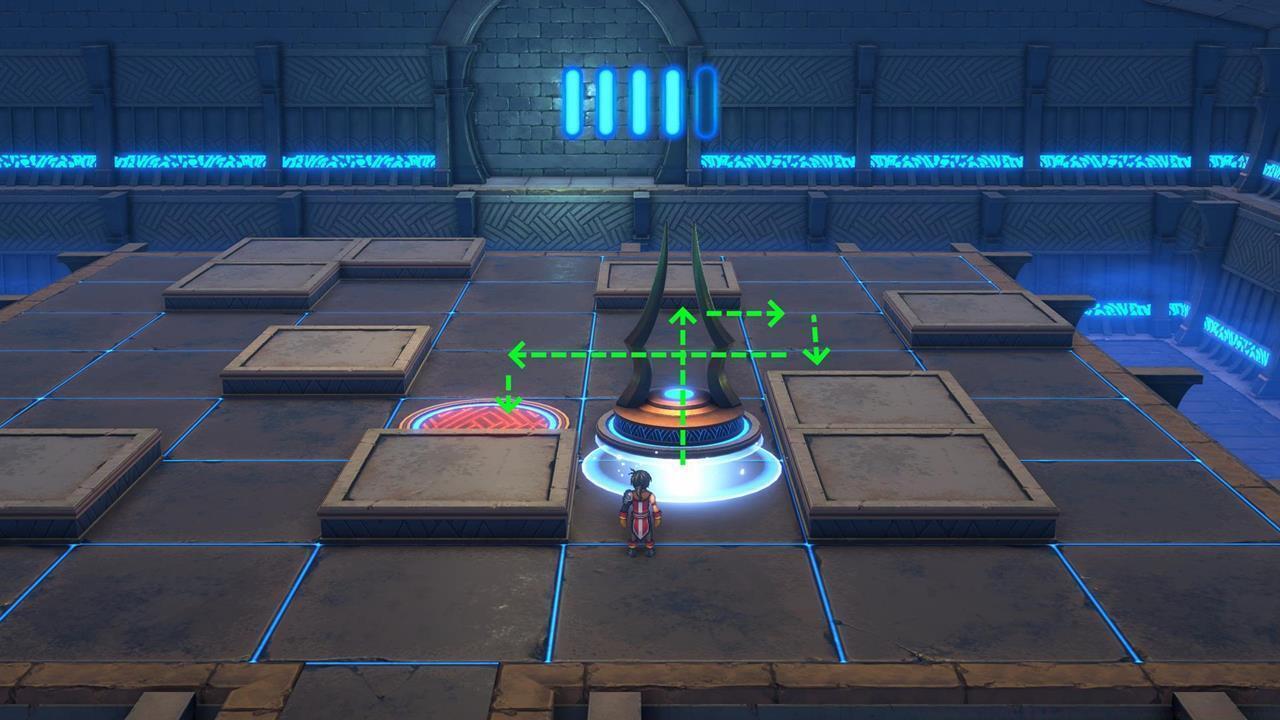
Puzzle #1 Solution: This introductory mechanism involves aligning elemental symbols in specific sequential patterns. Begin by interacting with the central console to establish baseline configuration. Rotate the outer ring clockwise twice, then adjust the inner mechanism counterclockwise once. The solution produces audible confirmation when correctly executed.
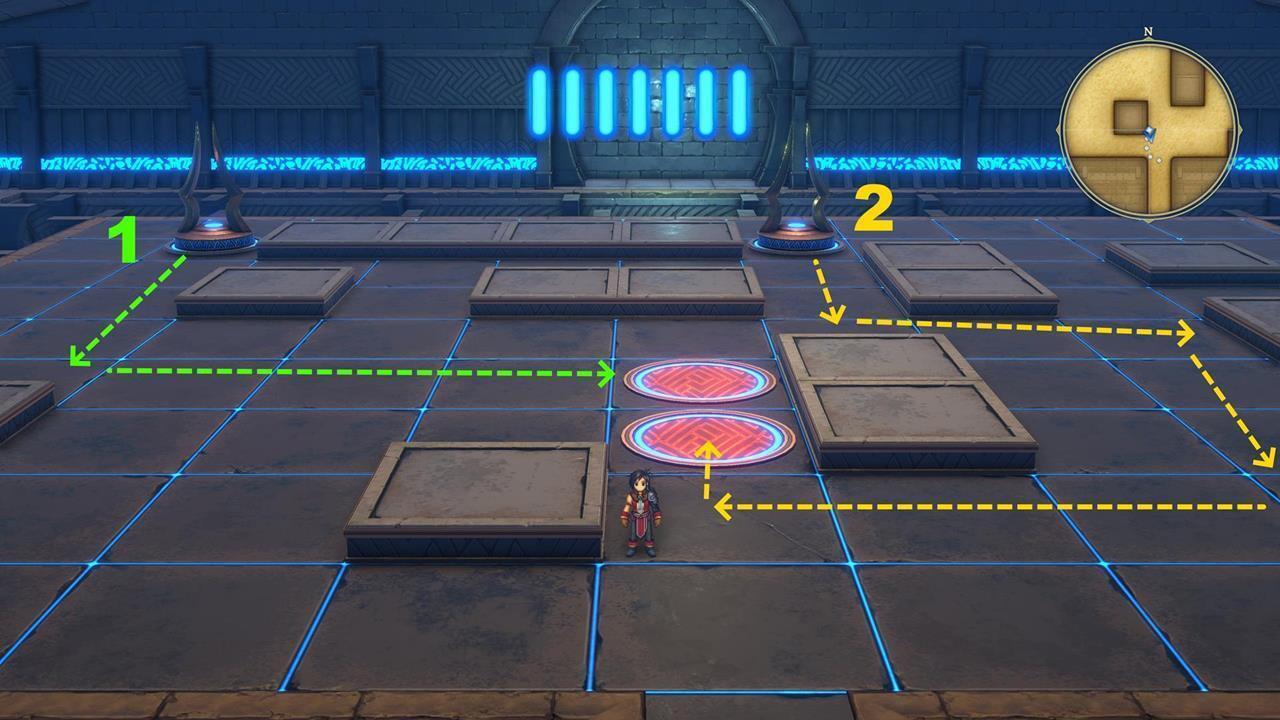
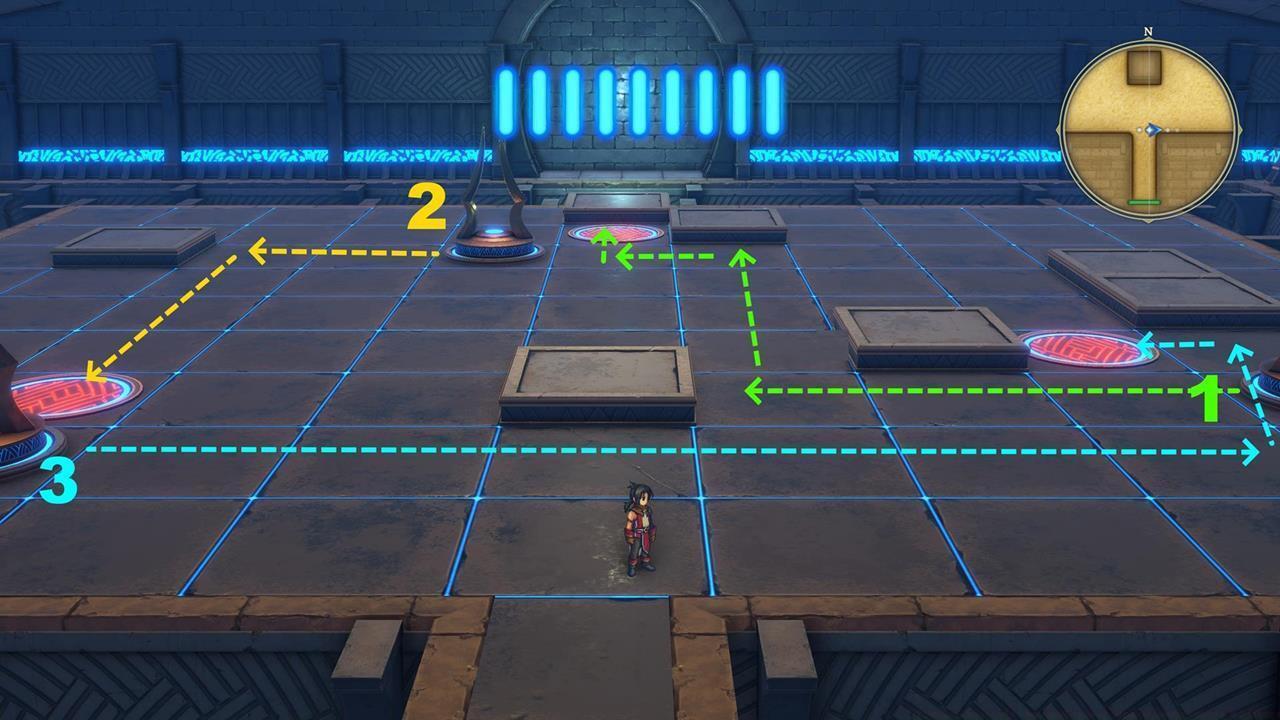
Puzzle #2 Solution: The intermediate challenge incorporates pressure plates and movable statues. Position the first statue on the western plate, the second on the northeastern plate, and the third on the southeastern plate. Activation sequence matters – proceed in clockwise orientation from the entrance.
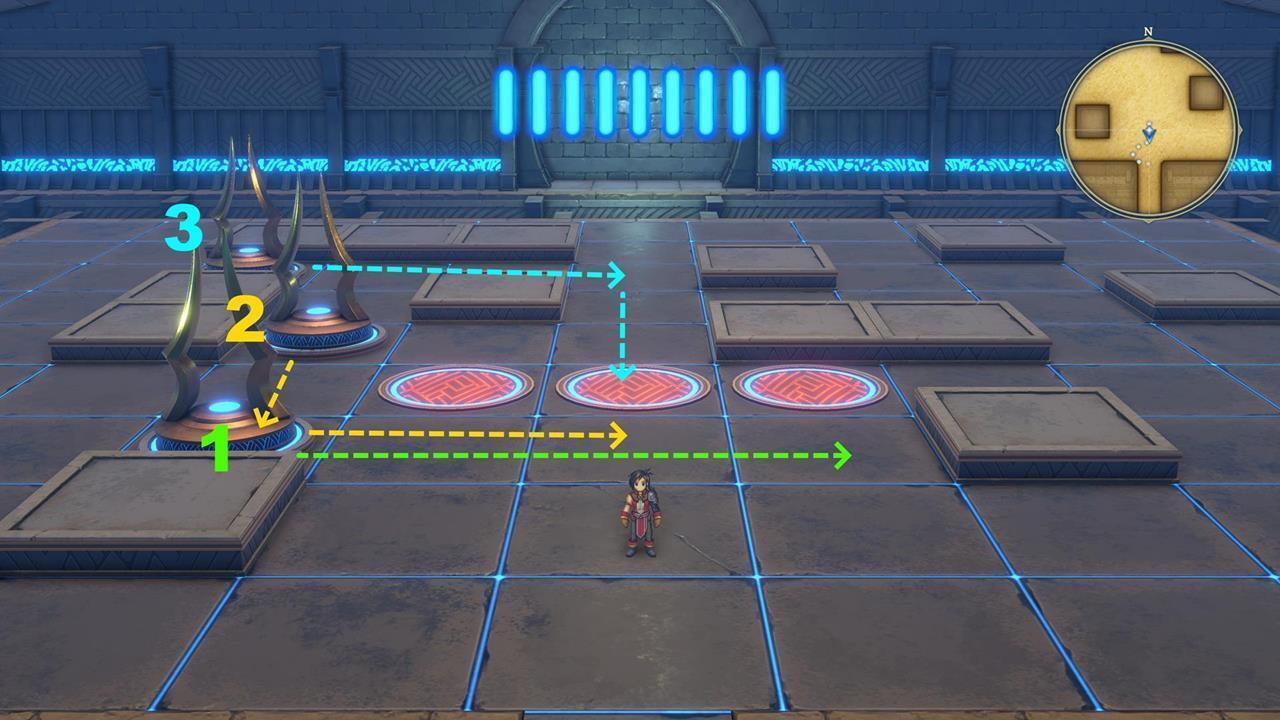
Puzzle #3 Solution: This advanced puzzle combines light reflection mechanics with timed platform movements. Activate the initial crystal to commence the sequence. Redirect the beam toward the central prism, then quickly navigate across the disappearing platforms before they reset. The solution requires precise timing and memorization of platform patterns.
Optimization Tip: Complete puzzles during daylight hours for improved visibility of environmental clues. Nighttime completion increases difficulty due to reduced contrast on puzzle elements.
The right wing mirrors the left’s symmetrical layout but introduces unique mechanical variations that prevent simple pattern replication. Each puzzle resolution contributes additional degradation to the Golem’s combat parameters.
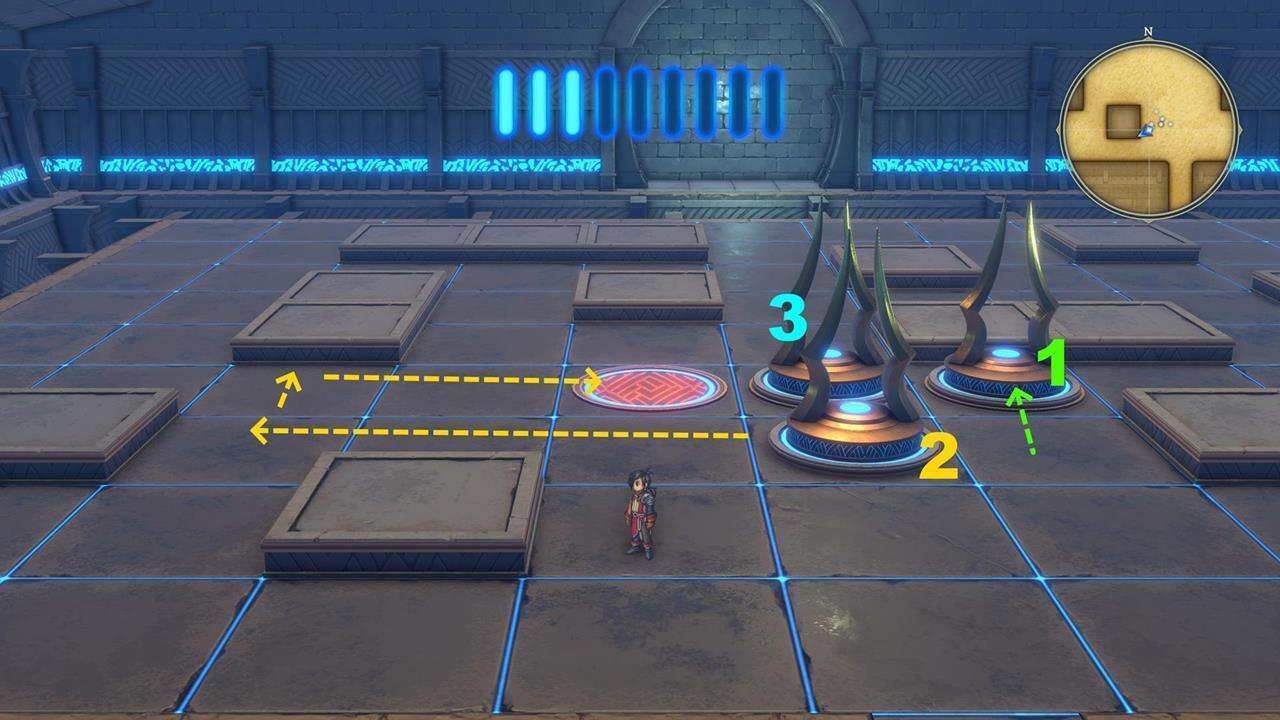
Puzzle #1 Solution: This mirror challenge involves counterweight balancing across three platforms. Load the left platform with two weights, the center remains empty, and the right platform receives one weight. The mechanism unlocks when equilibrium is achieved.

Puzzle #2 Solution: The symmetrical intermediate puzzle requires color-based symbol matching. Associate blue crystals with triangular markers, red with circular patterns, and green with square indicators. Activation occurs automatically upon correct configuration.
Puzzle #3 Solution: This final mirror puzzle incorporates rotating bridges and elemental alignment. Position the bridges to form continuous pathways: earth bridge oriented north-south, water bridge east-west, and fire bridge diagonal northeast-southwest. Complete within two minutes to avoid mechanism reset.
Advanced Strategy: Experienced players can solve both wings simultaneously by splitting their party, though this requires careful coordination and communication between team members.
Upon resolving all six environmental puzzles, the Rune Golem undergoes substantial power reduction, transforming the encounter from impossible to strategically manageable.
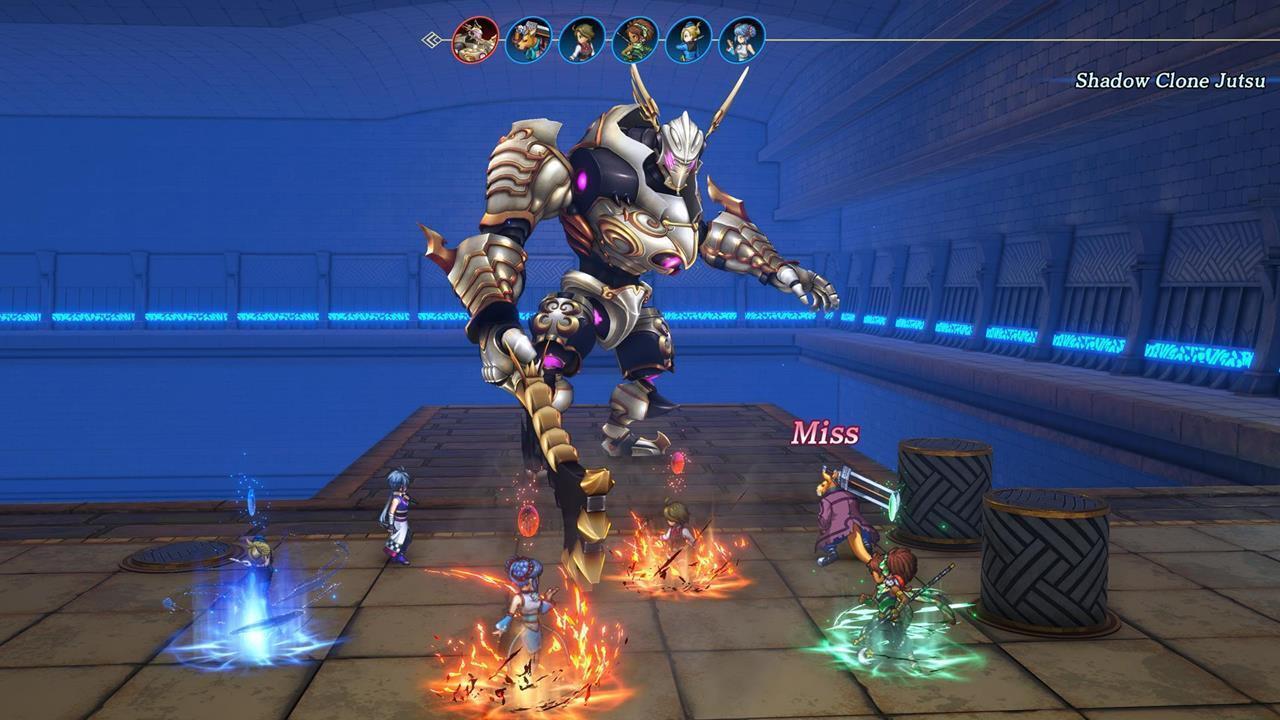
Weakened Golem Strategy: The entity now exhibits significantly reduced damage output and defensive capabilities. Focus attacks on its crystalline core vulnerability that becomes exposed following puzzle completion. Utilize elemental combinations – fire attacks against earth-infused segments, water against fire-based components.
The Runebarrows complex contains eight treasure chests strategically positioned throughout both wings. Rewards include rare crafting materials, powerful equipment enhancements, and substantial currency reserves. One chest contains a unique accessory that cannot be obtained elsewhere in the game world.
Reward Analysis: The most valuable loot includes the Runic Amulet (grants MP regeneration), Golem’s Heart (rare alchemy component), and several high-tier weapon upgrade materials.
Time Investment: Most players require 45-60 minutes to complete all puzzles and defeat the weakened Golem. Speedrunners can achieve completion in approximately 25 minutes using optimized routing strategies.
For comprehensive character optimization strategies that enhance your puzzle-solving efficiency, consult our detailed Class Guide covering optimal party compositions for environmental challenges.
Action Checklist
- Complete Hishahn main story arc and recruit Isha through her questline in Eltisweiss
- Recruit Garoo alongside Marisa after Seign’s storyline conclusion
- Trigger CJ’s appearance at castle gates with both recruits in party
- Immediately retreat from initial Rune Golem encounter to conserve resources
- Solve all six puzzles (three per wing) to weaken the Golem
- Defeat the weakened Rune Golem using elemental targeting strategies
- Collect all eight treasure chest rewards throughout the complex
No reproduction without permission:SeeYouSoon Game Club » Eiyuden Chronicle: Hundred Heroes – Runebarrows Puzzle Solutions Master the Runebarrows puzzles and defeat the Rune Golem with our comprehensive step-by-step guide