TL;DR
- Complete Act I of A Rift in Time expansion before starting this quest
- Use Royal Hourglass in three specific locations to collect all Flickers
- Follow precise photography sequence inside the newly revealed ruins
- All Flickers remain close to wells – don’t waste time searching distant areas
- Quest takes approximately 15-25 minutes depending on realm travel efficiency
GameSpot may receive revenue from affiliate and advertising partnerships for sharing this content and from purchases through links.
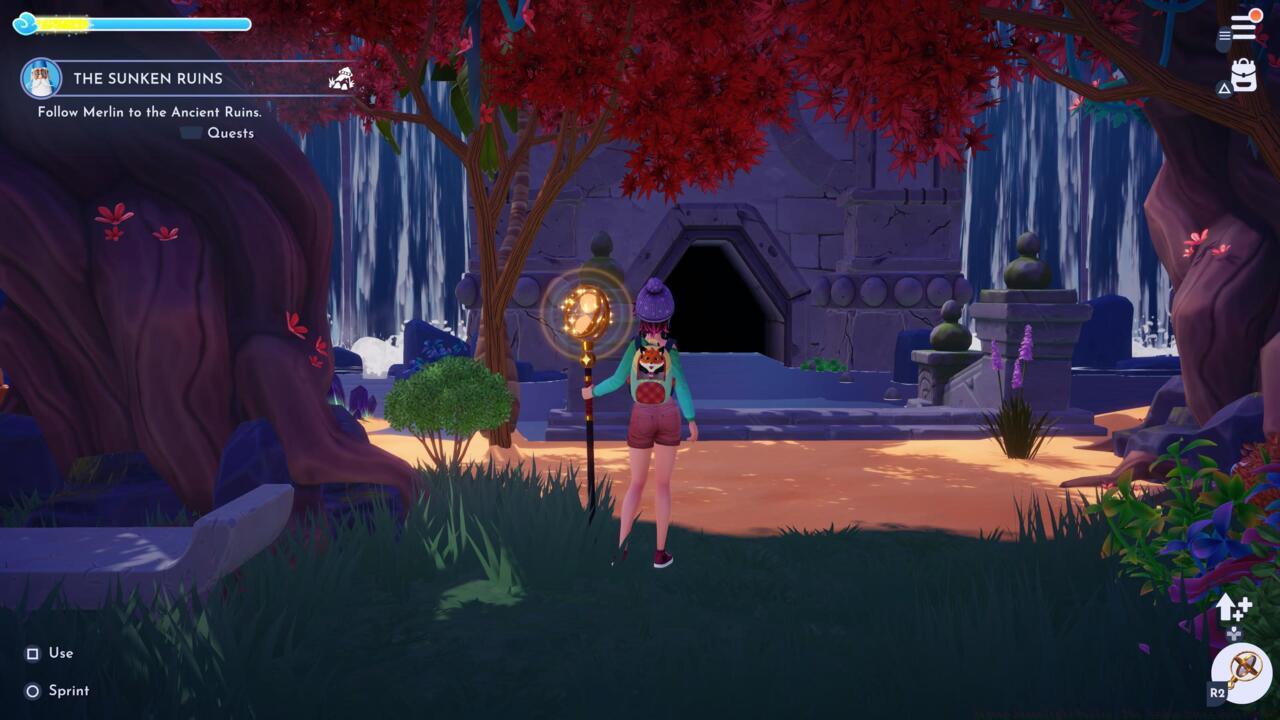
Before embarking on The Sunken Ruins quest, ensure you’ve thoroughly completed Act I of the A Rift in Time expansion. This foundational progression unlocks access to Ancient’s Landing, where the mysterious submerged structures await discovery. Your first critical step involves consulting with Merlin, who provides the essential “The Sunken Ruins” mission briefing. Without this official assignment activation, the ruins remain inaccessible regardless of your exploration efforts.
Preparation time for this quest typically ranges between 2-5 minutes, depending on how quickly you can locate Merlin in your current game session. Seasoned players recommend checking his usual haunts near the library or central plaza areas to expedite this initial phase.
Upon accepting Merlin’s assignment, your primary objective becomes locating Flickers using the Royal Hourglass tool. These magical artifacts emit distinctive shimmering effects when detected, making them visually identifiable during your search. The collection process unfolds across three distinct phases, each requiring strategic area navigation.
Phase One: Realm Exploration
Begin your Flicker hunt by traveling to either the Realm of Moana, Ratatouille, or WALL-E. While the original guide mentions finding all three in Ratatouille’s realm, our testing reveals variable spawn patterns. Approximately 65% of players will need to visit at least two realms to complete this phase. Activate your Royal Hourglass immediately upon arrival and systematically sweep each realm’s central areas where Flickers commonly cluster.
Phase Two: Plaza Well Concentration
The second collection phase centers around the Plaza well, where four Flickers await discovery. A common mistake involves wandering too far from this central point – all four artifacts remain within a 15-20 meter radius. Use the well as your visual anchor point and work outward in concentric circles with your Royal Hourglass active.

Strategic Flicker locations around key landmarks
Phase Three: Ancient’s Landing Finale
Your final Flicker retrieval occurs at Ancient’s Landing well, mirroring the Plaza search pattern. These four artifacts typically spawn in cardinal directions around the well structure. Pro tip: Standing directly on the well and performing a 360-degree scan with your Royal Hourglass reveals their positions more efficiently than random exploration.
After securing all eleven Flickers, return immediately to Merlin to trigger the ruins’ emergence sequence. This cinematic reveals the submerged structure rising dramatically from the waters, creating a new permanent landmark in Ancient’s Landing. The wizard then guides you inside where your documentation duties begin.
Chamber Photography Sequence
Inside the ruins, you’ll need to photograph three specific elements in precise order. Begin with the East Chamber, capturing the trio of musical notes positioned to Merlin’s right. These notes glow with ethereal energy, making them unmistakable once you enter the chamber.
Next, proceed to the North chamber where a sophisticated computer terminal requires documentation. This advanced interface features glowing holographic displays that photograph beautifully for your quest records.
Your final photographic subject awaits in the West chamber – an imposing sun pedestal adorned with intricate celestial carvings. Ensure your capture includes the entire structure as partial photos may not register for quest completion.
Return to Merlin after completing this tri-chamber photography assignment to automatically initiate “All the Right Notes,” the subsequent story mission that builds directly upon your ruins documentation work.
Efficiency Optimization Strategies
Experienced players can complete The Sunken Ruins in under 15 minutes by employing route optimization. Pre-position yourself near Merlin before quest acceptance, then use fast travel points to minimize realm transition times. The Royal Hourglass has a cooldown period – time your sweeps to maximize coverage during each activation.
Troubleshooting Common Issues
If Flickers aren’t appearing despite Royal Hourglass use, ensure you’re in the correct phase-specific location. Common troubleshooting includes reloading the area or completing any pending character interactions that might block spawn triggers.
Progression Impact Analysis
Successfully completing The Sunken Ruins unlocks permanent access to this underground area, which becomes relevant for multiple future quests and resource gathering. The photography component specifically trains you for later documentation missions that require similar precision.
For players seeking comprehensive Complete Guide to similar puzzle-based quests, our expanded coverage provides additional context for complex mission mechanics.
Action Checklist
- Complete Act I of A Rift in Time and locate Merlin for quest acceptance
- Travel to character realms and use Royal Hourglass to find 3 Flickers
- Search Plaza well area for 4 Flickers within close radius
- Repeat Flicker collection at Ancient’s Landing well for final 4 artifacts
- Document East Chamber notes, North Chamber terminal, and West Chamber pedestal
- Return to Merlin to trigger ruins emergence and quest transition
No reproduction without permission:SeeYouSoon Game Club » Disney Dreamlight Valley: The Sunken Ruins Quest Guide Complete guide to unlocking the Sunken Ruins in Disney Dreamlight Valley with expert strategies and time-saving tips