TL;DR
- Leviathan requires 270+ Power Level and specific quest completion for access
- Weekly rotation changes Royal Pools, Pleasure Gardens, and Gauntlet encounter order
- Skyburner’s Oath and Merciless provide significant advantages against Cabal enemies
- Team coordination and role assignment are critical for Castellum and boss encounters
- Each major encounter provides unique loot including Emperor Calus Tokens and Legendary gear
Destiny 2’s inaugural raid experience, Leviathan, presents players with a formidable challenge combining intricate puzzles, demanding combat scenarios, and intense boss confrontations. Originally launched on consoles, this pinnacle activity has now become available to PC guardians seeking the ultimate test of skill and coordination. Attempting to navigate these complex encounters without proper guidance often leads to frustration and failure, which is why we’ve compiled this exhaustive strategy compendium covering every aspect from initial access to final victory.
Critical awareness: The raid’s structure undergoes weekly transformations where the sequence of three primary encounters—Royal Pools, Pleasure Gardens, and The Gauntlet—randomizes with each Tuesday reset. This dynamic design ensures that teams cannot rely on memorized patterns and must instead master fundamental mechanics.
For additional game guidance, including comprehensive class breakdowns alongside our detailed skill and ability galleries for various subclasses, be certain to explore our Class Guide for deeper strategic insights. Looking forward, Destiny 2’s initial DLC expansion, Curse of Osiris, promises fresh raid content, though specific details remain undisclosed at publication.
Director Navigation and Quest Activation
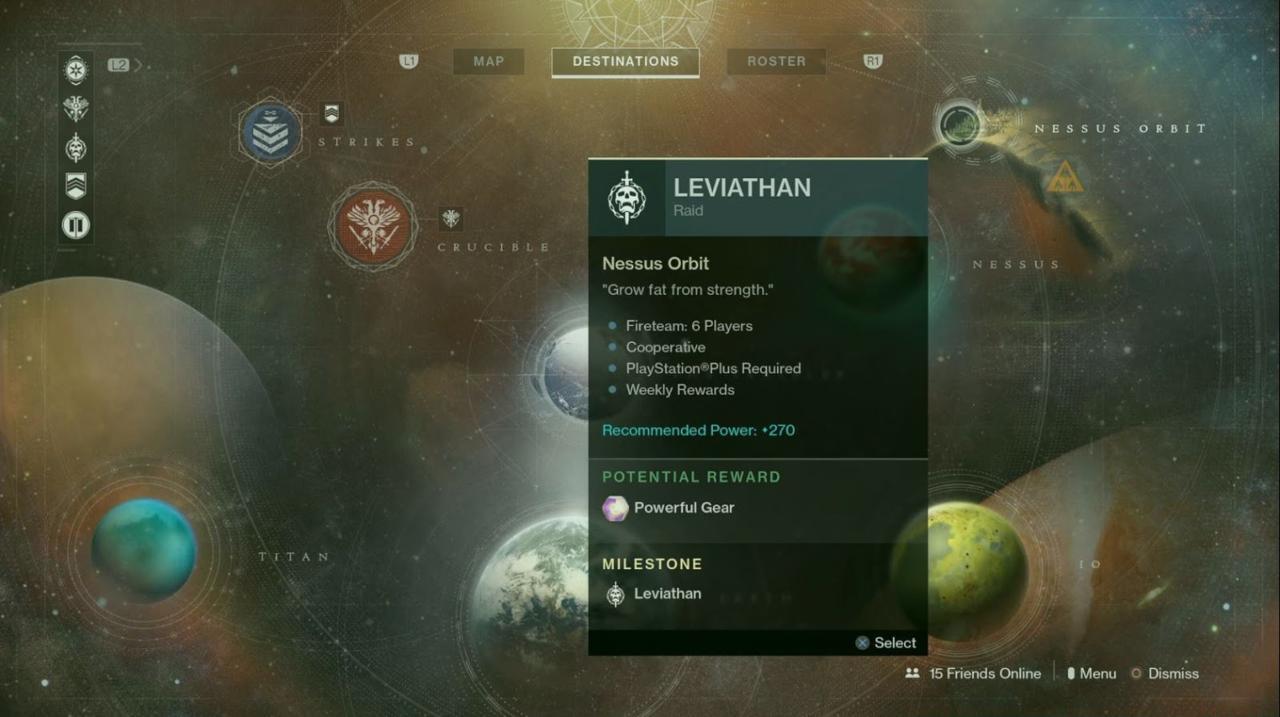
To initiate your Leviathan expedition, simply target the distinctive Leviathan emblem positioned in the upper right quadrant of your Director interface, as illustrated in the accompanying visual reference. Additionally, you should commence the On the Comms quest chain, which randomly activates following sustained engagements with Cabal forces. Successfully navigating its primary objectives unlocks the Destroyer of Worlds milestone, mandating Leviathan Raid completion. Achieving this objective rewards you with exclusive loot upon raid conclusion while simultaneously clearing valuable inventory space occupied by the quest item.
Power Level Specifications and Team Composition
Beyond finishing the On the Comms mission sequence, verify your combat effectiveness reaches at minimum Power Level 270 before attempting the Leviathan Raid. Venturing inside with inferior power statistics remains technically feasible, but recognize that entering the raid with inadequate Power Level potentially transforms you into a liability for your Fireteam. Additionally, undertaking this challenge with a complete six-guardian squad dramatically enhances success probability.
Common Preparation Mistakes: Many teams underestimate the importance of pre-raid coordination. Establish clear communication protocols and assign specific roles before engaging. Under-leveled players often struggle with survivability during intense damage phases, particularly in the Royal Pools and Emperor Calus encounters where environmental hazards and concentrated enemy fire demand robust resilience.
Essential Exotic Weaponry
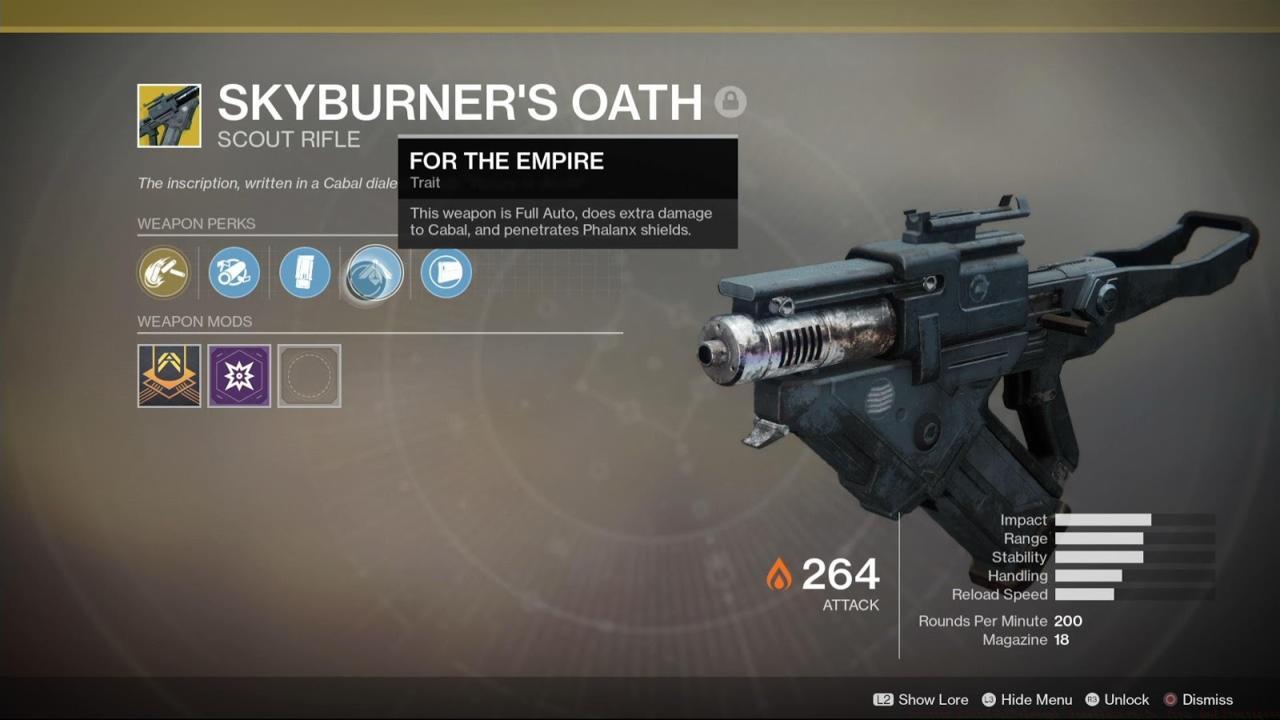
While numerous equipment combinations prove effective, one armament deserving particular consideration is the Exotic scout rifle Skyburner’s Oath. This specialized weapon discharges solar-projectiles that inflict bonus damage against Cabal adversaries while bypassing Phalanx defensive barriers. This versatile tool significantly streamlines your efforts to eliminate the substantial Cabal forces encountered throughout the Leviathan Raid. Additional noteworthy armaments encompass Merciless (a fusion rifle capable of rapid successive discharges), explosive cluster munition rocket launchers (such as Curtain Call or Cup-Bearer), and Coldheart (the exclusive pre-order trace rifle, exceptionally valuable during the concluding boss engagement).
Advanced Loadout Synergies
Weapon Rotation Strategy: Experienced raiders recommend establishing a damage phase rotation where Skyburner’s Oath handles shield penetration, Merciless devastates major combatants, and Coldheart provides sustained precision damage during critical moments. This approach maximizes your team’s damage output while minimizing ammunition scarcity issues.
Alternative Equipment Options: For guardians lacking specific exotics, consider Rat King for close-quarters team healing or Sweet Business for overwhelming suppression fire. Each encounter demands different tactical approaches, making adaptable loadouts more valuable than rigid weapon preferences.
For comprehensive weapon acquisition guidance, consult our Weapons Unlock resource for detailed pathways to obtaining these essential tools.
Part 1: Embankment Approach
Following raid commencement, advance progressively until encountering initial hostile forces. These opponents refrain from aggression unless provoked. Abstain from engaging them, bypass entirely, and continue ascending the incline before proceeding through the gateway.
Part 2: Leviathan Castellum (Initial Phase)
Upon attaining the Castellum threshold, you’ll initiate a trial requiring acquisition and protection of three Standards. To achieve this objective, your unit should divide into two squads: one securing the central objective point where Standards must be delivered, while another retrieves them from their designated carriers. Remain vigilant that should Cabal Legionaries approach too near the central location, previously secured Standards become vulnerable to recapture.
After successfully returning all three Standards, an entranceway unlocks the forward passage where you’ll discover the initial Leviathan Raid treasure cache, containing a Powerful Legendary engram, the Calus’ Selected coloration, and Emperor Calus Tokens. Recall that, as previously indicated, the sequence of subsequent engagements fluctuates weekly—your progression will lead either to the Royal Pools, Pleasure Gardens, or Gauntlet subsequently.
Part 3: Royal Pools Encounter
Within this area, you’ll discover four pressure-activated platforms, complemented by a fifth situated centrally. Each platform features an orb granting a temporary enhancement that shields you from environmental harm (sustained while immersed in the aquatic environment of this zone). Ensure you and your allies activate this protective buff before commencing the trial, as submerging in this region’s waters without its safeguard rapidly depletes your vitality. Once prepared, position four teammates individually on separate pressure platforms.
The trial’s fundamental principle unfolds as follows: four individuals must maintain stance on their assigned pressure plates to gradually elevate a counterweight along its chain. However, as anticipated, formidable adversaries materialize, substantially complicating the procedure. During the ongoing assault, guarantee you and your companions consistently re-activate the protective buff. You’ll effectively organize two trios for each flank; one member secures the buff and assumes a comrade’s position on a plate; that guardian then acquires the buff and cycles into the alternate player’s station, and so forth.
Once the chains across all four sectors reach adequate elevation, you’ll detect an auditory signal, whereupon all personnel must promptly relocate to the central area (where the buff originates). Five operators should concentrate on demolishing the suspended illuminators in this vicinity while one eliminates proximate hostiles. Your buff eventually expires, at which juncture you should evacuate the aqueous environment to prevent fatal consequences. A Psion combatant will ultimately generate here and requires elimination via melee strike (and potentially one necessitating projectile termination). At this stage, return to your platforms and replicate the complete sequence. After eliminating all illuminators, the trial concludes and a treasure cache materializes containing an Emperor Calus Token and potential equipment acquisitions.
Part 4: Leviathan Castellum (Secondary Phase)
The subsequent segment again requires defending and obtaining three Standards. Nevertheless, this iteration sees the central defensive point exchanging positions with one of the peripheral locations. Despite this alteration, employ the identical dual-team methodology to finalize the trial. Additionally remain cognizant of specialized Psion units designated Councillors who must be neutralized with melee assaults; you’ll want to dispatch them swiftly, as they enhance enemy combat capabilities. Following your achievement, a loot container spawns containing currency.
Part 5: Pleasure Gardens Engagement
Initially, eradicate visible adversaries before advancing toward the monumental golden effigy. Designate two companions to collect the crystalline spheres and energize them using the illumination dispersed throughout the environment. An aperture should manifest beneath the statue; remaining personnel should then collect the pollen contained within. The members positioned above must subsequently direct pollen bearers to specific flora distributed across the terrain. You possess restricted duration to guide pollen carriers to a blossom before a Warhound’s Psionic Howl reverts your advancement. Regardless, once pollen bearers attain a flower, those elevated must discharge their orbs at the blossom to endow their allies with a potency enhancement. Execute this procedure two to three iterations to accumulate sufficient power.
Once sufficiently empowered, the pollen bearers should then assault the Warhounds. However, should a Warhound detect your companions, they retain sixty seconds to inflict harm before withdrawing to the secure chamber beneath the golden statue. Repeat this methodology until eliminating all Warhounds. Maintain awareness that you only receive four opportunities to defeat all six Warhounds, as the safe room seals permanently following the third endeavor. You’ll subsequently receive a key, and a treasure cache emerges atop the secure chamber containing randomized loot and an Emperor Calus Token.
Part 6: Leviathan Castellum (Tertiary Phase)
Once more the identical concept pertains here. Simply implement the same dual-team approach to secure the Standards and conclude the trial. Again, monitor for Councillors, who are eliminated with melee strikes. A loot container spawns containing additional currency.
Part 7: The Gauntlet Challenge
To commence the trial, leap onto the circular platforms to invoke enemies. Systematically eliminate them to saturate the gauge beneath each column in the chamber. Two spheres will ultimately generate; assign two teammates to collect them. This transfers them into passageways in the adjacent territory.
Those within the conduit must traverse barriers featuring rows of circular patterns. Energy obstructions seal these distinctively configured portals, thus tunnel sprinters need to rapidly announce which barrier’s row of circles displays a crimson indicator. Companions externally then possess limited duration to concurrently fire at the rows of illuminated triangles on the corresponding barrier that lacks a red circle. Successful execution opens the barrier, creating passage for the tunnel sprinters. The two tunnel sprinters merge and propel their spheres into an energy reservoir.
After finishing three complete circuits, your entire squad proceeds to the center and collects a sphere; everyone then traverses the tunnels, with operators alternating who passes through the apertures containing charges. Three participants must triumphantly complete the course and impact their spheres into the energy reservoir, terminating the trial.
Part 8: Emperor Calus Confrontation
After completing the third Castellum challenge, you’ll be conducted to Emperor Calus’s sovereign chamber. To begin the conflict, projectile the chalice from his grasp, and he’ll initiate spawning enemies into the room for your engagement. Eventually, Calus will teleport all personnel; three operators will transfer to a violet dimension to combat a colossal projection of his cranium, while the remaining three will be returned to protect themselves in the throne room. Four Psions then generate in the throne room, each with an emblem suspended above them—ensure your companions refrain from eliminating them.
Those transported interior the violet dimension will each observe a distinct symbol on the Calus projection’s forehead. Each participant must vocally communicate the symbol they perceive to their teammates in the throne room. The players remaining in the physical realm must then eliminate the Psion associated with the symbol that wasn’t announced. This reduces the barrier enveloping the Calus projection’s cranium.
Following multiple iterations of executing the call-outs, the Calus projection will then commence emitting cranial projectiles. While individuals interior eliminate them—and you’ll want to destroy numerous, as they provide an enhancement amplifying damage versus Calus—those externally must interrupt Calus, who is conducting an assault. The players inside will additionally need to projectile three Psions that materialize and eliminate two projections, all while evading voids or being elevated by emerging inclines. Once the shield beneath Calus’s designation vanishes, three spheres will appear and the players in the violet dimension can return.
At this juncture, everyone must determine assignments for activating pressure plates, which you’ll employ sequentially. Once all are positioned, inflict maximum damage to Calus. Eventually, he elevates his arm and you’ll want to vacate the plate and advance to the subsequent one (later, he’ll target an armament rather than raise his arm). Persist with this methodology, transitioning from one plate to the next. After he sustains adequate injury, he’ll alter forms and acquire a location on his torso that you can strike for critical hits. Once his health reaches null, Calus enters one ultimate stage where you must continue applying damage. Eliminate his shield, and you’ll ultimately conquer Calus.
Action Checklist
- Complete On the Comms questline and verify 270+ Power Level
- Assemble full six-guardian fireteam with assigned roles
- Equip Skyburner’s Oath, Merciless, and Coldheart for optimal performance
- Navigate Castellum using two-team standard retrieval strategy
- Master Royal Pools rotation mechanics and buff management
- Coordinate Pleasure Gardens pollen collection and Warhound engagement
- Execute Gauntlet tunnel running with precise call-out coordination
- Defeat Emperor Calus using dimension switching and pressure plate sequencing
No reproduction without permission:SeeYouSoon Game Club » Destiny 2 Raid Walkthrough: Leviathan Guide, Tips, And Strategies Complete Leviathan Raid guide with advanced strategies, common pitfalls, and optimized loadouts for Destiny 2