TL;DR
- Complete Salvaged Goods bounty by collecting 5 Legendary engrams through normal gameplay
- Access Spine Burrows via Lost Oasis landing zone, heading east to find blue water cave entrance
- Navigate through Taken-filled caverns and locate chest behind large tree after tunnel exit
- Use specific sparrow routes and enemy engagement strategies for optimal completion time
- Avoid common navigation errors that lead players to wrong locations on Io
Destiny 2’s Season of Opulence introduces weekly bounties that provide access to Powerful gear and essential upgrades for your Chalice of Opulence. These activities feature standard completion criteria such as achieving specific kill counts or finishing designated mission types. However, merely finishing these initial steps rewards you with Treasure Maps rather than direct loot, requiring you to decipher and follow these guides to uncover valuable Runes, Imperials, and legendary equipment.
The bounty objectives often demand significant time investment, and the luminous treasure containers they unlock typically reside in concealed locations. Emperor Calus strategically positions these caches in obscure areas that frequently escape immediate detection. Fortunately, our comprehensive investigation has pinpointed each of Calus’s hidden troves to provide exact navigation instructions.
The Salvaged Goods assignment mandates collecting five Legendary engrams from activity rewards, meaning consistent standard gameplay will naturally fulfill this requirement without additional effort. Successfully completing it grants the treasure chart that directs you to the Io destination.
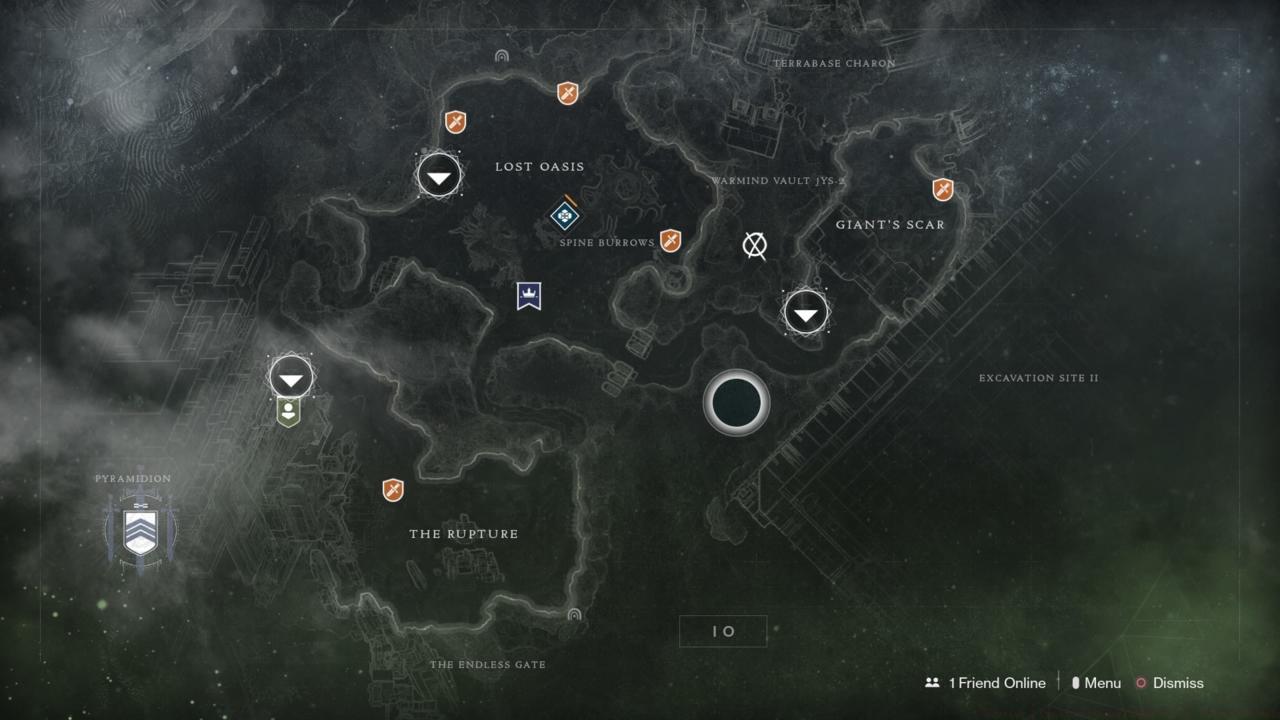
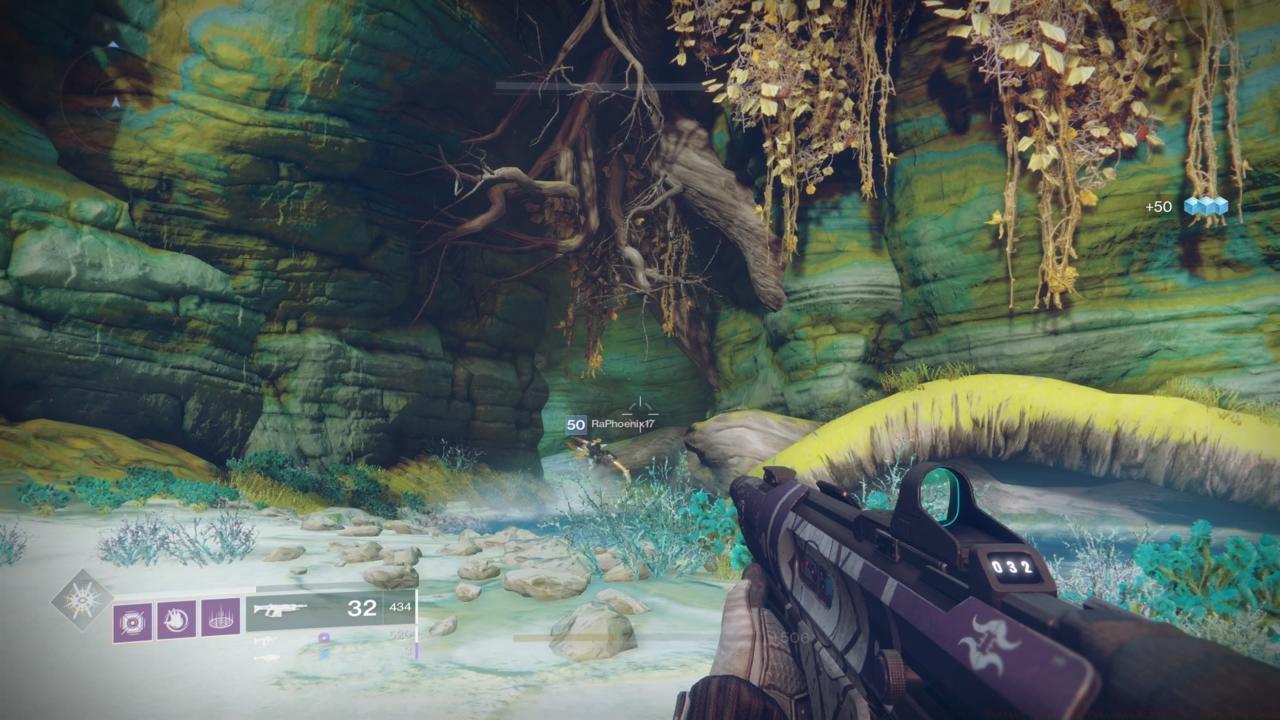
When arriving at Io, your target zone is the Spine Burrows sector. While map inspection might suggest proximity to Giant’s Scar, the actual access point originates from Lost Oasis. Select the Lost Oasis landing point, then mount your sparrow and travel directly east toward the region boundary (in the direction of the “Spine Burrows” map marker). Upon arrival, identify the cavern entrance distinguished by a flowing blue water stream leading inward—this marks your intended pathway.
Proceed through the subterranean passage until reaching an expansive chamber occupied by Taken forces. The Spine Burrows designation should display on your interface confirming correct positioning. The sought-after container rests on the terrain to your right; leap across to the compact ledge immediately before you on the right flank and continue along the tunnel passage.
You’ll emerge adjacent to a substantial tree structure. Descend to the lower ground and execute a complete rotation to discover the chest directly behind your position.
For optimal efficiency, pre-load your character with five Legendary engrams before acquiring the bounty, enabling instant completion. Many guardians mistakenly travel to Giant’s Scar first, wasting valuable mission time—always begin from Lost Oasis for direct access. The Taken enemies in the cavern can overwhelm unprepared players; consider bringing area-of-effect weapons or crowd control abilities.
Navigation errors commonly occur when players miss the specific blue water stream marker or misinterpret the tunnel branching. The chest respawns weekly, making this a repeatable source of Imperials for your Chalice upgrades. Seasoned players can complete the entire process in under 15 minutes with proper route memorization and loadout optimization.
Understanding these weapon strategies and class selection principles from other games can enhance your overall combat effectiveness during treasure hunts.
Action Checklist
- Collect 5 Legendary engrams through standard gameplay activities
- Select Lost Oasis landing zone on Io and travel east toward Spine Burrows
- Locate cave entrance marked by blue water stream and navigate through Taken-filled chamber
- Follow tunnel to exit near large tree, then turn 180 degrees to find chest
- Claim Runes, Imperials, and legendary gear rewards
No reproduction without permission:SeeYouSoon Game Club » Destiny 2 Chalice Treasure Map Guide: Salvaged Goods Master Destiny 2's Salvaged Goods bounty with expert navigation tips and treasure hunting strategies