TL;DR
- Caldera features one Verdansk-style bunker and 12 circular hatches scattered across the map
- The Falcon’s Peak bunker requires keycards similar to original Verdansk mechanics
- Circular hatches match Captain Butcher’s Season 1 trailer design and Nazi bunker lore
- Strategic bunker access requires careful drop planning and team coordination
- Most hatches remain locked but offer future Easter egg potential
Discover every concealed bunker and mysterious hatch scattered throughout Warzone’s Pacific-themed Caldera map. This comprehensive guide provides exact coordinates and tactical approaches for accessing these intriguing locations.
Call of Duty: Warzone’s expansive Caldera map launched on December 8, introducing a tropical island setting filled with hidden secrets. While active Easter eggs remain dormant currently, numerous locations across the island demand attention as seasonal content evolves.
Similar to Modern Warfare’s elaborate Warzone Easter egg quests involving massive military bunkers, Caldera contains its own clandestine facilities. These structures hint at future narrative developments and potential gameplay mechanics that could significantly impact match strategies.
Caldera contains a single bunker door designed identically to the original Verdansk military bunkers. This architectural consistency suggests potential connectivity to established Warzone lore and mechanics.
Currently, no keycards have been discovered in the loot pool, which previously served as the access mechanism for Verdansk’s bunker network. This indicates these locations may activate during future seasonal updates or special events.
Falcon’s Peak
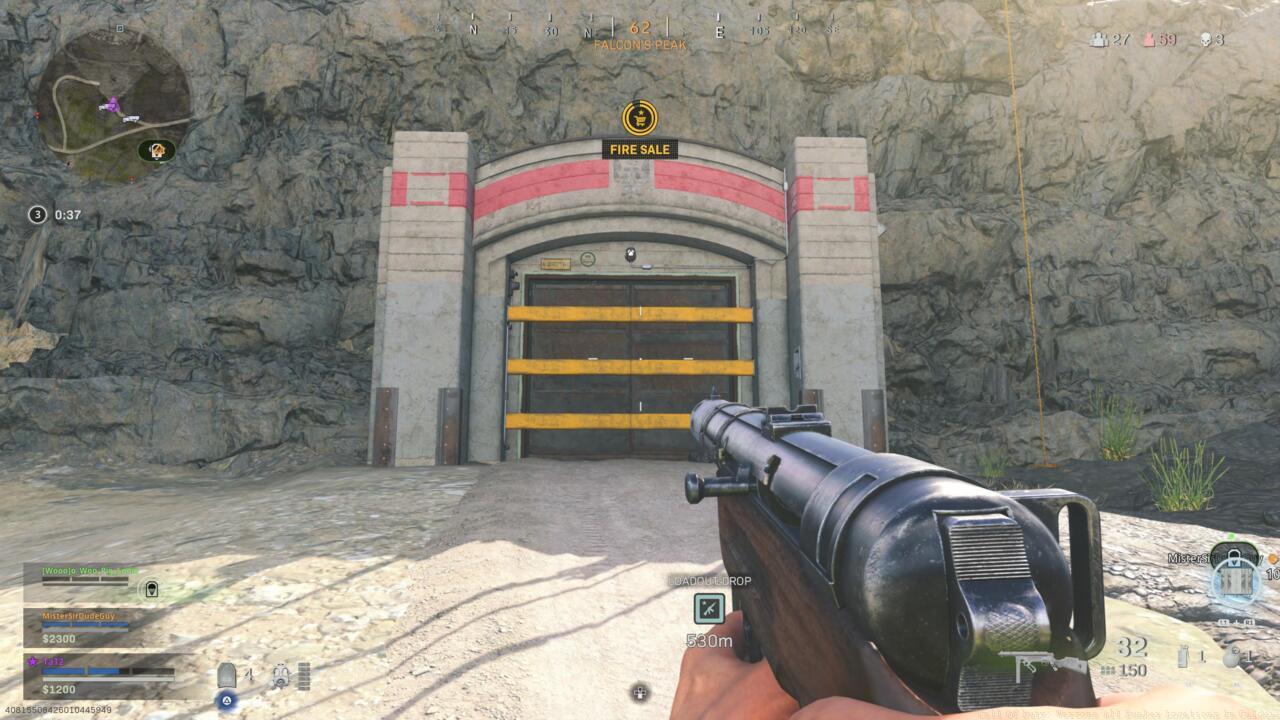
Falcon’s Peak bunker
This solitary Verdansk-style bunker entrance becomes visible from the western foundation of Caldera’s volcanic mountain, specifically marked as Falcon’s Peak on your tactical map.
Throughout Caldera, players can locate multiple circular bunker hatches distributed across diverse terrain. These access points will likely become operational eventually, matching the hatch configuration Captain Butcher revealed in Caldera’s Season 1 narrative preview.
The cinematic presentation depicted Butcher’s aircraft emergency landing along the island’s coastline, where he uncovered a beachside hatch. After opening this entrance, he descended into a Nazi-era bunker, declaring “the world would never be ready for what I found.”
Here are all confirmed positions for Caldera’s bunker network:
- Verdansk-style Warzone bunker
- Falcon’s Peak
- Circular Warzone hatches
- Docks
- Arsenal
- Ruins
- Mines
- Lagoon
- Power Plant
- Airfield
- Plentiful Fields
- Falcon’s Peak
- Beachhead
- Sub Pen
- Resort
Docks
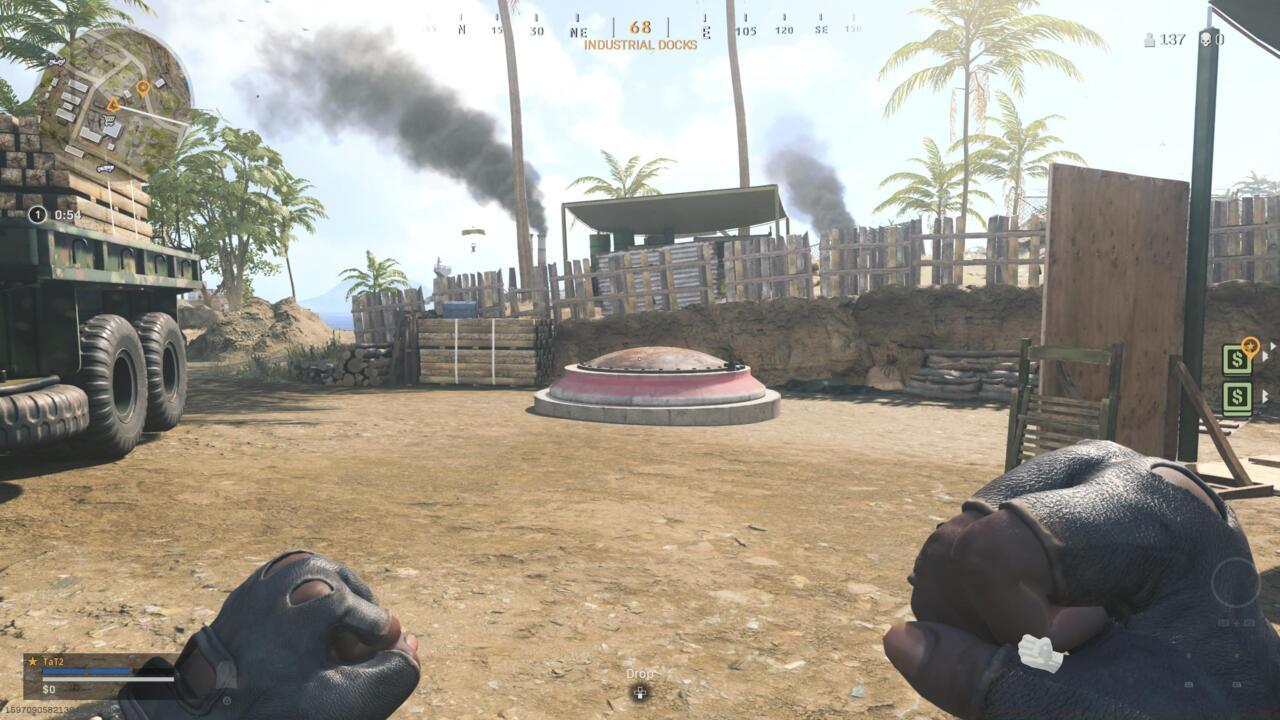
Docks hatch
The Industrial Docks hatch presents minimal concealment challenges. Position yourself near the commercial truck parked south of the primary shipping facilities. This placement proximity to a Buy Station offers convenient resource acquisition during exploration.
Arsenal
Arsenal hatch
Locate this hatch immediately exterior to Caldera’s Arsenal complex. Specifically, the entrance rests upon the vegetated cliff face providing overwatch of the Arsenal, within the Naval Arsenal designated zone.
Ruins
Ruins hatch
This concealed entrance positions itself within the Ruins vicinity adjacent to rocky cliff formations. Moderate camouflage from vines and surrounding foliage increases detection difficulty.
Mines
Mines hatch
The Phosphate Mines hatch occupies elevated terrain along the western grassy cliffs. Navigate toward the substantial bulldozer equipment that surveys the mining operations below.
Lagoon
Lagoon hatch
This highly visible hatch requires minimal search effort. Proceed directly to the Lagoon on the island’s eastern shoreline. Captain Butcher’s wrecked aircraft and the bunker he discovered in Caldera’s Season 1 preview situate within the Clear Water Lagoon sector along the western coast. Identify the small structure immediately north of the crash location.
Power Plant
Power Plant hatch
Caldera’s most cunning hatch placement occurs at the Power Plant facility. A central waterfall divides the area—approach the cascade and traverse along the left flank behind the water curtain. The flowing water masks a mining tunnel containing this hatch.
Airfield
Airfield hatch
Discover this hatch northwest of Caldera’s Airfield installation. Advance toward the adjacent mountain summit that provides aerial observation of the runway complex.
Plentiful Fields
Plentiful Fields hatch
The Plentiful Fields hatch positions itself at the rear perimeter of the agricultural area. Navigate behind the two enormous blue and white striped storage silos.
Falcon’s Peak
Falcon’s Peak hatch
This additional hatch at Falcon’s Peak volcanic location offers dual access methods. Either descend through the central crater opening or utilize the mining passage near the volcano’s foundation.
Beachhead
Beachhead hatch
Situated within Beachhead’s southern sector, this hatch maintains high visibility near temporary shelter clusters. Its placement adjacent to a Buy Station facilitates equipment procurement.
Sub Pen
Sub Pen hatch
Locate this hatch within the Shark’s Lair Submarine Pen territory, specifically the hilltop region immediately north of the principal Sub Pen structure.
Resort
Resort
This final hatch occupies a modest grassy elevation directly south of the Resort’s prominent yellow clocktower landmark.
Mastering Caldera’s bunker network requires sophisticated tactical planning beyond simple location memorization. These facilities likely contain high-tier loot and narrative significance when activated.
Drop Zone Optimization: Plan your initial descent to land within 200 meters of target bunkers. This proximity allows rapid access while minimizing exposure to enemy squads during the critical opening minutes.
Team Coordination Protocols: Designate specific roles: point scout for hatch inspection, perimeter security, and loot management specialist.
Risk Assessment Framework: Evaluate each bunker’s strategic value against potential ambush risks. High-traffic locations like Power Plant require additional caution.
Resource Allocation: Since most bunkers position near Buy Stations, prioritize cash collection during initial looting phases to enable quick equipment purchases.
We’ll continue monitoring emerging details concerning Easter egg activations and bunker accessibility. Additional noteworthy Caldera destinations include several Call of Duty: World at War historical locations that may connect to broader narrative arcs.
For comprehensive tactical guidance on similar military operations, consult our Battlefield 6 Complete Guide covering advanced class selection strategies and weapon proficiency development in our BF6 armaments unlocking guide.
Action Checklist
- Study bunker locations during pre-match planning phase
- Coordinate drop timing with squadmates for simultaneous arrival
- Assign specific tactical roles: scout, security, loot manager
- Secure perimeter before attempting hatch inspection
- Monitor seasonal updates for keycard availability and activation events
No reproduction without permission:SeeYouSoon Game Club » Call Of Duty: Warzone All Bunker Locations In Caldera Complete guide to Warzone Caldera's secret bunkers and hatches with expert navigation strategies