Master the Lava Dragon Statue boss fight with advanced strategies, team compositions, and combat mechanics explained in detail
Boss Overview and Strategic Location Details
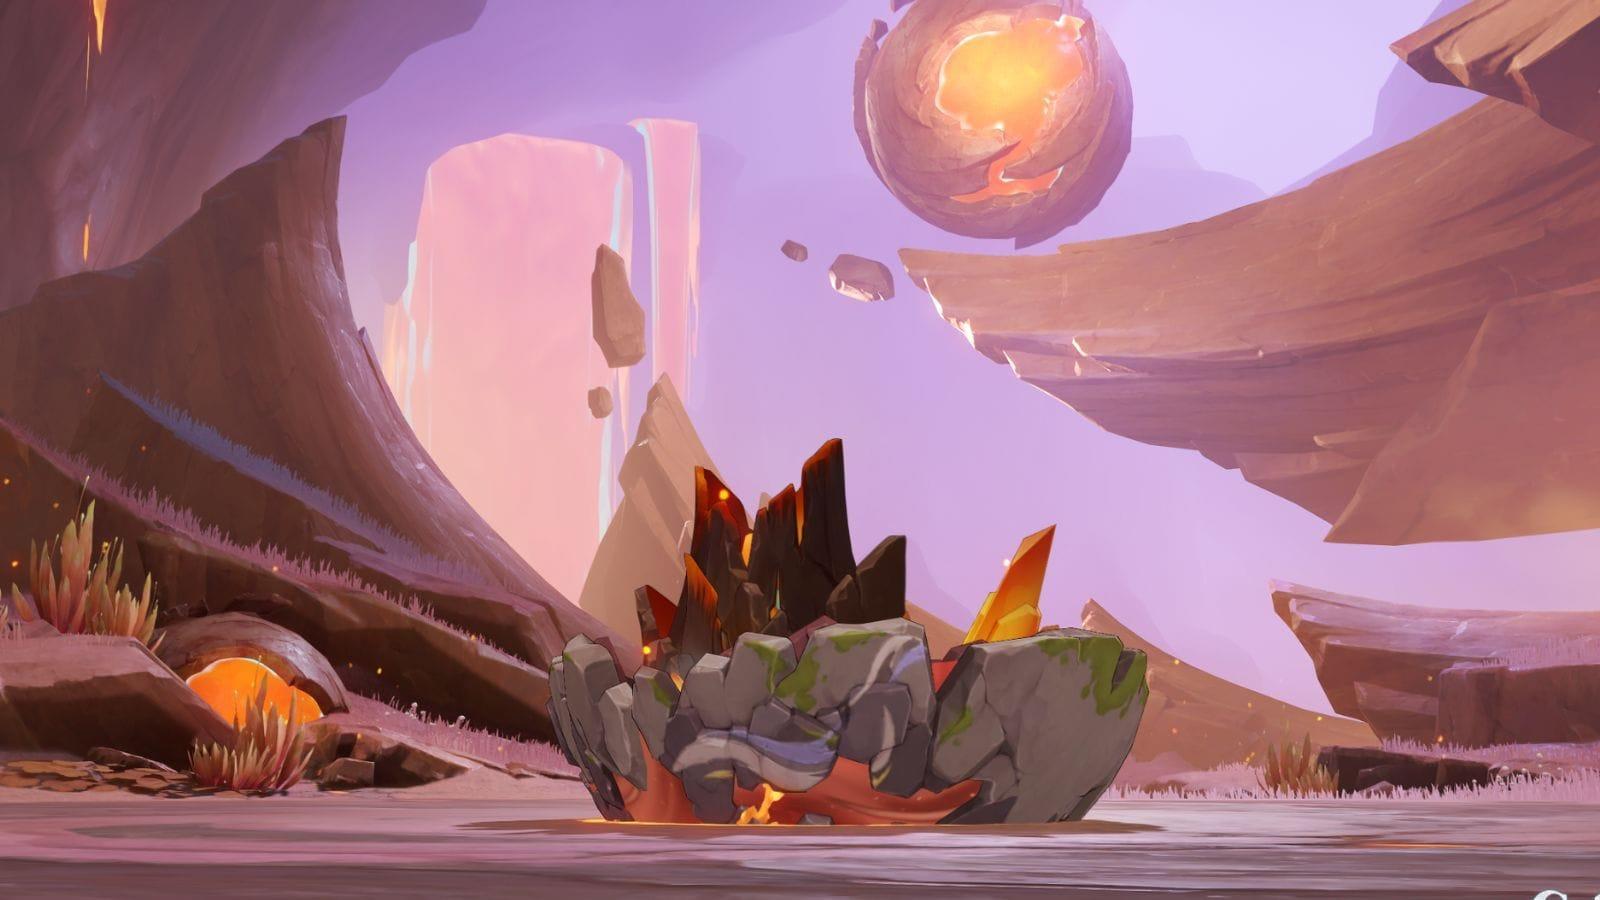
The Lava Dragon Statue represents one of the most challenging world bosses introduced in Genshin Impact version 5.5, situated within the volcanic landscapes of Atocpan in the Natlan region. This formidable enemy drops the essential Sparkless Statue Core material, which serves as a critical ascension component for recently released characters including Ifa and Varesa. Understanding its unique mechanics is essential for efficient farming and character progression.
Comprehensive Combat Mechanics and Phase Transitions
The boss employs a sophisticated Fury system that dictates the entire combat flow. When the initial Fury bar reaches maximum capacity through specific elemental reactions, the Lava Dragon Statue undergoes a dramatic transformation into its Molten Dragon form. This enhanced state features a secondary Fury bar pre-filled to approximately 20% capacity and generates a persistent Pyro elemental aura that continuously applies Pyro to nearby characters.
Successfully filling this secondary bar triggers the critical Overburn state, where the boss experiences a substantial resistance reduction of -60% across all damage types. During this vulnerable period, the Lava Dragon Statue becomes completely immobilized and takes continuous damage, creating the primary damage window for your team. Proper timing of elemental bursts and skill rotations during this phase can dramatically reduce clear times.
Critical Mechanic Warning: Utilizing Cryo or Hydro elemental attacks during the Geohuman or Molten Dragon active phases will rapidly deplete the Fury meter, significantly prolonging the encounter. These elements should be reserved exclusively for after immobilization occurs, when they can contribute to reaction damage without interfering with the core mechanic progression.
Optimized Team Compositions and Character Synergies
Also read: Genshin Impact Operation Downpour Simulation event guide
Building effective teams requires understanding elemental synergies that efficiently generate the necessary reactions to fill the Fury meter. Here are strategically optimized compositions:
- Mavuika, Kinich, Emilie, Bennett – Premium Pyro-focused team with strong Burning application
- Kinich, Emilie, Bennett, Dehya – Defensive variation with interruption resistance
- Kinich, Emilie, Bennett, Xiangling – Maximum off-field Pyro application
- Mavuika, Varesa, Iansan, Chevreuse – Overload-focused composition
- Varesa, Bennett, Chevreuse, Iansan – Budget-friendly Overload variant
- Mavuika, Bennett, Chevreuse, Ororon – Flexible team with healing support
- Arlecchino, Bennett, Emilie, Kaedehara Kazuha – Swirl-enhanced damage composition
- Arlecchino, Bennett, Emilie, Lan Yan – Shield-protected sustained damage
For players lacking specific 5-star characters, effective budget alternatives include teams centered around Bennett, Xiangling, Nahida, Dehya, Sucrose, and Fischl. The core strategy involves focusing on Burning and Overload elemental reactions, which generate the most efficient Fury accumulation. Teams built around these reactions can fill the Fury bar 30-40% faster than standard compositions, significantly reducing encounter duration.
Also read: 6 most popular teams in Genshin Impact 5.6 Spiral Abyss
Advanced Attack Pattern Recognition and Evasion Techniques
The Lava Dragon Statue employs distinct attack patterns across its two forms that require specific counterplay strategies. During the Geohuman phase, the boss creates hazardous lava pools that inflict substantial area damage. The tell for this attack is a distinctive left-arm swinging motion – dodging during this animation window completely avoids the damage. Maintaining distance is crucial as the boss also executes high-damage physical combos at close range.
Strategic positioning using shielders like Zhongli and Lan Yan provides consistent protection, while off-field damage dealers such as Xiangling and Nahida enable safe damage application from distance. This approach minimizes exposure to the boss’s dangerous melee attacks while maintaining consistent Fury generation.
In the Molten Dragon transformation, the boss gains a relentless charge attack that tracks player movement across the arena. This ability can be evaded by maintaining constant circular movement around the perimeter – the attack automatically concludes after a fixed duration regardless of connecting. The boss also employs ranged lava beam attacks telegraphed by a brief charging animation; recognizing this signal and creating distance ensures easy evasion.
The most dangerous ability is a massive area-of-effect explosion initiated with a two-handed ground slam. This attack features a clearly visible red indicator on the ground – moving outside this marked zone before the detonation is essential for survival. Mastering these evasion patterns transforms this from a challenging encounter into a predictable and manageable battle.
Advanced Combat Optimization and Strategic Execution
Also read: Genshin Impact official cookbook is now available for pre-order: Here’s how to do it
Beyond basic mechanics, several advanced techniques can dramatically improve your clear efficiency. Pre-positioning elemental skills before triggering the Overburn state ensures maximum damage during the vulnerability window. Coordinate your team’s elemental bursts to align with the resistance reduction period for explosive damage spikes.
Common Strategic Errors: Many players mistakenly use Cryo or Hydro applications too early, resetting Fury progress. Others misposition during the Molten Dragon charge attack, taking unnecessary damage. Advanced players optimize their skill rotations to maintain continuous Fury generation while avoiding mechanic resets.
For speedrunning approaches, focus on teams that can rapidly trigger multiple Overload reactions while maintaining consistent Pyro aura application. The timing between phase transitions can be minimized with precise elemental sequencing, potentially reducing clear times by 25-30% compared to standard approaches.
No reproduction without permission:SeeYouSoon Game Club » Best tips to beat Lava Dragon Statue in Genshin Impact Master the Lava Dragon Statue boss fight with advanced strategies, team compositions, and combat mechanics explained in detail