Master Battlefield 4’s most iconic maps with expert strategies, common pitfalls to avoid, and advanced optimization techniques
Introduction: Battlefield 4’s Enduring Legacy
As Battlefield 2042 approaches its release, veteran players are revisiting the tactical excellence that defined Battlefield 4’s multiplayer experience. This title successfully competed against annual Call of Duty releases by offering authentic modern warfare rather than following futuristic trends.
The most exceptional Battlefield 4 maps created immersive combat environments that balanced realism with intense action. Each battlefield presented plausible warzone scenarios that maintained authenticity while delivering thrilling gameplay. Rather than featuring rocket boots or jetpacks, Battlefield 4 provided a credible modern warfare simulation that continues to attract dedicated players years after its initial release.
 EA
EA
Battlefield 4’s strategic depth keeps players engaged years after release.
What sets these maps apart is their strategic diversity – from close-quarters prison battles to massive vehicle-dominated landscapes, each requires distinct approaches and specialized tactics. Understanding these nuances separates casual players from true battlefield masters.
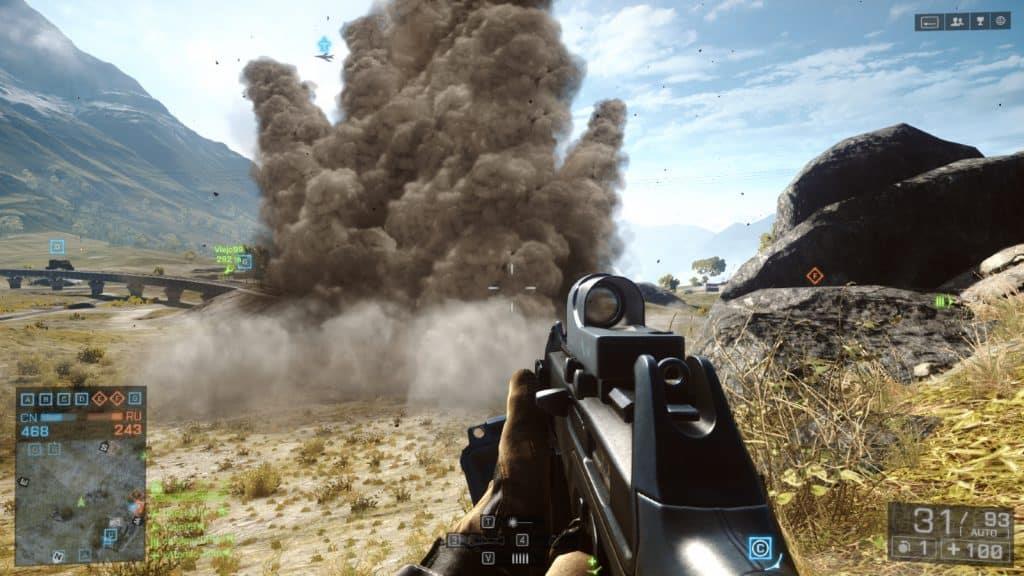
1. Zavod 311: Soviet Industrial Warfare
Zavod 311 represents the ultimate Battlefield 4 tactical playground, set within a decaying Soviet-era munitions factory where abandoned Cold War machinery creates an atmospheric combat environment. This haunting setting serves as a powerful reminder that even formidable military powers can collapse from strategic errors, providing thematic motivation for survival-focused gameplay.
 DICE / EA
Zavod’s industrial landscape teaches valuable lessons about tactical positioning.
Strategic Advantage: The map’s expansive layout features numerous concealed positions and flanking routes, enabling players to bypass opponents and execute sophisticated ambushes behind enemy lines. The endless strategic possibilities explain why Zavod 311 maintains enduring popularity among tactical players.
Common Mistake: Many players underestimate the vertical combat opportunities. The factory buildings provide multiple elevation levels that skilled players use for overwatch positions and unexpected attack angles.
Advanced Tip: Master the underground tunnel system connecting key objectives. Controlling these subterranean routes allows your team to move between capture points undetected, creating relentless pressure on enemy defenses.
2. Paracel Storm: Naval Combat Excellence
Paracel Storm presents a dangerously beautiful tropical combat zone where maritime mobility becomes essential for survival. This aquatic battlefield exclusively relies on nautical vehicles for traversing between different combat areas, creating unique tactical challenges.
Critical Warning: Players utilizing watercraft face significant exposure vulnerabilities that experienced opponents eagerly exploit. The limited cover on open water transforms vehicles into easy targets for coordinated enemy attacks.
Strategic Approach: Successful navigation requires understanding wave mechanics and using islands as temporary cover. The storm dynamic that gives the map its name affects visibility and vehicle handling, adding another strategic layer to naval engagements.
Common Mistake: Beginners often abandon boats too far from objectives, leaving them exposed during long swims. Always beach vehicles directly at capture points to minimize vulnerable transition time.
Advanced Tip: Use attack helicopters to suppress enemy boat movements while your team captures objectives. The air-to-sea combat dynamic is crucial for establishing naval dominance on Paracel Storm.
3. Siege of Shanghai: Urban Destruction Playground
Siege of Shanghai stands as Battlefield 4’s most recognizable map, largely due to its prominent featuring during the game’s beta testing phase. This exposure meant many purchasers already possessed familiarity with its urban warfare dynamics before the official launch.
The map masterfully blends traditional city combat with aquatic mobility, creating diverse engagement opportunities. Its infamous subterranean sector proves notoriously lethal, with many combatants failing to escape its confined combat spaces alive.
Destruction Mastery: This urban battlefield showcases Battlefield’s demolition systems more extensively than any other map, particularly through the destructible central skyscraper. Players who successfully demolish this iconic structure create unforgettable battlefield moments while dramatically altering the combat landscape.
Common Mistake: Rushing the tower without establishing ground control first. Experienced players will pin your team inside while their teammates capture all ground objectives.
Advanced Tip: Use the tower collapse to your advantage by positioning snipers on adjacent rooftops beforehand. The dust cloud provides perfect cover for repositioning while enemies are disoriented.
4. Rogue Transmission: Radar Array Warfare
Rogue Transmission evokes nostalgia for classic first-person shooter designs, with its massive radar installation recalling environments from iconic titles like GoldenEye. The map’s design intentionally baits inexperienced players toward the prominent radar dish area, where veteran marksmen systematically eliminate them.
![]() DICE / EA
DICE / EA
Rogue Transmission’s open spaces demand careful movement and positioning.
This tactical dynamic creates sophisticated predator-prey gameplay, where survivors quickly learn to avoid repeating fatal positioning errors. The resulting gameplay evolves into strategic cat-and-mouse engagements that reward patience and positioning awareness.
Common Mistake: Crossing open fields without smoke cover or vehicle support. The vast sightlines make infantry extremely vulnerable to sniper fire.
Advanced Tip: Use the rocky terrain on the map edges for concealed advancement. The elevation changes provide natural cover while allowing you to flank the radar array position.
5. Lancang Dam: Mixed Environment Combat
Lancang Dam represents another legendary Battlefield 4 environment that many players hope DICE will resurrect in Battlefield 2042 or subsequent franchise installments. This versatile combat zone delivers ideal balanced gameplay through its combination of expansive exterior areas and constricted interior passageways.
Players who invest time learning the terrain intricacies gain significant tactical advantages. Engaging 63 opponents in chaotic deathmatch scenarios provides tremendous enjoyment, despite the map’s occasional punishing difficulty spikes.
Contesting dam control against opposing squads creates exceptional player-versus-player encounters that every online FPS enthusiast should experience. The verticality of the dam structure itself creates unique engagement angles not found on other maps.
Common Mistake: Neglecting the underground tunnels beneath the dam. These passages provide crucial flanking routes but are often underutilized.
Advanced Tip: Use the dam’s emergency spillways for unexpected attack routes. The water flow can conceal movement while providing alternative approaches to key objectives.
6. Hainan Resort: Coastal Stealth Operations
Hainan Resort transforms a picturesque coastal vacation destination into a deadly combat zone where survival demands tactical sophistication. The map’s extensive exposed areas, resulting from its non-military original design, generate intense combat tension.
Combatants who master terrain knowledge and employ stealth techniques dramatically improve survival odds. Those failing to adapt typically meet swift demises in the sandy combat environment.
Strategic Imperative: The resort’s layout favors defensive positions and controlled advancement. Rushing between objectives without proper cover typically results in quick elimination by positioned defenders.
Common Mistake: Fighting on the beach without utilizing the resort buildings for cover. The wide-open shoreline becomes a killing zone for any infantry caught in the open.
Advanced Tip: Use the swimming routes around the resort perimeter to flank enemy positions. The underwater approach is rarely guarded and can devastate unprepared teams.
7. Flood Zone: Aquatic Urban Combat
Battlefield 4’s Flood Zone creates unforgettable combat memories through its unique submerged urban environment. As the name clearly indicates, players operate in water-filled streets, making this map distinctly memorable within the gaming landscape.
While numerous games feature heavy precipitation environments, none implement flooding to this extreme degree. Fortunately, despite the aquatic setting, water mechanics don’t significantly impede player mobility.
The majority of Flood Zone’s immersion effects remain visual rather than mechanical, but they successfully generate atmospheric tension and desperation that intensifies the high-energy combat experience.
Common Mistake: Staying in the water too long. While the flooding appears cosmetic, it does slow movement slightly and makes you more visible to elevated enemies.
Advanced Tip: Master the rooftop routes to maintain elevation advantage. The vertical gameplay in Flood Zone is more important than on most urban maps due to the ground-level flooding.
8. Golmud Railway: Vehicle Warfare Training Ground
 DICE / EA
Golmud Railway serves as the perfect training ground for vehicle-inclusive combat.
Golmud Railway represents Battlefield 4’s quintessential versatile combat environment, offering diverse interior and exterior combat zones for tactical exploration. This is where countless players developed their fundamental Battlefield skills.
Combatants can seize and defend structural positions while repelling enemy assaults, or engage in chaotic encounters while utilizing the abundant vehicle options for traversing the extensive open areas.
This exceptional training environment allows players to refine their abilities before advancing to more demanding battlefields. The balanced mix of infantry and vehicle combat makes it ideal for learning core Battlefield mechanics.
Common Mistake: Ignoring anti-vehicle equipment. With so many tanks and transports available, engineers with rocket launchers become crucial for team success.
Advanced Tip: Use the train tracks as navigation guides and ambush points. The linear nature of the railway creates predictable enemy movement patterns you can exploit.
9. Operation Locker: Close Quarters Mayhem
While the Gulag dominates prison-based player-versus-player discussions, Battlefield 4’s Operation Locker provides an equally compelling confined correctional facility environment for skill testing. Survival duration remains limited due to the arena’s claustrophobic design, though Gulag veterans may demonstrate slightly better adaptation.
The map’s constrained layout creates intense close-quarters combat that favors specific weapon types and tactical approaches. Understanding choke point management becomes essential for successful navigation.
Strategic Necessity: Grenade usage and class selection dramatically impact performance on Operation Locker. The confined spaces amplify explosive effectiveness while limiting long-range engagement opportunities.
Common Mistake: Charging directly through the central hallway without smoke or flashbang support. This main corridor becomes a meat grinder for unprepared teams.
Advanced Tip: Use the outside snow routes to bypass indoor chokepoints. While exposed to sniper fire, these exterior paths often surprise enemies focused on indoor combat.
10. Dawnbreaker: Urban Dawn Combat
Dawnbreaker’s distinctive character stems primarily from its temporal setting, with combat initiating at sunrise to create unique engagement scenarios uncommon in other player-versus-player environments. Without this distinctive low-light ‘pistols at dawn’ ambiance, Dawnbreaker risked becoming just another metropolitan combat zone.
However, Battlefield 4 enthusiasts maintain strong affection for Dawnbreaker, and the map possesses more personality than it initially received credit for upon the game’s original launch.
The evolving lighting conditions create dynamic combat situations where visibility changes throughout matches. This temporal element adds strategic depth not present on static-time maps.
Common Mistake: Underestimating how the changing light affects visibility. The transition from dark to light can leave players exposed in positions that were previously concealed.
Advanced Tip: Use the sunrise to mask your movement toward objectives. The rising sun creates glare that can conceal advances from eastern approaches.
Conclusion: Mastering Battlefield 4’s Battlefields
These exceptional multiplayer maps represent Battlefield 4’s lasting legacy, each offering distinct tactical challenges and learning opportunities. Mastering their nuances requires understanding both macro-level strategy and micro-level positioning.
The skills developed across these diverse combat environments translate directly to improved performance in newer Battlefield titles and other tactical shooters. The fundamental principles of cover usage, flanking maneuvers, and objective control remain consistent across the franchise.
As you anticipate forthcoming game releases, remember that the tactical foundations built in Battlefield 4 will continue serving you in future combat scenarios. The strategic thinking these maps demand creates better players regardless of the specific game environment.
Looking ahead to upcoming game releases? Check out our hubs: The Elder Scrolls 6 | Halo Infinite | GTA 6 | Forza Horizon 5 | Diablo 2 Resurrected | Overwatch 2 | Far Cry 6
No reproduction without permission:SeeYouSoon Game Club » Best Battlefield 4 maps: Multiplayer maps ranked Master Battlefield 4's most iconic maps with expert strategies, common pitfalls to avoid, and advanced optimization techniques